

How To Repair Sword Medieval Blacksmith
The Crafting of a Sword
by Victoria Mercouris
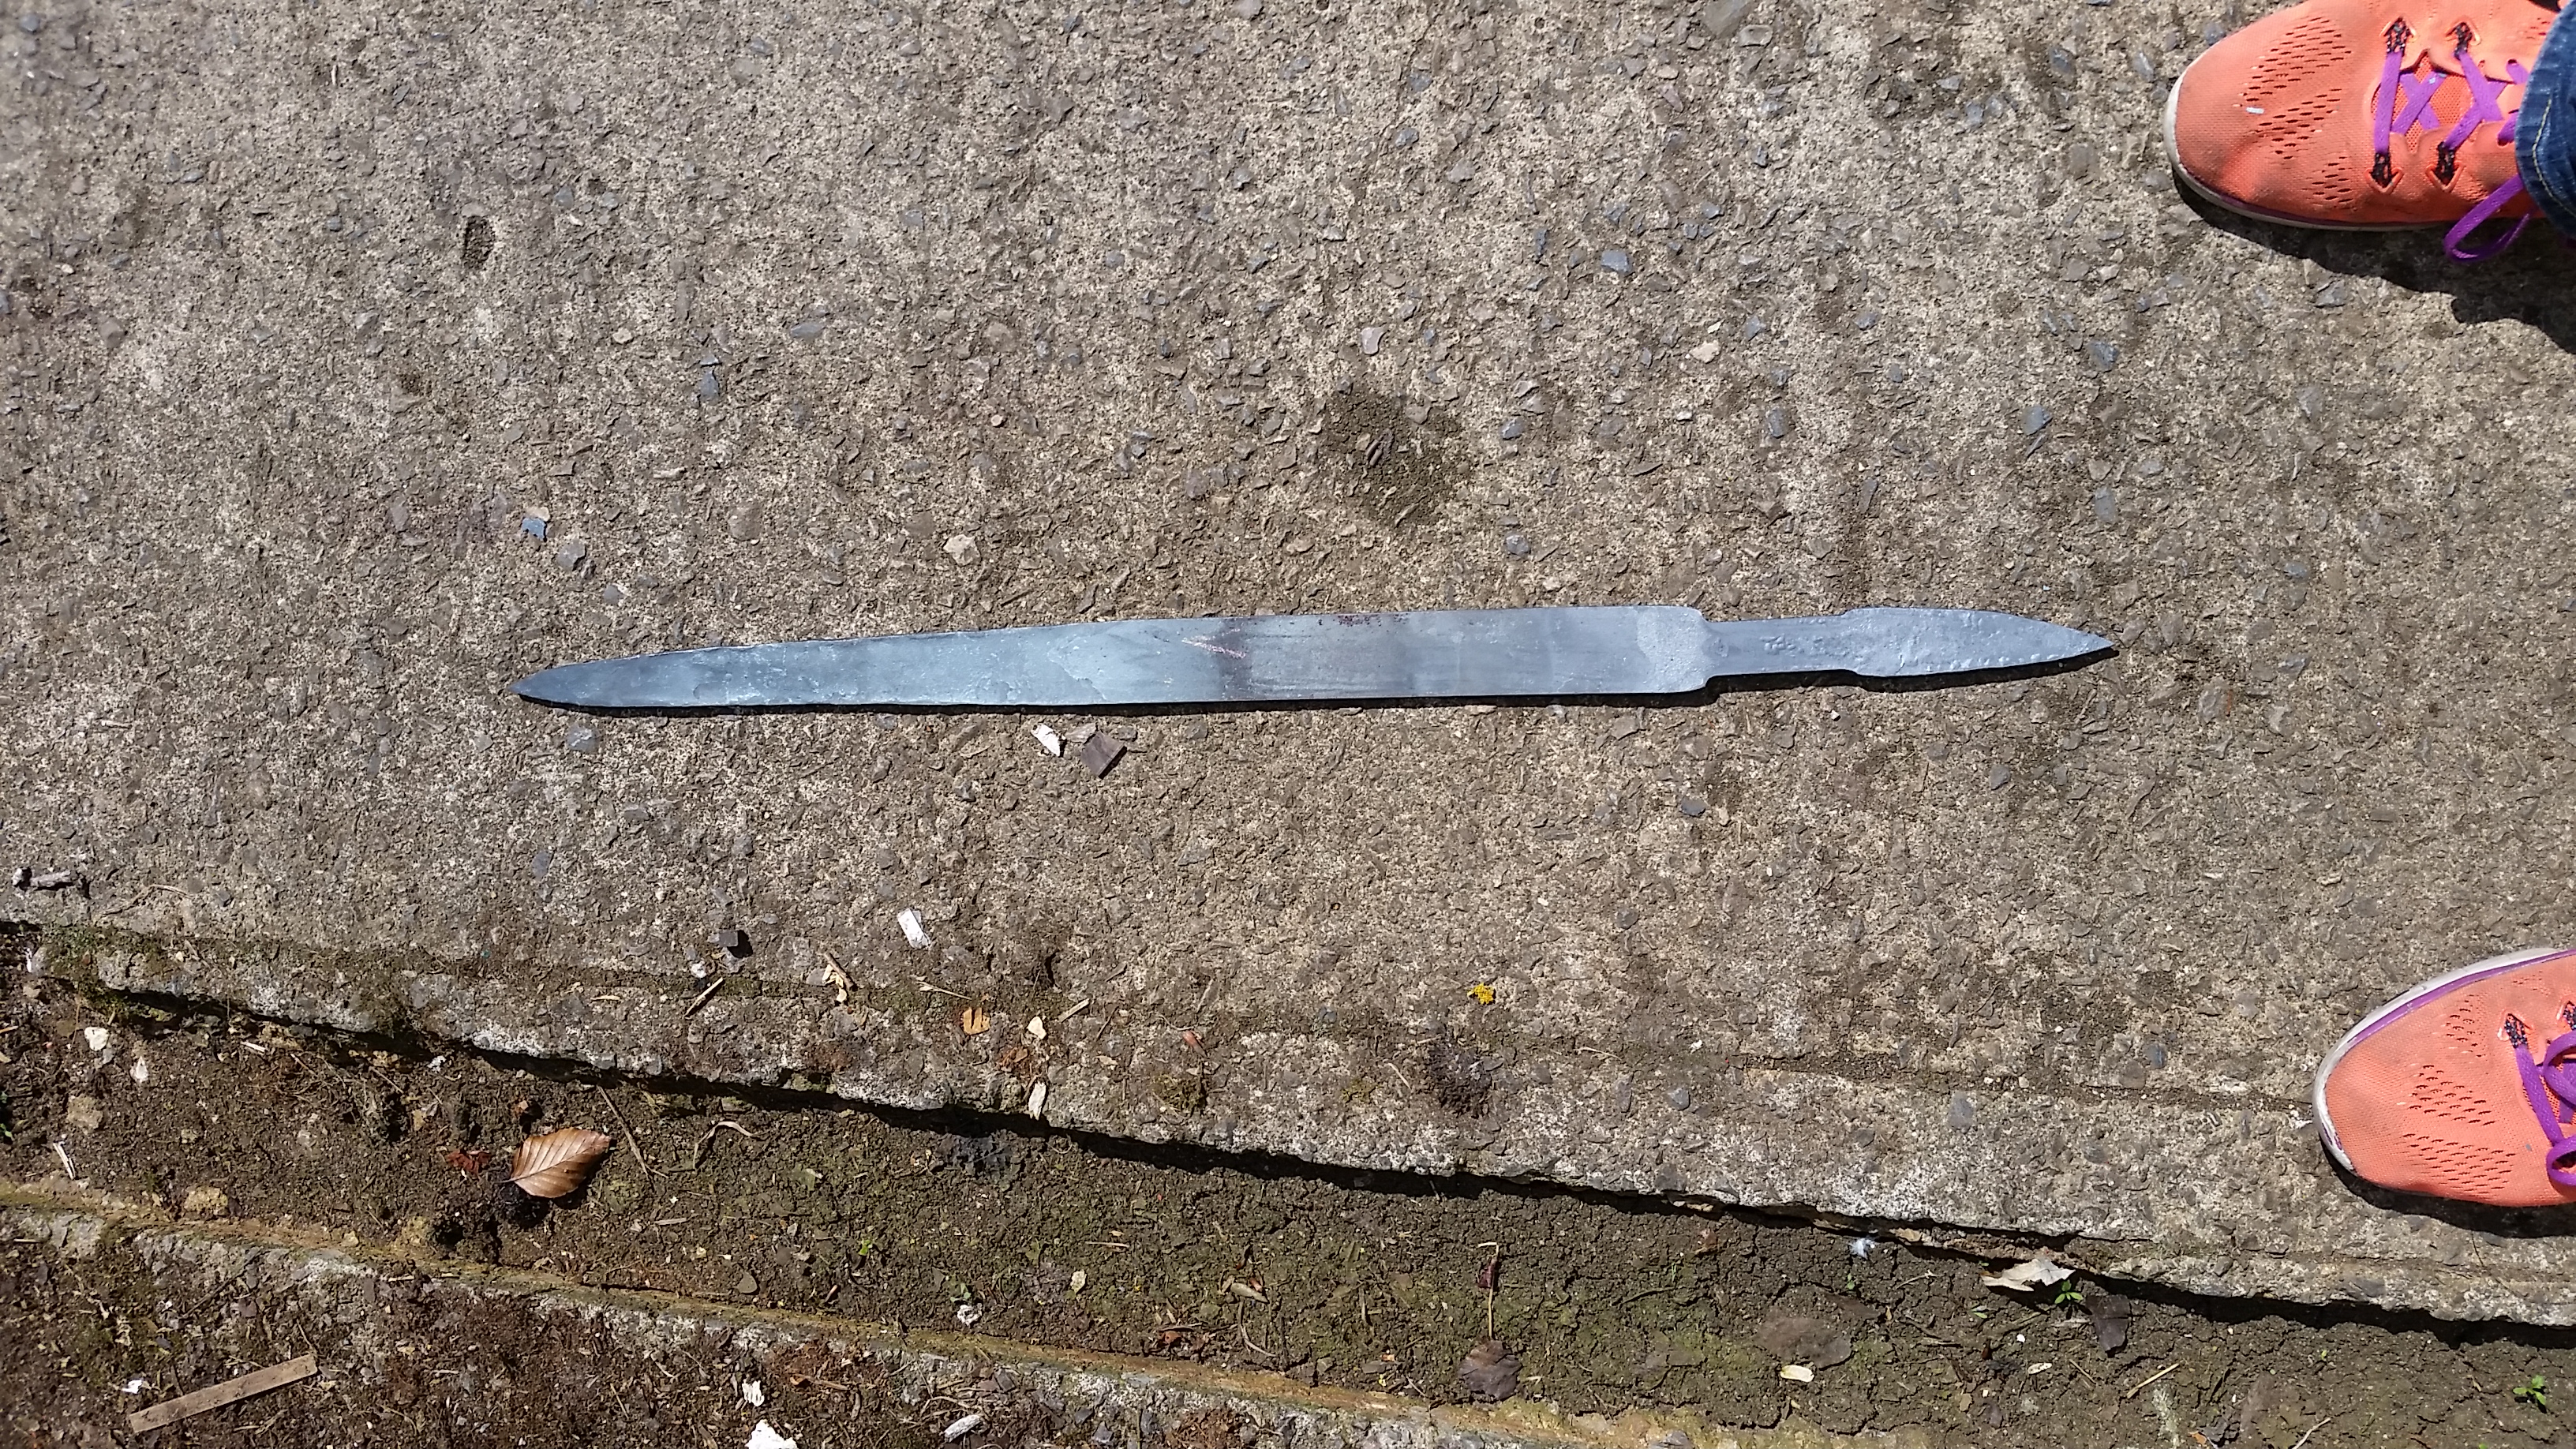
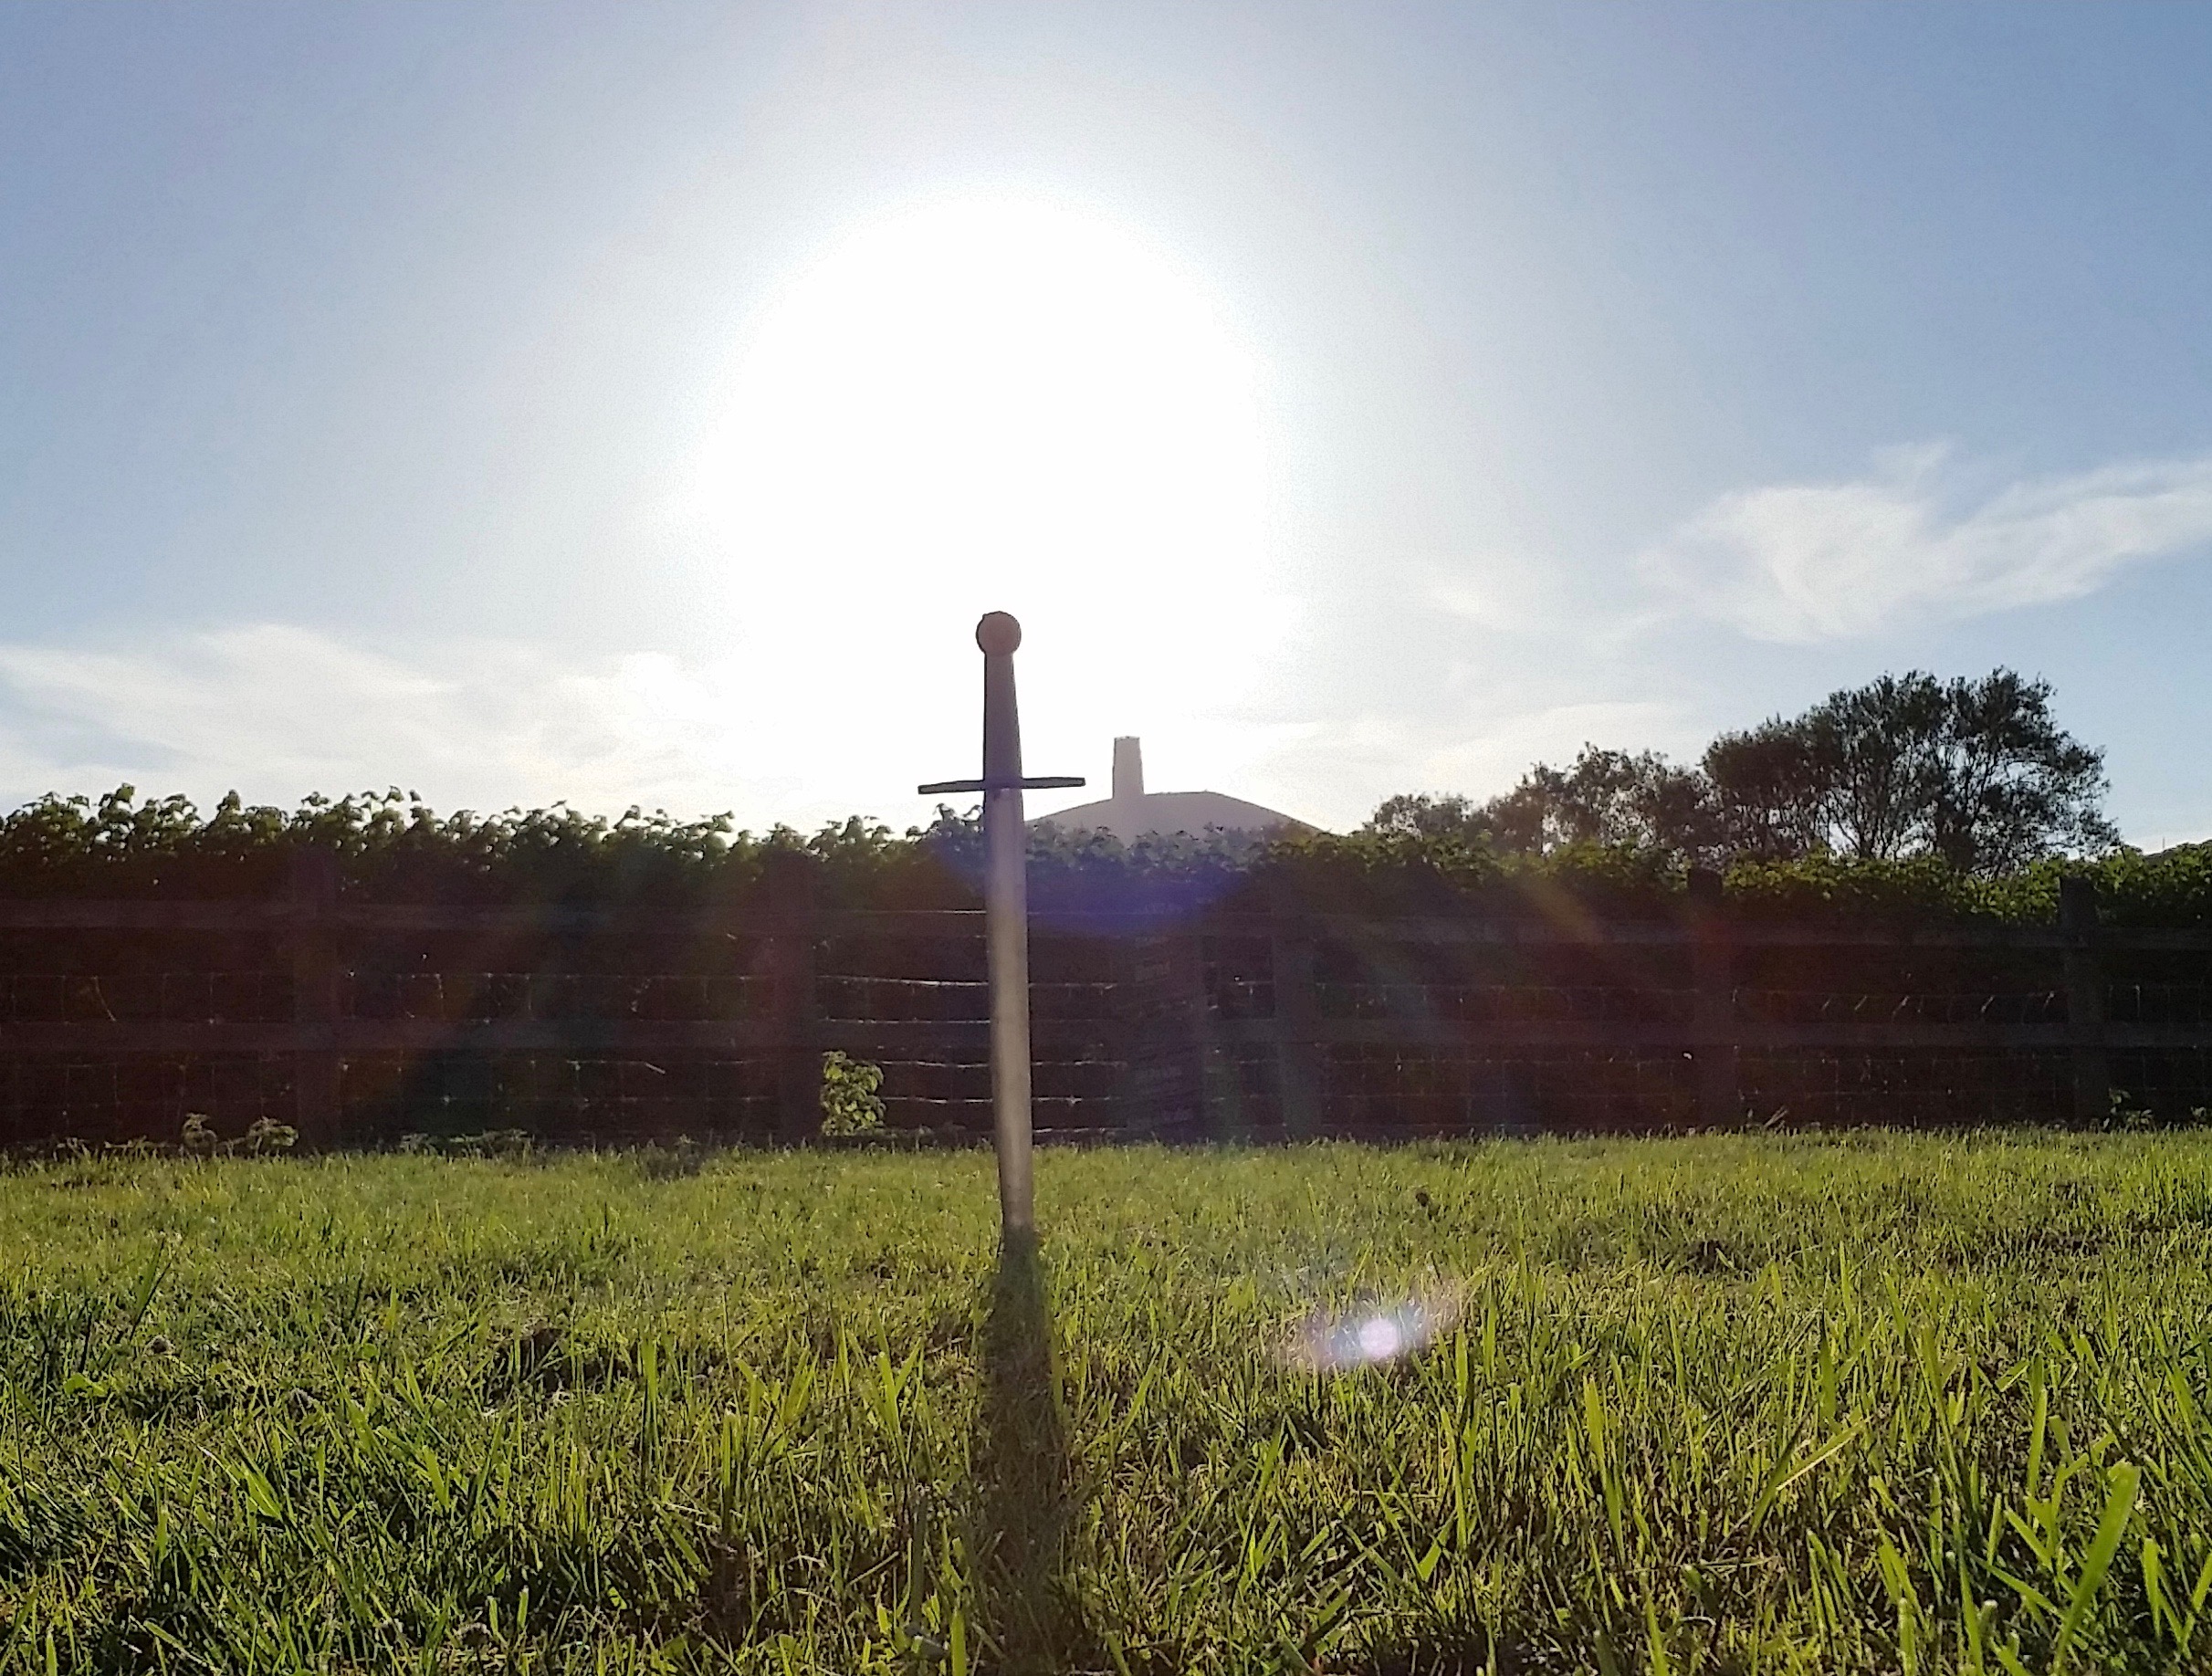 My finished sword in front of the Tor | |
| Photo Credit | Victoria Mercouris |
|---|---|
Contents
- 1 The Crafting of a Sword
- 2 Abstract
- 3 Introduction
- 4 Section one: Background
- 4.1 The Function of A Blacksmith
- 4.2 The Procedure of Becoming a Blacksmith
- iv.3 Tools of the Trade
- 5 Department 2: Deliverable
- v.1 Daily Periodical
- v.i.i Tuesday June 13, 2022 – Day i at the Forge
- five.1.2 Wednesday June 14, 2022 – Day 2 at the Forge
- 5.1.3 Thursday June 15, 2022 – 24-hour interval iii at the Forge
- 5.1.iv Firday June xvi, 2022 – Day 4 at the Forge
- v.1 Daily Periodical
- 6 Conclusion
- seven References
Abstract
The goal of this project was to take a look at the process of crafting a sword. While blacksmithing used to be a very important job in medieval times its importance has macerated in today's nowadays society due to the invention of factories and machine production. Looking at today's society it is incredible to meet the blacksmithing community however thriving, while non at much in a product sense just in a historical one. While the blacksmiths practice use some modernistic technology much of the crafting process is even so done by hand as information technology was done in medieval times. For this project, I went through the process of crafting my own sword to be able to experience what it feels like to be a modern blacksmith.
Introduction
This project was all near the procedure of creating a sword in a modern day forge. In lodge to report this topic, I went to a four-24-hour interval course offered by the Forge of Avalon called Forging your Own Sword. Surprisingly this is a course that has been run many times a yr for over 16 years and is not unique to the forge I worked at, The Forge of Avalon. Then while I did written report the process I am defiantly not 1 of the outset people to be interested in the topic. This project is the capstone of my humanities and arts experience and it really encompasses two of my other topics that I studied, defensive architecture in castles and historical European martial arts.
Department i: Background
The Role of A Blacksmith
During the middle ages, blacksmiths played a very important role in the community. They were in charge or crafting weapons, armor, keys, chains, and tool that any town would demand. A blacksmith had tools similar to a goldsmith in order to melt and combine different metals and and so shape them into the desired object. A blacksmith was required to take a large corporeality of noesis and feel non simply on shaping metal but besides its limerick. What types of metallic an object was made of was very of import to its hardness, strength, and toughness. Past manipulating the composition of metal a blacksmith could create the right combination so the object created would shatter or bend. While becoming a blacksmith require a lot of time in an apprenticeship, the end goal was well worth it due to the blacksmithing social club being very profitable from the wide variety of objects that they made. While blacksmithing used to be the centre of manufacturing in the middle ages, the same tin not be said for modern day society. With new materials such as plastic and carbons fiber, plus the many factories that pump out products faster than whatever person could craft by mitt the necessity for blacksmiths have become none existent. The question then is why can they still be plant and how do they make their living. Many people now are fascinated by the ability that is felt from crafting objects with their hands. In that location is likewise a connection that people tin can feel while crafting to the blacksmiths that came before them. Many modern mean solar day blacksmiths make a living off of selling their functional or ornamental creations, at either medieval festivals or on the internet. Others also brand coin by holding classes didactics what they know to other people who are interested. There are some blacksmiths that specialize in making blades, known as bladesmiths and they can make thousands of dollars selling quality products. Ray Rybar of Finleyville, Pennsylvania is 1 of the bladesmiths that specializes in blueprint-welded blades commonly called "Damascus". Damascus blades are generally fabricated of two or more than layers of metallic that are forge-welded into 1 bar. Rybars has had such success with his bract that he was able to sell ane for $75,000. Blacksmiths are too very involved in museum piece of work and historical reproduction. While this doesn't pay much it is adept for those that have a historical interest in what they are crafting. A common source of jobs for blacksmiths in New England is the restoration of historical buildings. A shop that specializes in historical reproductions might create xl,000 nails for a kitchen that was being reconstructed, reproductions of historical accurate swords, cooking implements, hinges, or locks.
The Process of Becoming a Blacksmith
The organization in place for training new blacksmiths during medieval times was an apprenticeship under a master. What not many people realize is that this notwithstanding continues in today's society, blacksmith apprentices can spend anywhere from five to eight years learning on the job under a principal blacksmith. The work is total fourth dimension and the pay ranges from $nine.l to $25 an hr. While this is nevertheless an choice it is non the but one available in order to learn the craft. In Southwestern Pennsylvania, in that location is a school called Hart Moore Blacksmith Studio that teaches groups of students. This school serves less every bit a identify to officially teach the craft and more as one to satisfy a curiosity that people might have about the blacksmithing experience. Another learning opportunity it through conferences held by blacksmiths' associations. Conferences are a major opportunity to gain new skill as professionals from all around the world assemble to demonstrate their techniques. There is too a blacksmithing and metalsmithing plan at Southern Illinois University at Carbondale. This university is the only one in the United States that offers a graduate degree in blacksmithing.
Tools of the Trade
Anvil - Usually made of from a cast of depression-carbon steel with a higher carbon steel face welded to onto the body. This tool serves every bit a surface on which an object being forged is struck. When a hammer hits on side of the object with a sure amount of force the anvil should rebound that same amount of force on the other side of the object.
Quenching Tank - A tank that contains oil or other hardening mediums used in the estrus treatment of blades. It tin can also just serve as a way to rapidly cool a piece of metal and then that it can exist quickly touched.
Hammer - A heavy hammer that is used in combination with an anvil to forge metallic.
Hardy - A metal working tool that fits inside a square hole in the anvil. It usually refers to a chisel that when hot steel is hammered over will cut the steel.
Wire Castor - A tool that is used past blacksmiths to brush away any hammer calibration that may appear on the piece beingness worked on.
Spring loaded Press - A large motorcar with different heads that tin be attached. Information technology is adept for making fast and even hammer blows.
Forge - A hearth used for heating metals to different temperatures so that they can be worked on. Two common types of forges include ones that run on propane or coal. A propane forge is easy to regulate the temperature of equally it is simply controlled past how much propane is existence used. This type of forge doesn't make every bit much of a mess as a coal forge and is practiced for when trying to work on many pieces at once. A cool for though is much larger and is ideal for oestrus tempering as the entire slice needs to be heated evenly which tin be hard to practise with propane.
Swage Cake - A big, heavy block of bandage iron, or steel that is made up of many different sized shapes. A block tin exist used to bend, cut, punch and form a hot piece of metal with the use of a hammer.
-

Swage Block
-
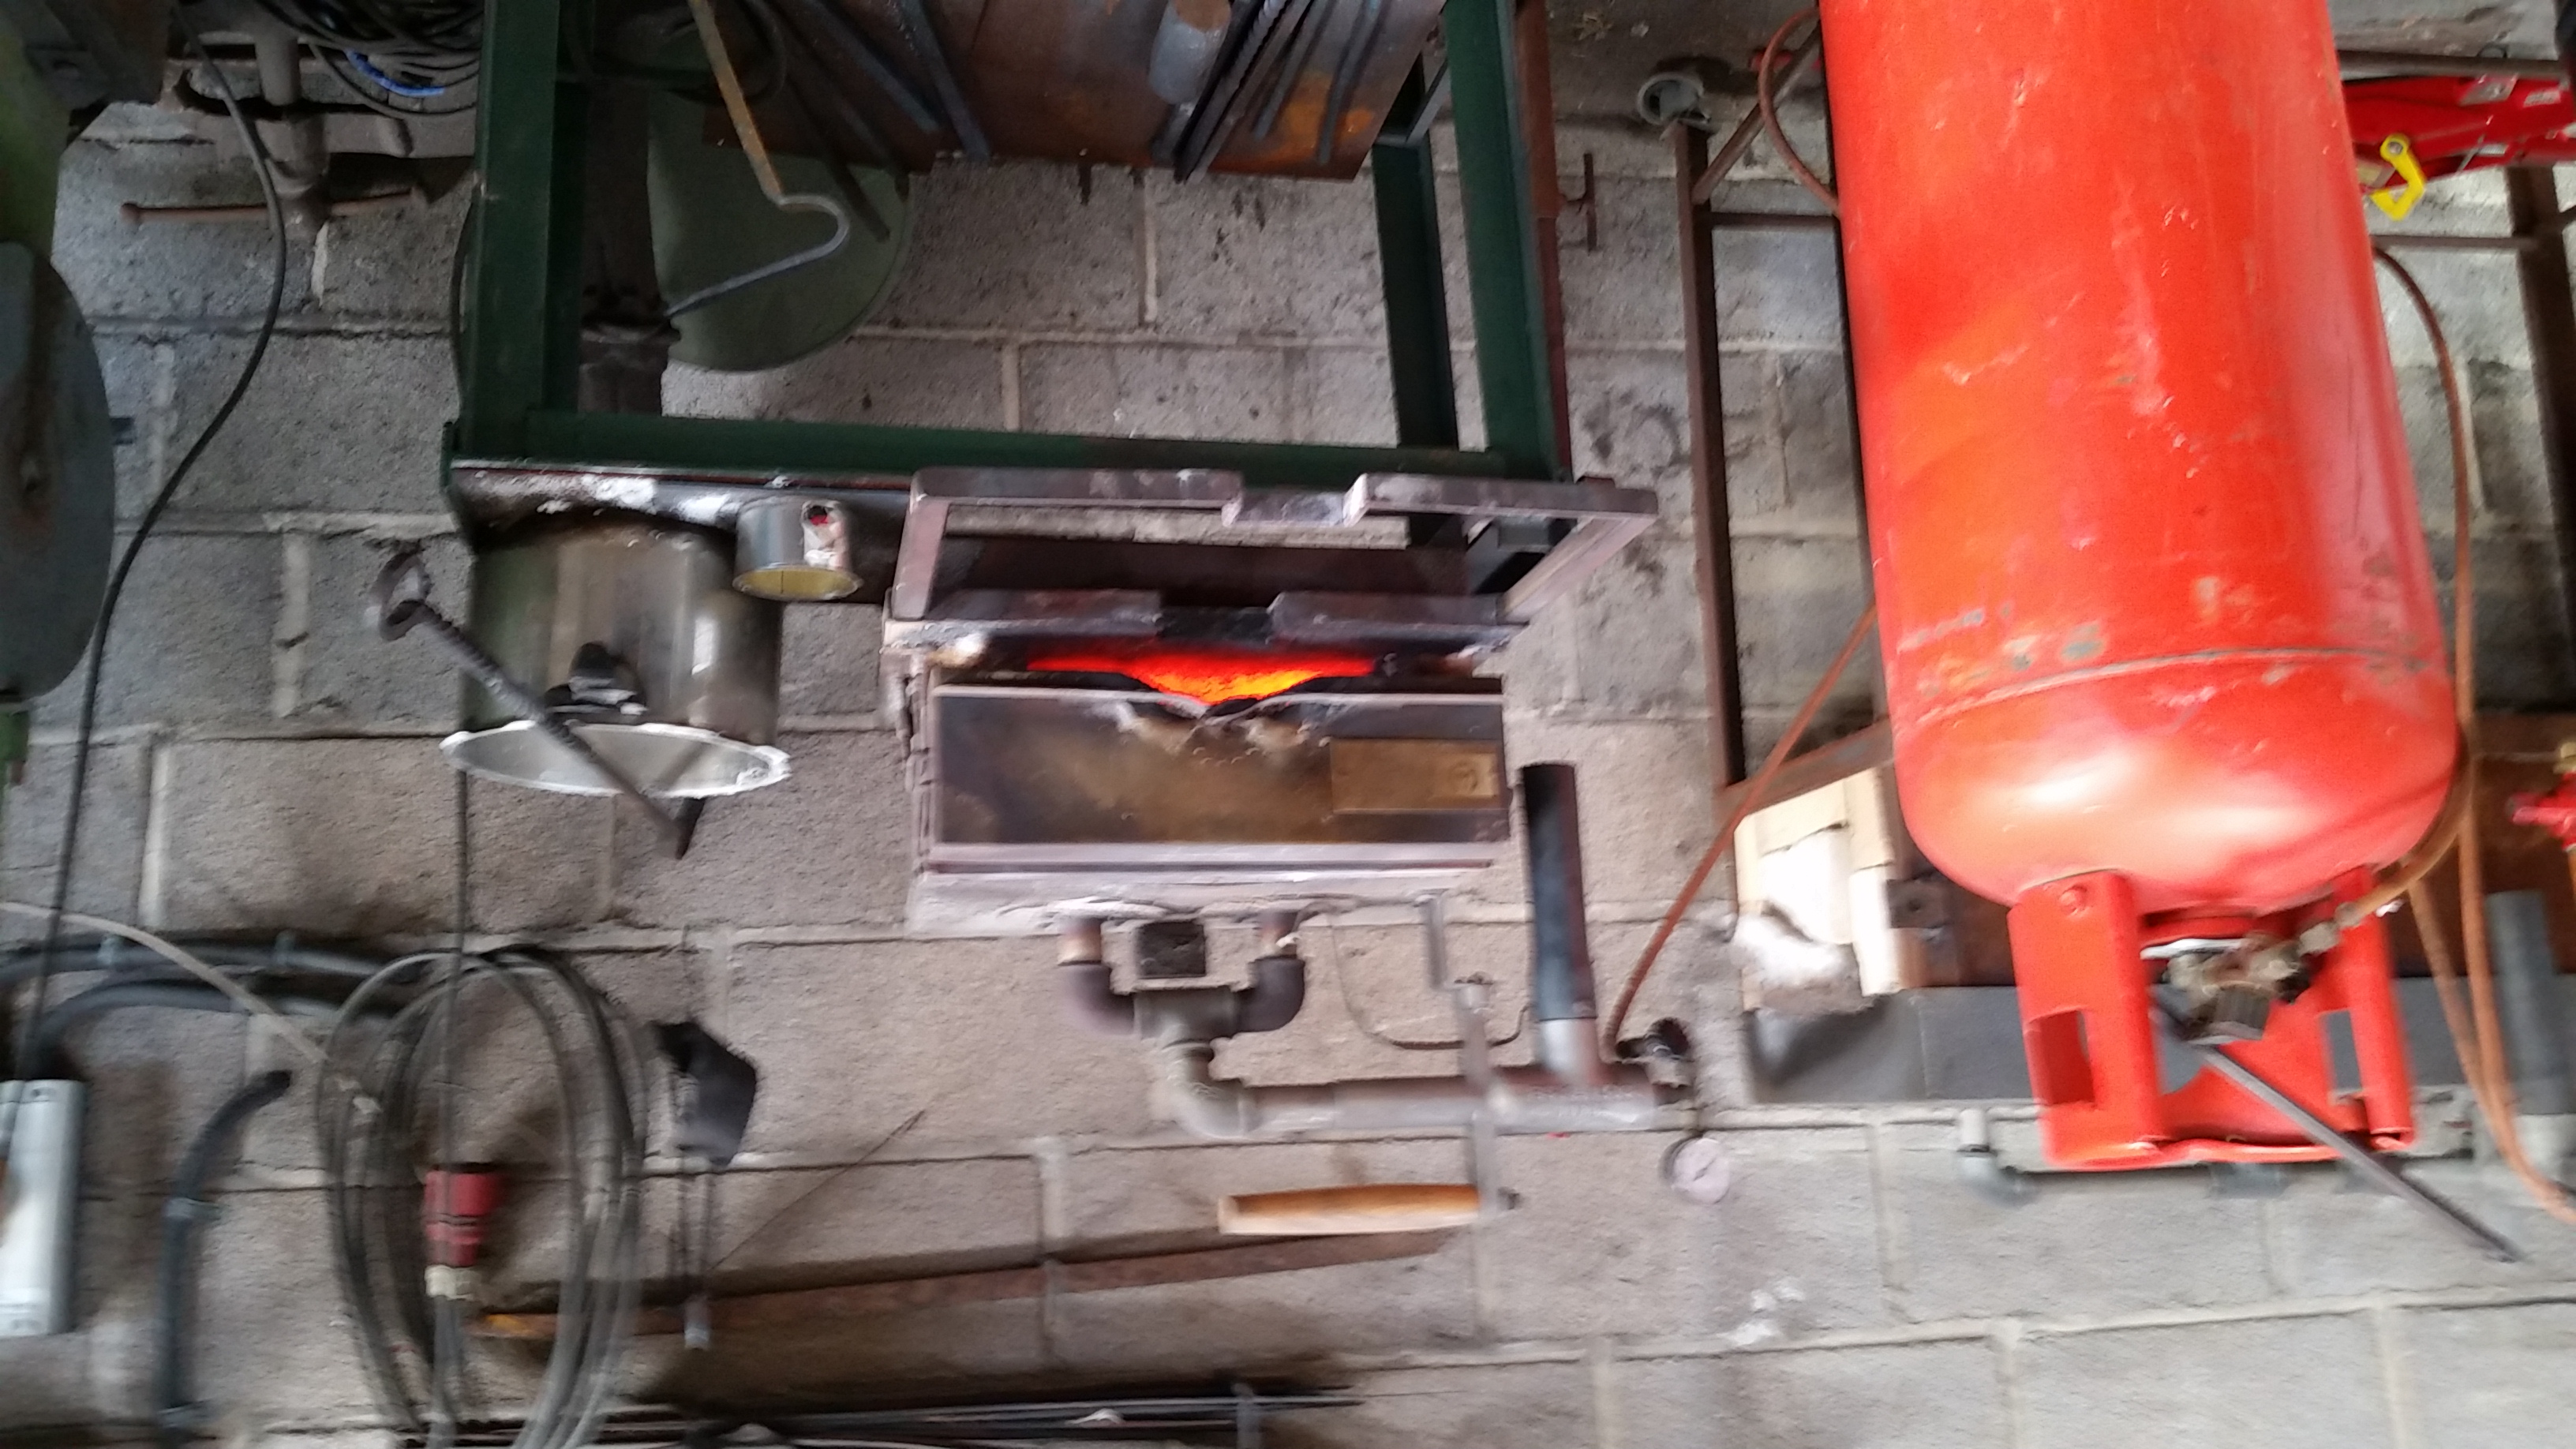
Propane Forge
-
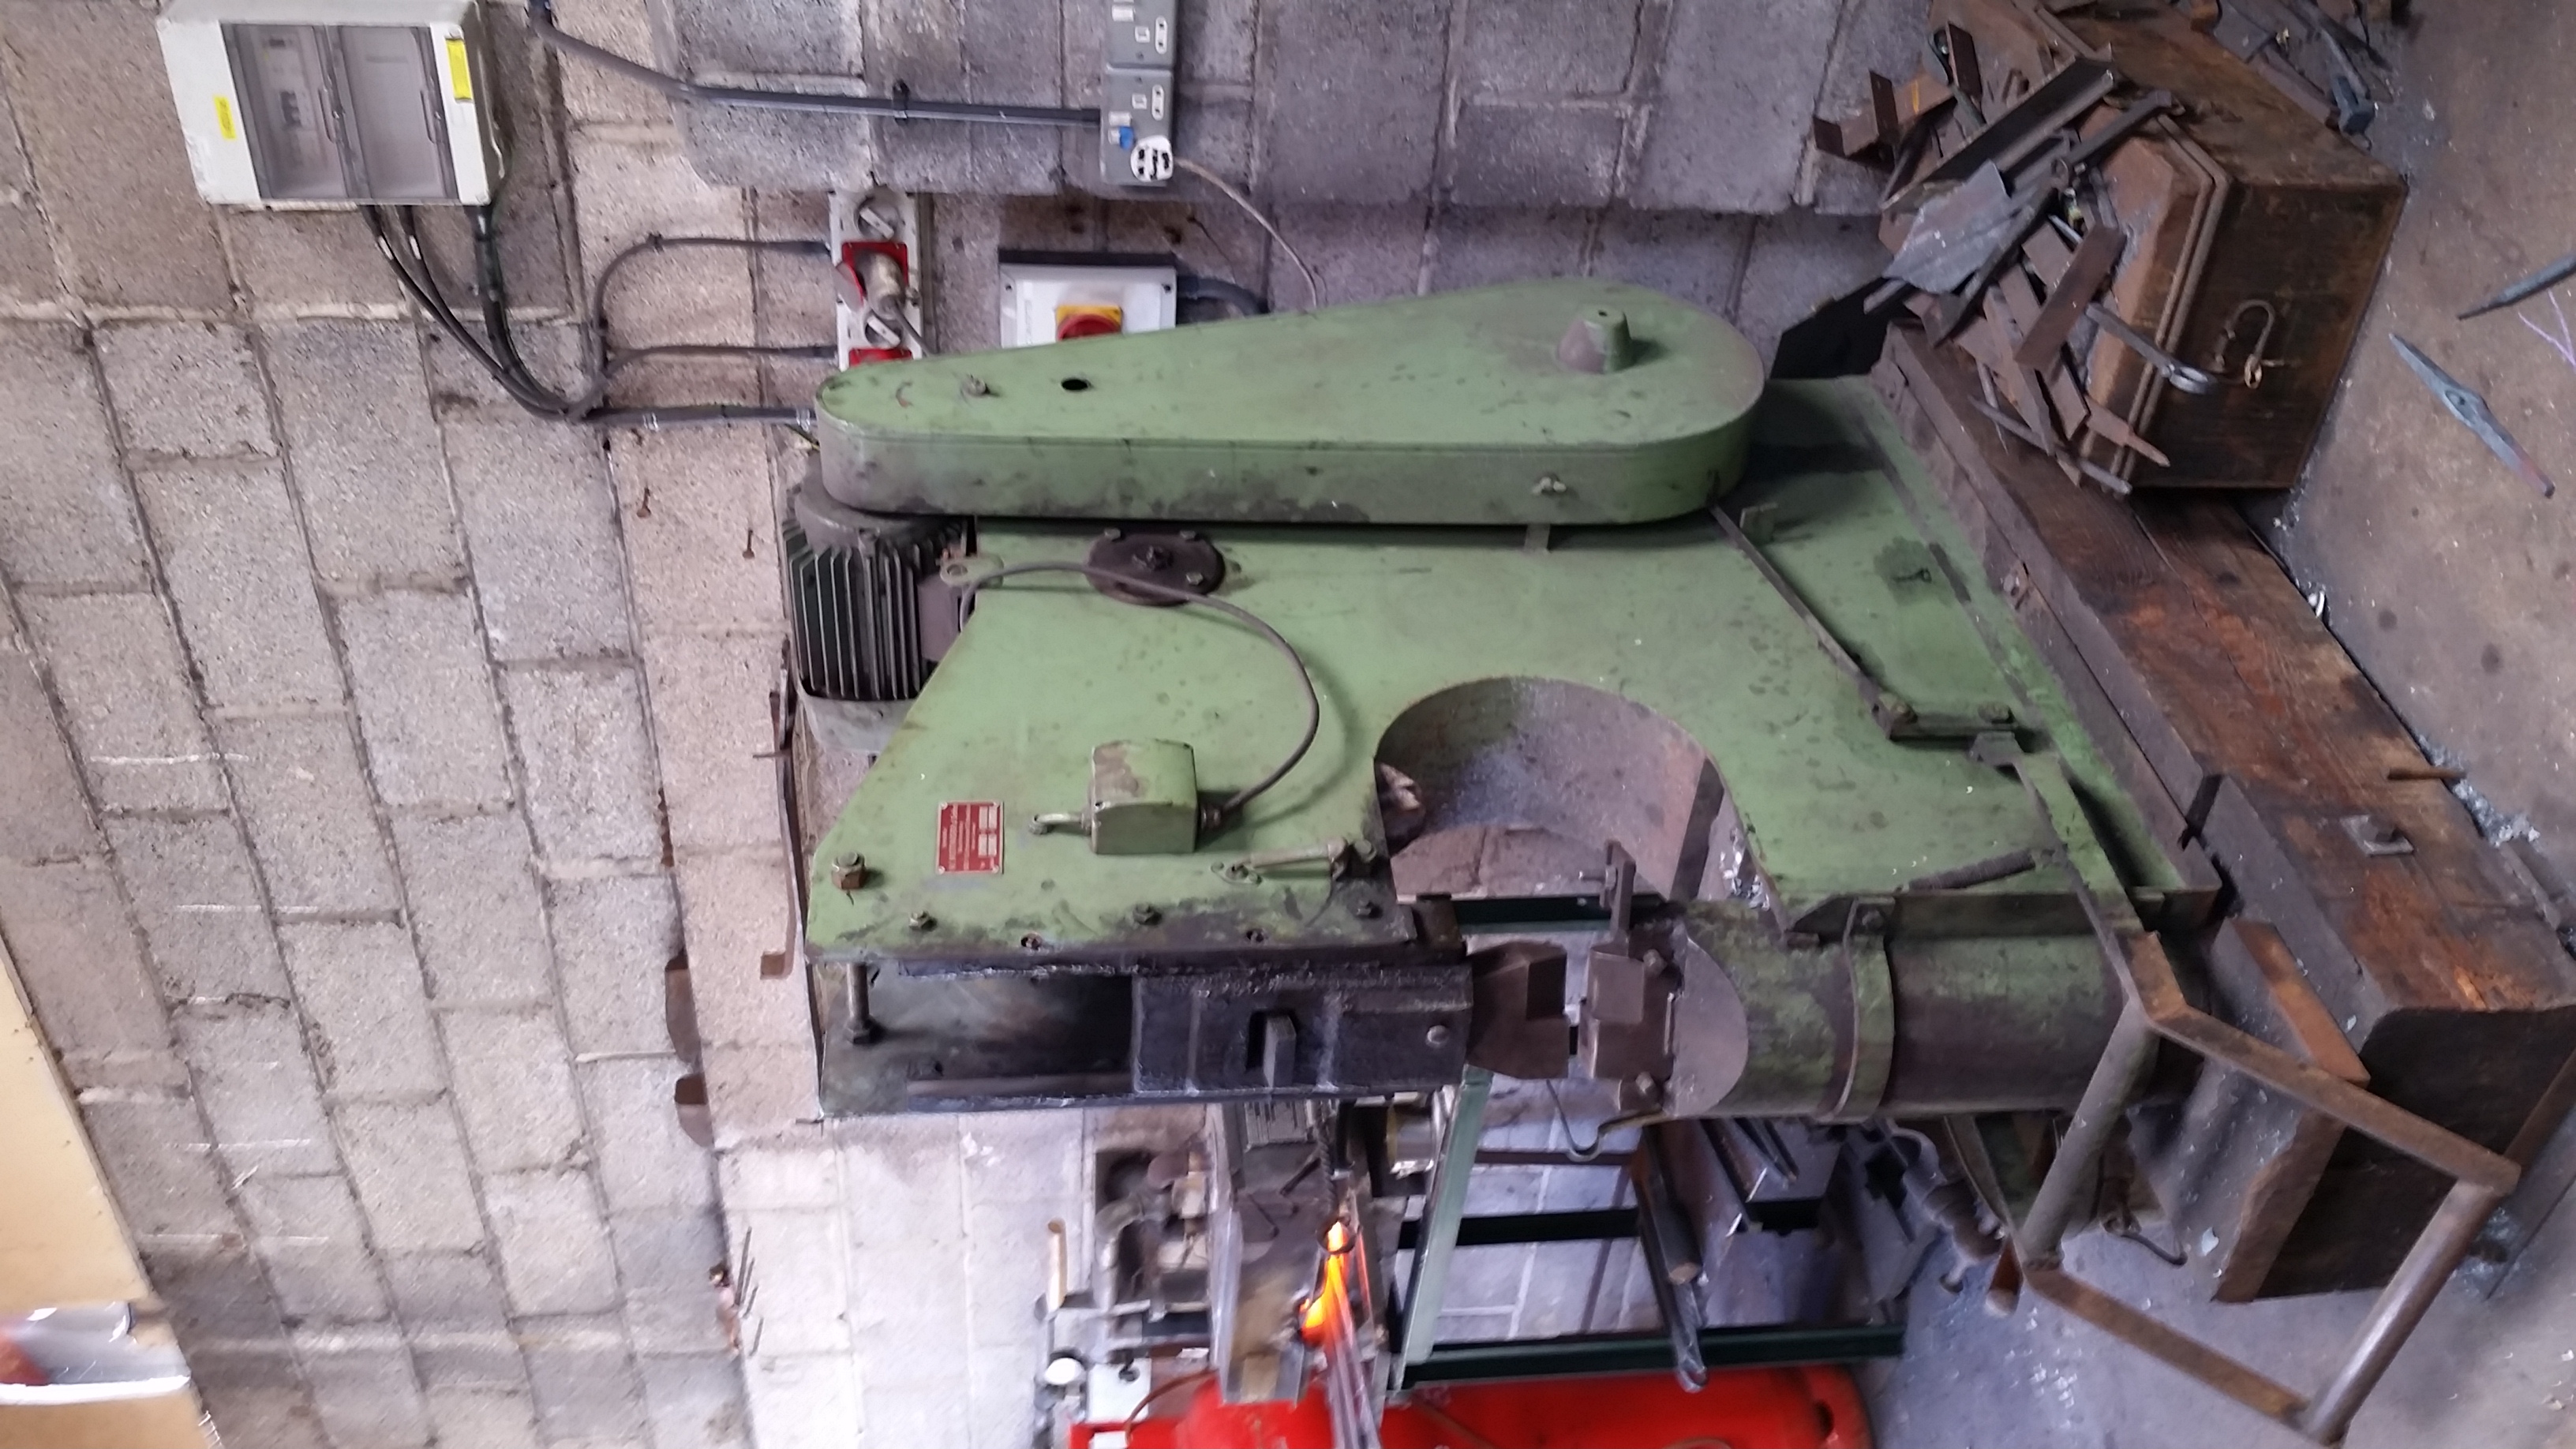
Spring Loaded Press
-

Brush
-
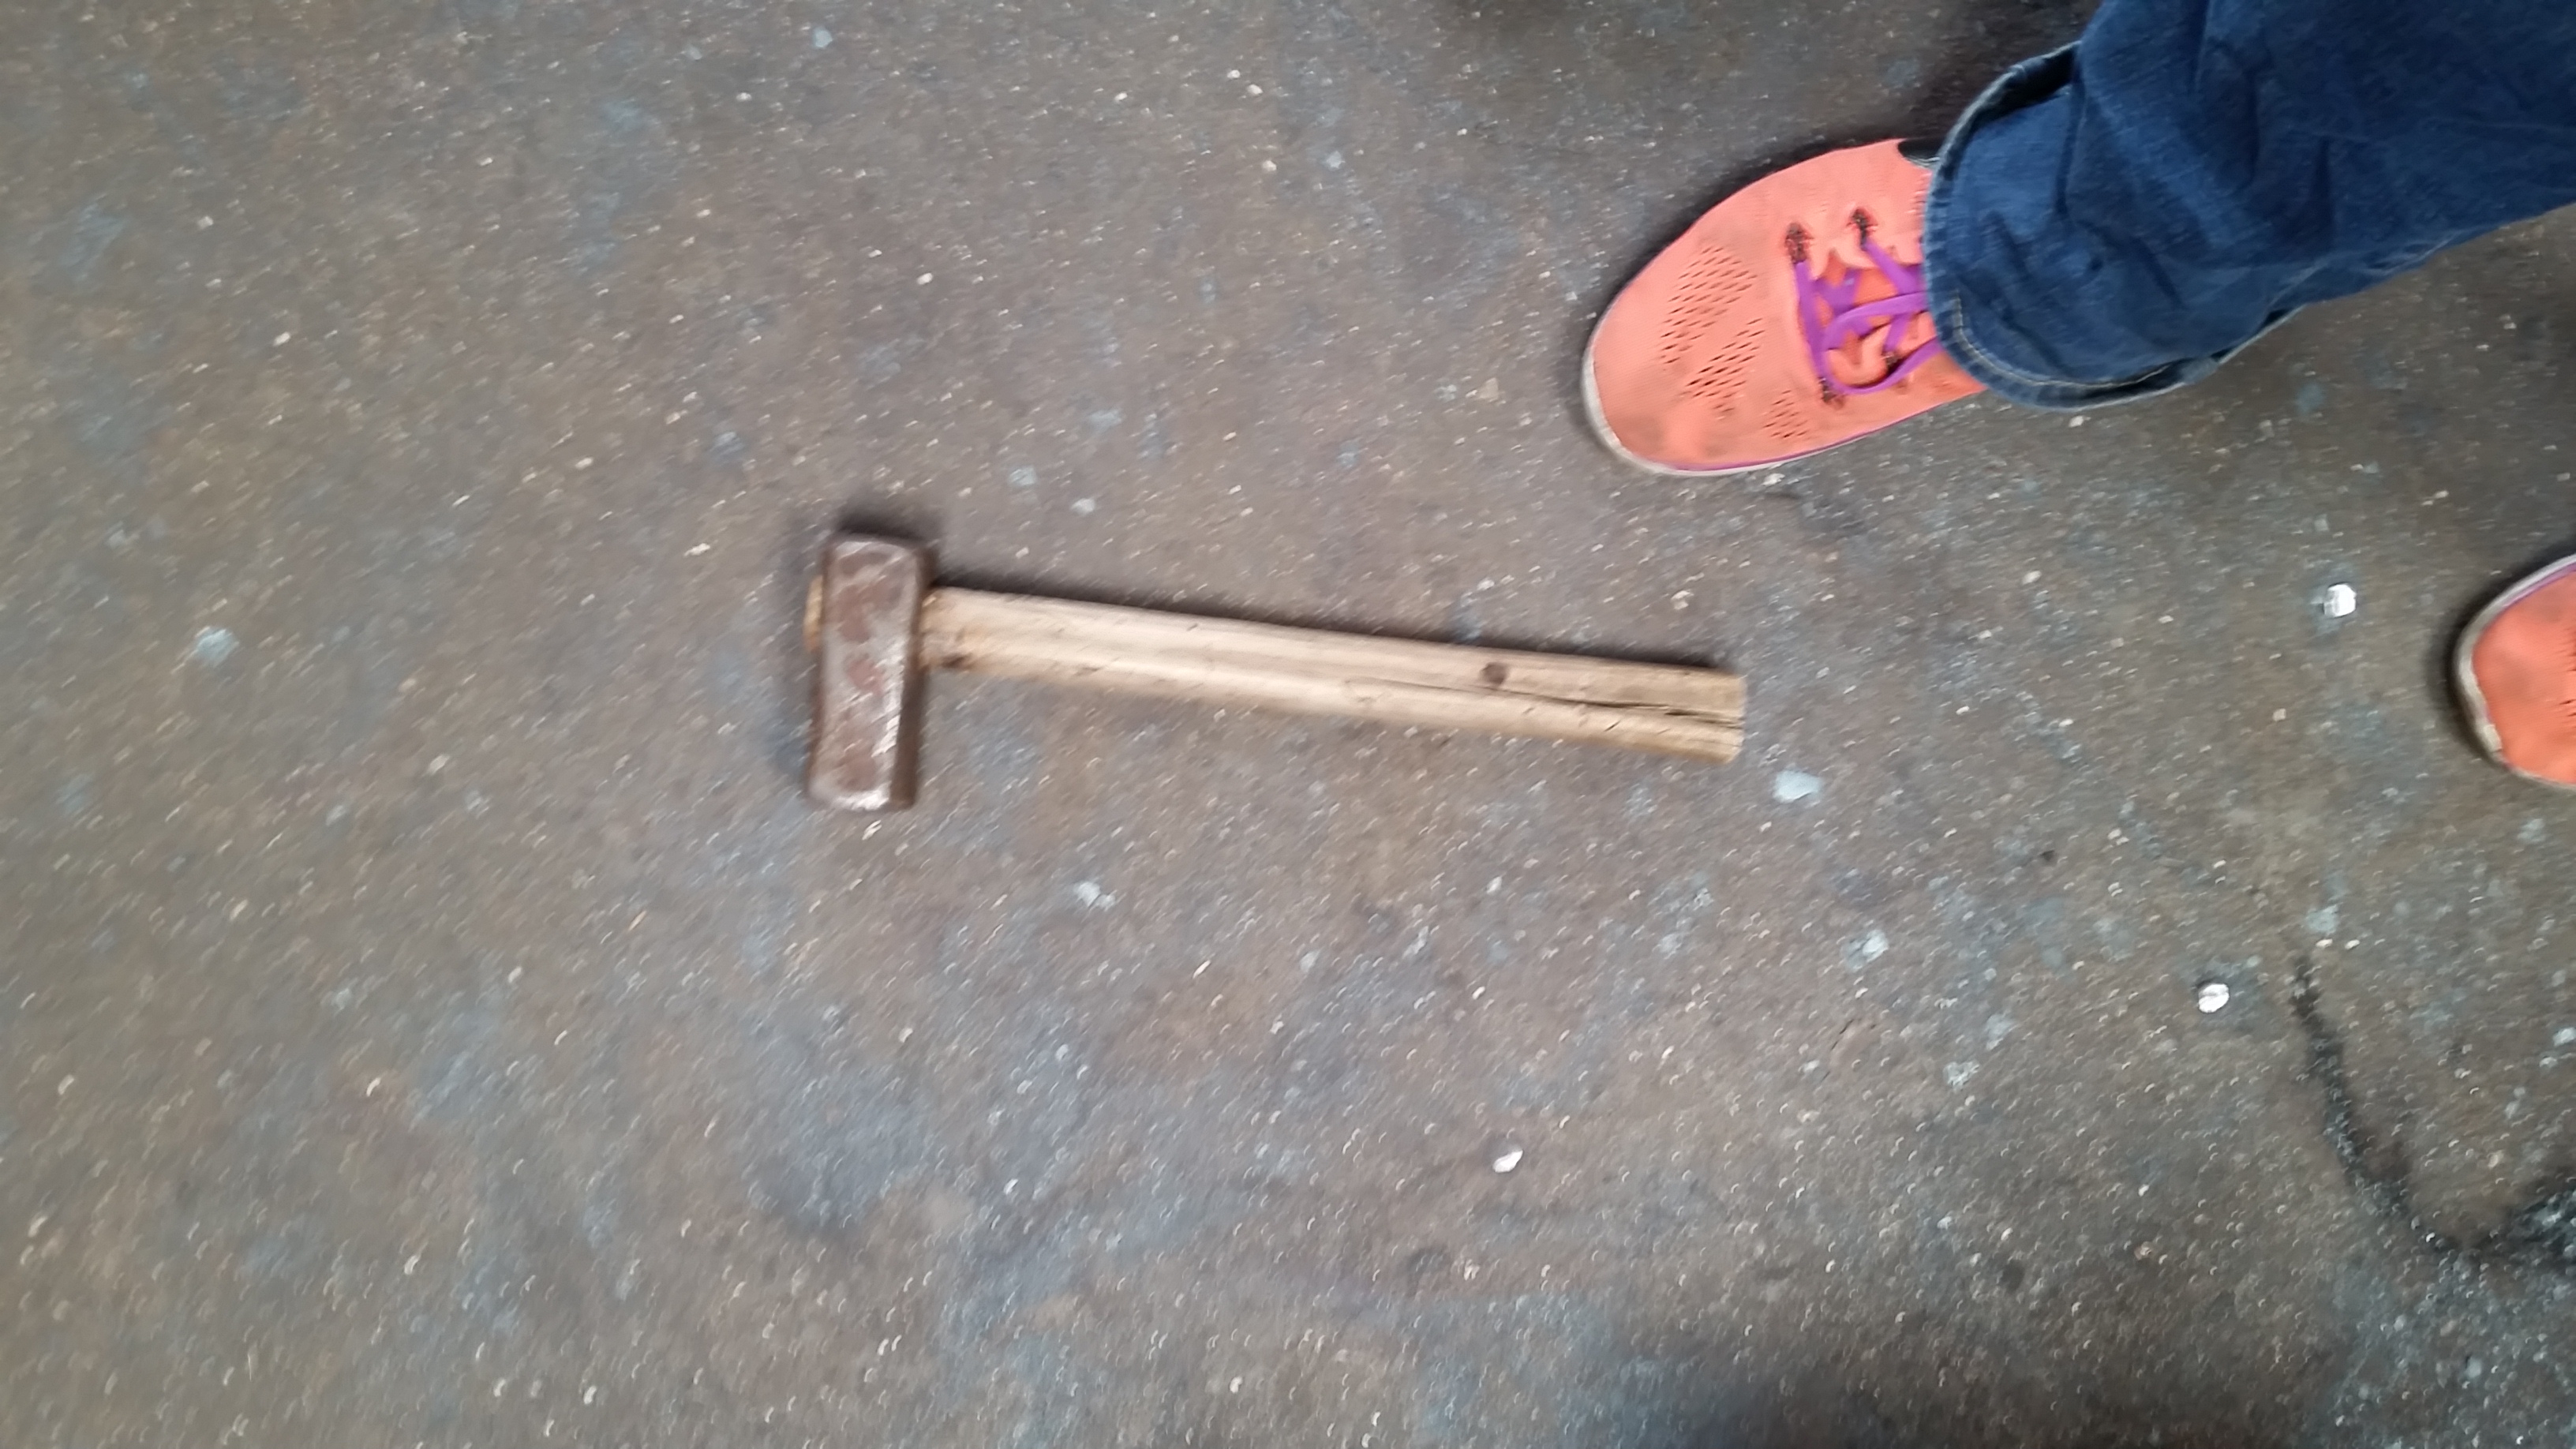
Hammer
-
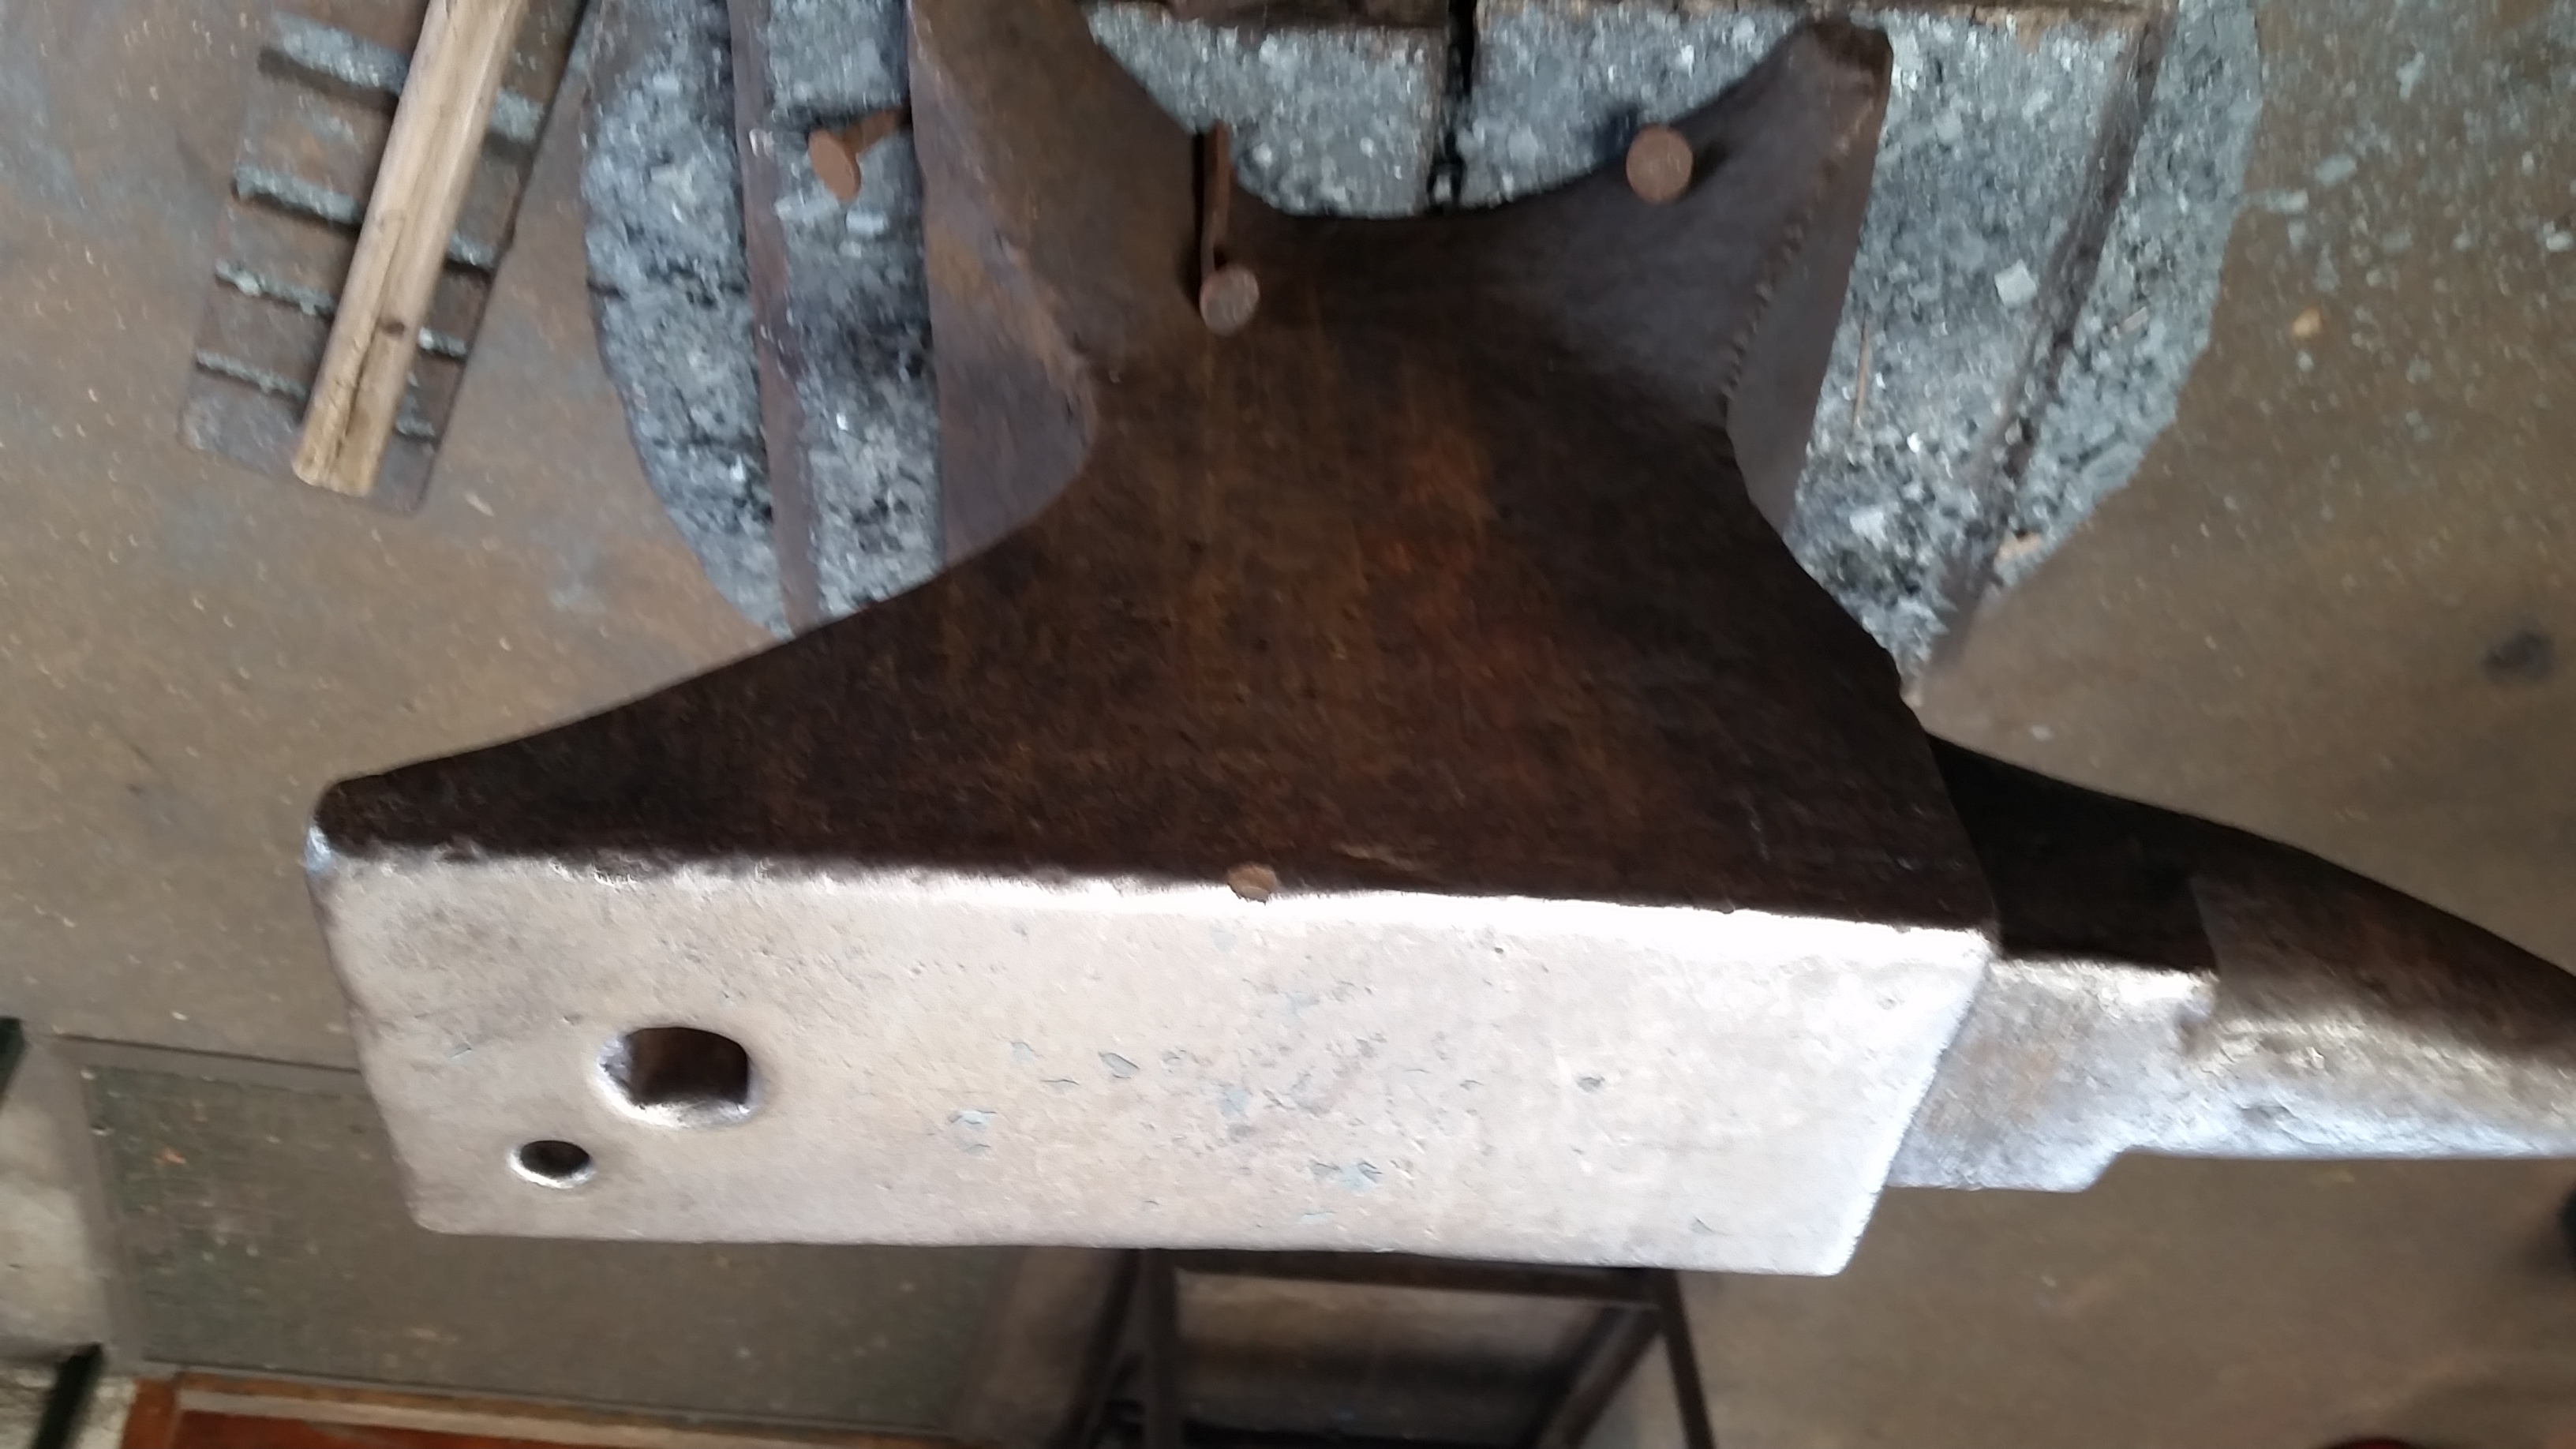
Anvil
Section two: Deliverable
Daily Periodical
Tuesday June 13, 2022 – Day 1 at the Forge
Before even starting to craft our swords we spent some fourth dimension going over the basics of blacksmithing. In gild to be able to smith items the material that you are working with has to exist hot enough. This tin be adamant past the colour of the metallic when taken out of the forge. If the material is ruby hot then it tin can deed like play dough and can be shaped, when if starts to get libation it is then considered cold. Trying to strike common cold metal can be bad for several reasons, the first is that when y'all strike it volition not change shape at all, the only affair that happens is that information technology causes stress to your arm. The other result is that steel is made up of a bunch of crystallized structures, that when red-hot volition rearrange, but when the steel is cold the crystallized structures start to shear and the whole piece that is being worked on will break. In total Richard, our forge master told us that at that place were 8 basic technics. We learned the commencement 5 by crafting steel nails from a rod. The starting time technic consisted of creating a foursquare betoken on a round rod. I was able to do this by hammering the tip of the rod on the anvil with my hammer at a 45-caste angle. After a couple of swings on one side, I then rotated the rod ninety degrees and hammered once more. The adjacent technique I learned was cornering which connects the square part of the rod with the round role to form a prissy corner. I struggled a lot with this technique because in guild to practice it I had to line up the edge of my hammer with the edge of the anvil and I had trouble keeping them lined up while hammering. Following the cornering technique was cartoon. This was all near stretching the nail out my making in thinner and was applied from the foursquare end of the corner to the indicate until the nail fit into a provide template hole. After that, nosotros cut the nail using a hardy, which was placed in a hole on the anvil. To cut the nail off the rod gets placed on the blade of the Hardy about a half an inch from the acme of the rounded side of the corner. The rod gets hammered and rotated till there is but a thin core left in the eye. And so the rod goes dorsum into the forge one last fourth dimension where it needs to get extremely hot. One time at the right temperature, the nail then gets put back into the template whole which then gets wiggled around until the boom breaks lose, the concluding technique is to make the head of the nail. While the nail is nevertheless very hot and in the template hole you hammer the caput equally dead on as possible to flatten out the steel on the top and create a nice round blast caput. In order to teach us all the steps, Richard created a nail for u.s.a. that nosotros were also able to utilize as a template. At showtime, it didn't seem to exist that hard watching him but when I tried it myself I was so proven very wrong. That hammer seemed to get heavier with each accident to the smash, plus is didn't look similar it was changing the shape of the rod very much. After about 45 minutes I was finally about to finish my nail, which came out so bad that it couldn't even be nailed into the wood. It was pretty disappointing since in comparison it just took Richard nigh seven minutes to brand his perfectly fabricated nail. Needless to say, I had to do some more in order to ensure that my sword ended upward coming out looking similar a sword. So I created another smash for about 45 minutes, which did come out improve but was still a long style away from where it needed to be, so I made a third nail. By then the improvements were defiantly noticeable. The head of the smash was centered it was a reasonable length and it was strong plenty to be hammered into the wooden table. By the time I finished my third smash it was already noon and time for lunch. After our suspension, we started with the creation of our swords, mainly the cross baby-sit function. Instead of working on a round rod we had to switch to a much thicker foursquare rod of steel. The benefit to this was that is was already foursquare then that made keeping the shape easier, the downside was that hammering is was so much harder since in that location was more material. In club to create the cross baby-sit I started my measuring out the from the end of the steel rod to 80 mm which was marked out in chalk, then from that line to xxx mm and from that line to some other eighty mm. 1 the rod was marked out in chalk I then used a center punch to punch indents into the metal. This immune for me to see where the marks were once the material became scarlet hot equally the chalk at that point burns abroad. This point was when all the do with the nails helped out as the techniques to make the cross baby-sit where the same. The first step was to start to make a point on the end of the rod. Afterwards that was developed I and so had to depict the ane side of the cross guard out from the finish of the rod to the beginning indent till the length matched the template provided by Richard. This took more than an hour for me, where I just went back and along between hammering and heating the steel, I recollect my biggest upshot with this step is I don't accept the strength and coordination needed to make heavy effective hits with the hammer. Once I finished drawing out the one side of the cross guard I then had to cutting the cantankerous guard off the rod at the terminal indent mark. Once the guard was costless I and then hard to replicate the first side onto the function that I but cut. I retrieve this was even more challenging than merely creating the first side since now I had to be concerned with the symmetry of the guard. When both sides looked roughly symmetric the side by side indicate of focus was the 30 mm center. This stride ended up being a ii person task in which one person held the hot cantankerous baby-sit with the tongs and the other person used an axe and a punch to form the holes. Since the grade is brusque on time there really wasn't the opportunity for u.s.a. to brand a fault as it could have ruined all of what we were working I was the 1 that held my cross guard while Richard struck information technology with the axe and the hole cutter. In gild to make the correct pattern the axe was used first, it was held directly in the center of the cantankerous guard and a hammer struck the dorsum of it, once the indent was large enough, the next step was to create the hole in which the tang volition go through. This utilized a square hole punch in the same fashion as the axe, however, this indent continued all the fashion through the guard till I stuck out through the bottom. At a later time, we volition cut this indent off which will finish the hole. By the time we had finished this it was already 4:30 and then we chosen it a day and left the forge. Overall on the outset 24-hour interval, I experience like I learned a lot, I did kickoff to find that my hammering arm is already starting to become sore, every bit are my fingers. I am also very much covered in blackness from the forge.
-
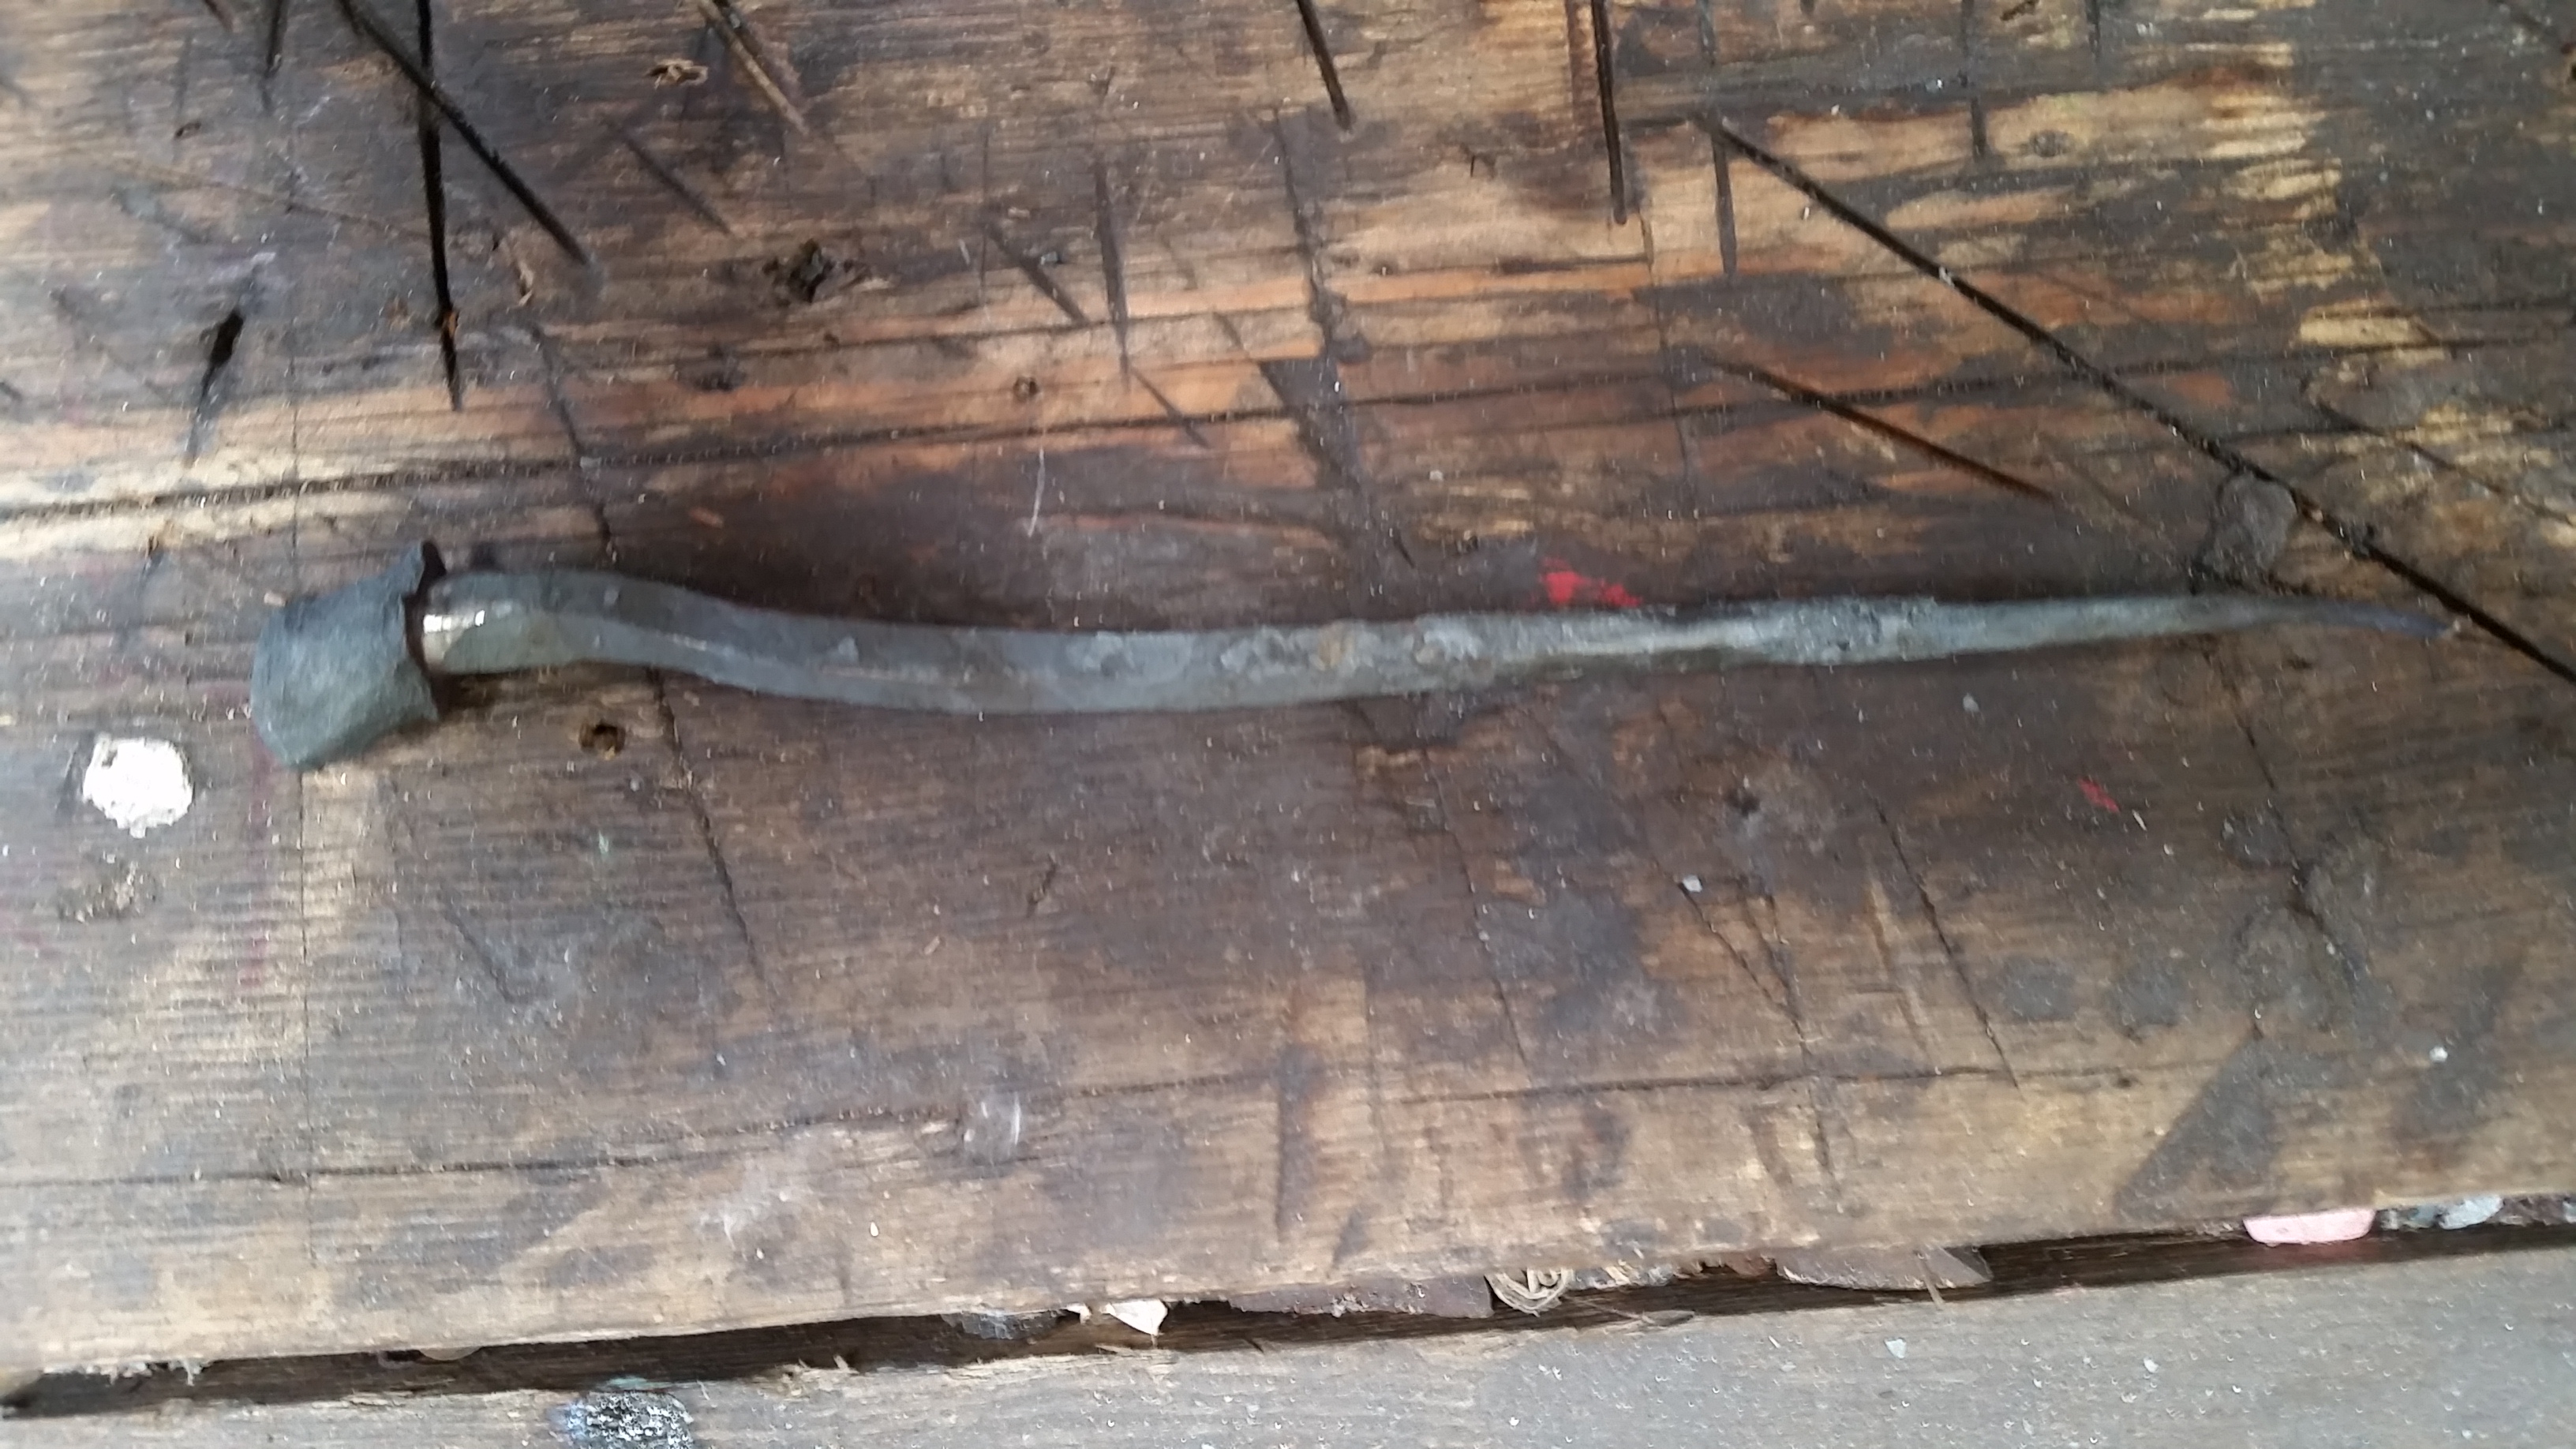
My first blast that I created
-
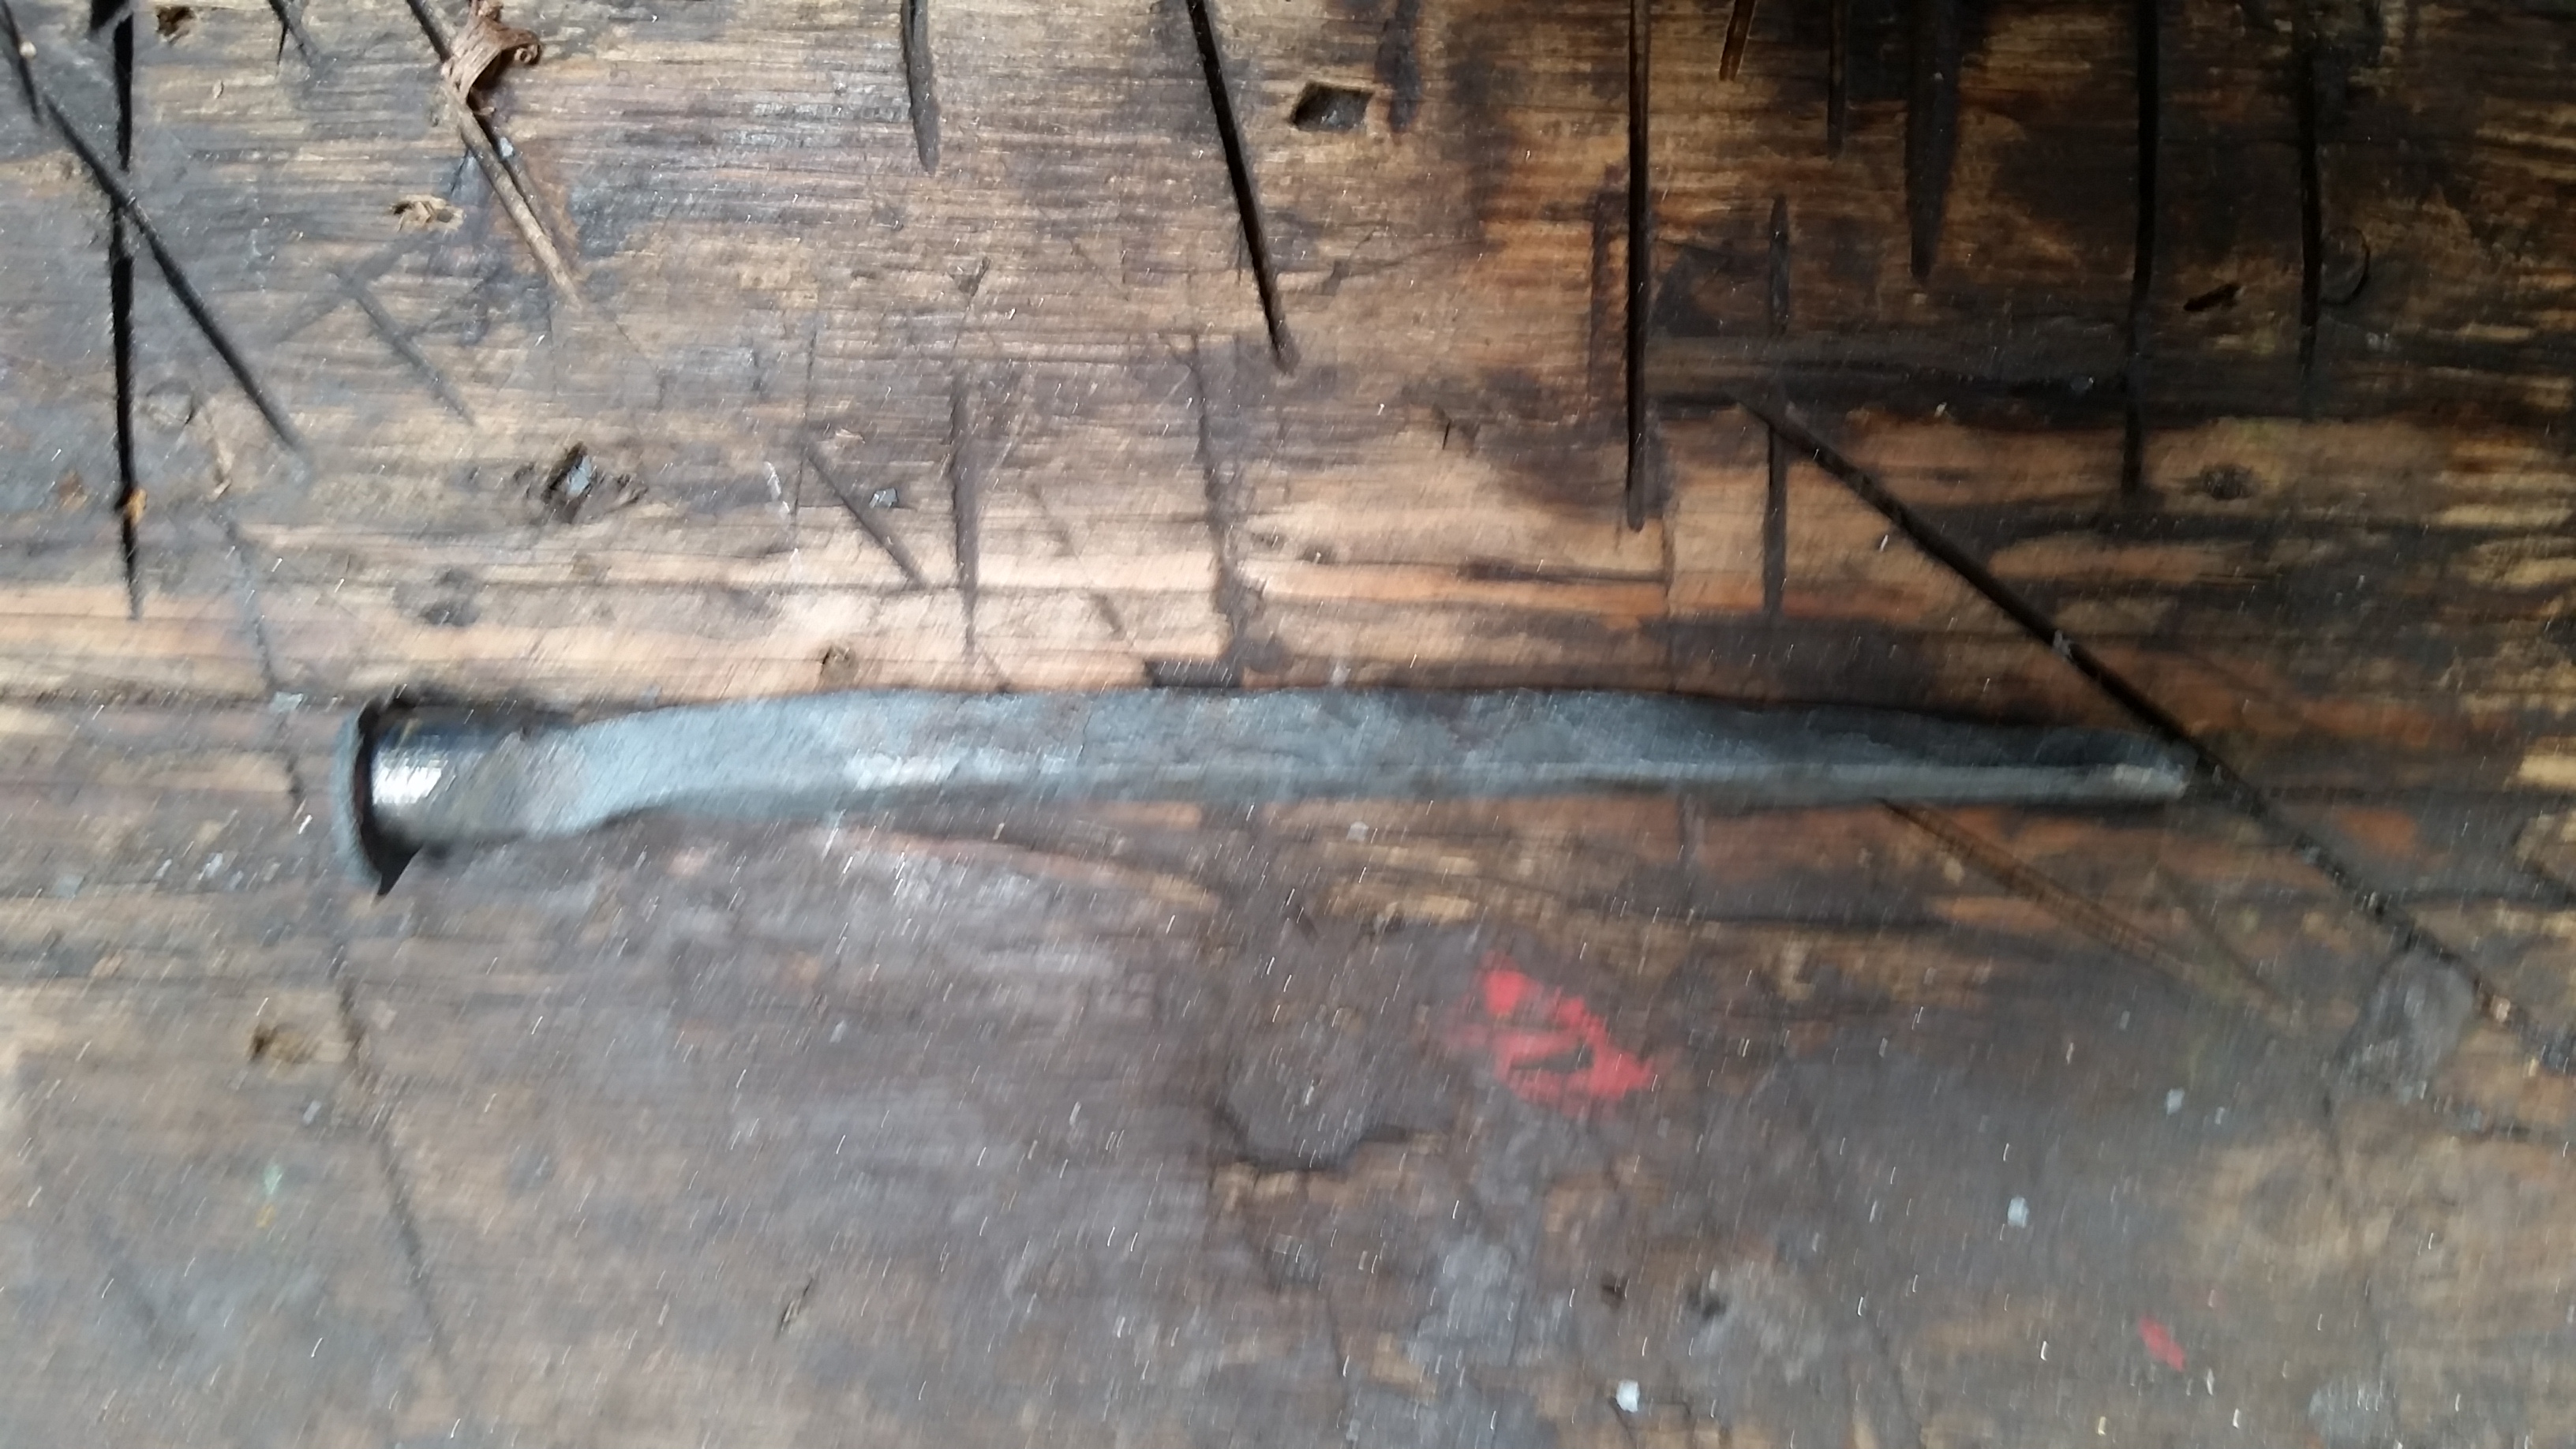
My 2d smash
-

My concluding nail for Tuesday
-
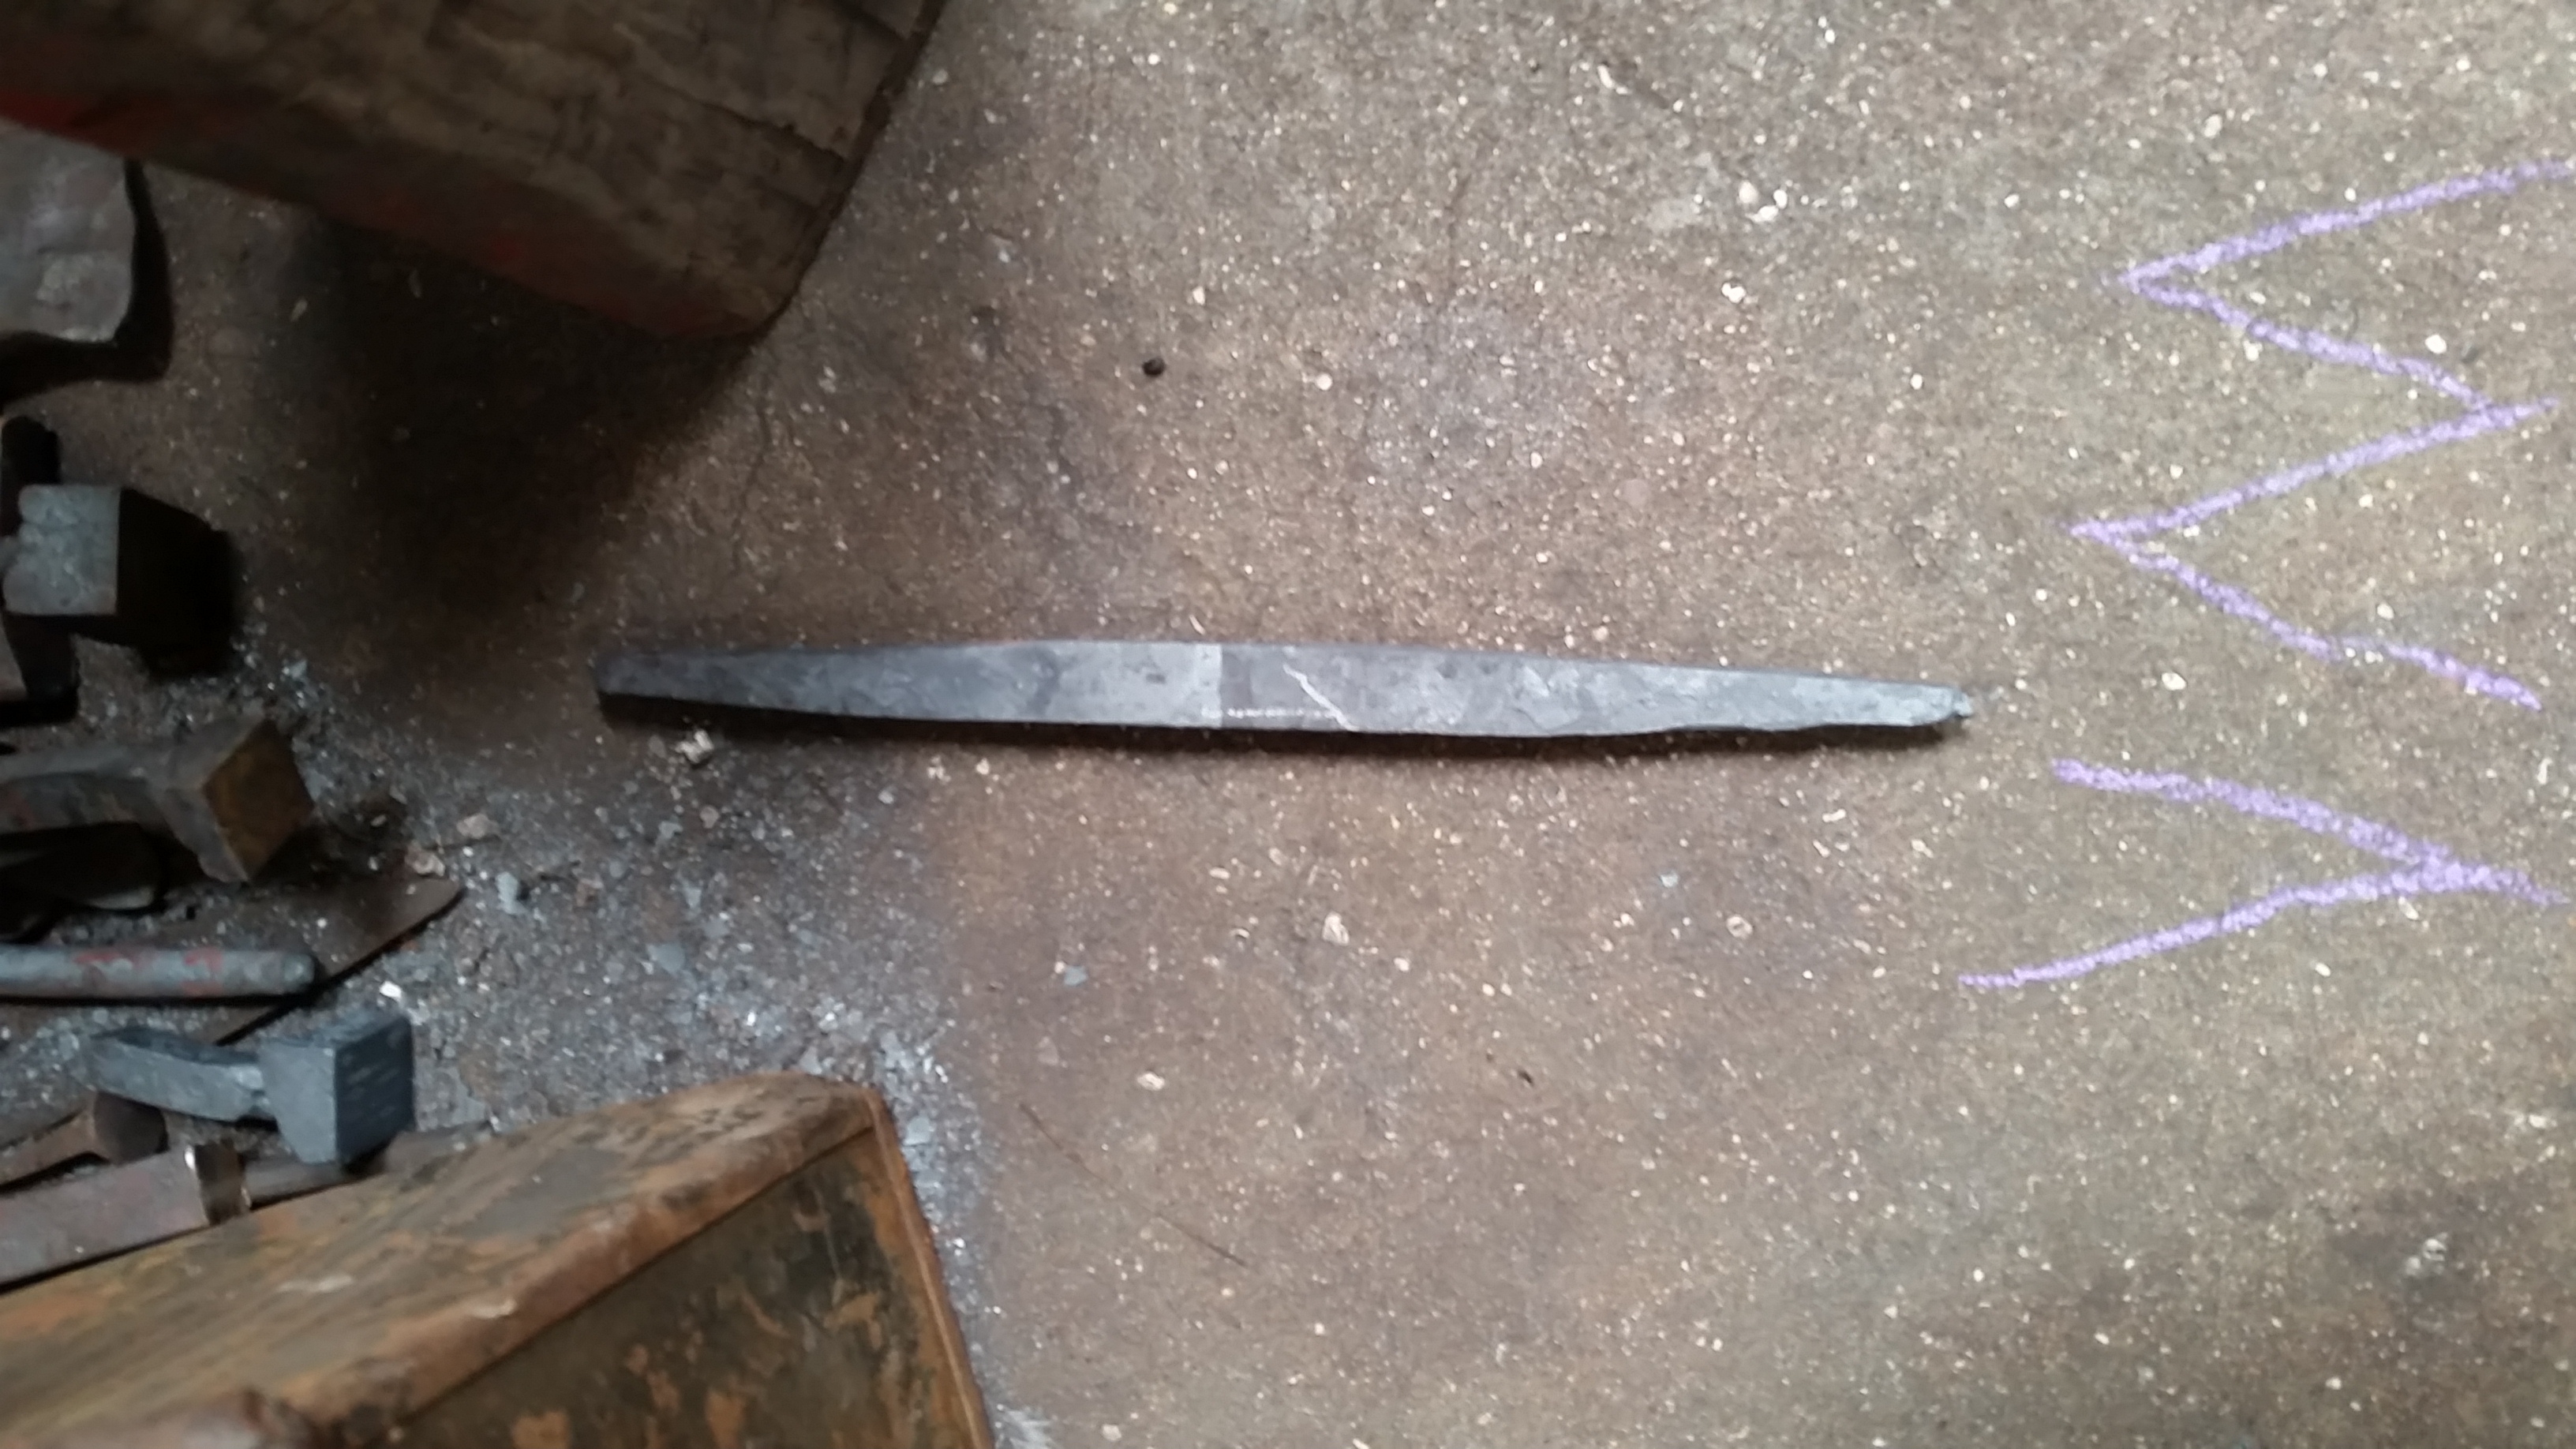
The First step of making my cross guard, which involved drawing the ends of a square steel rod.
-
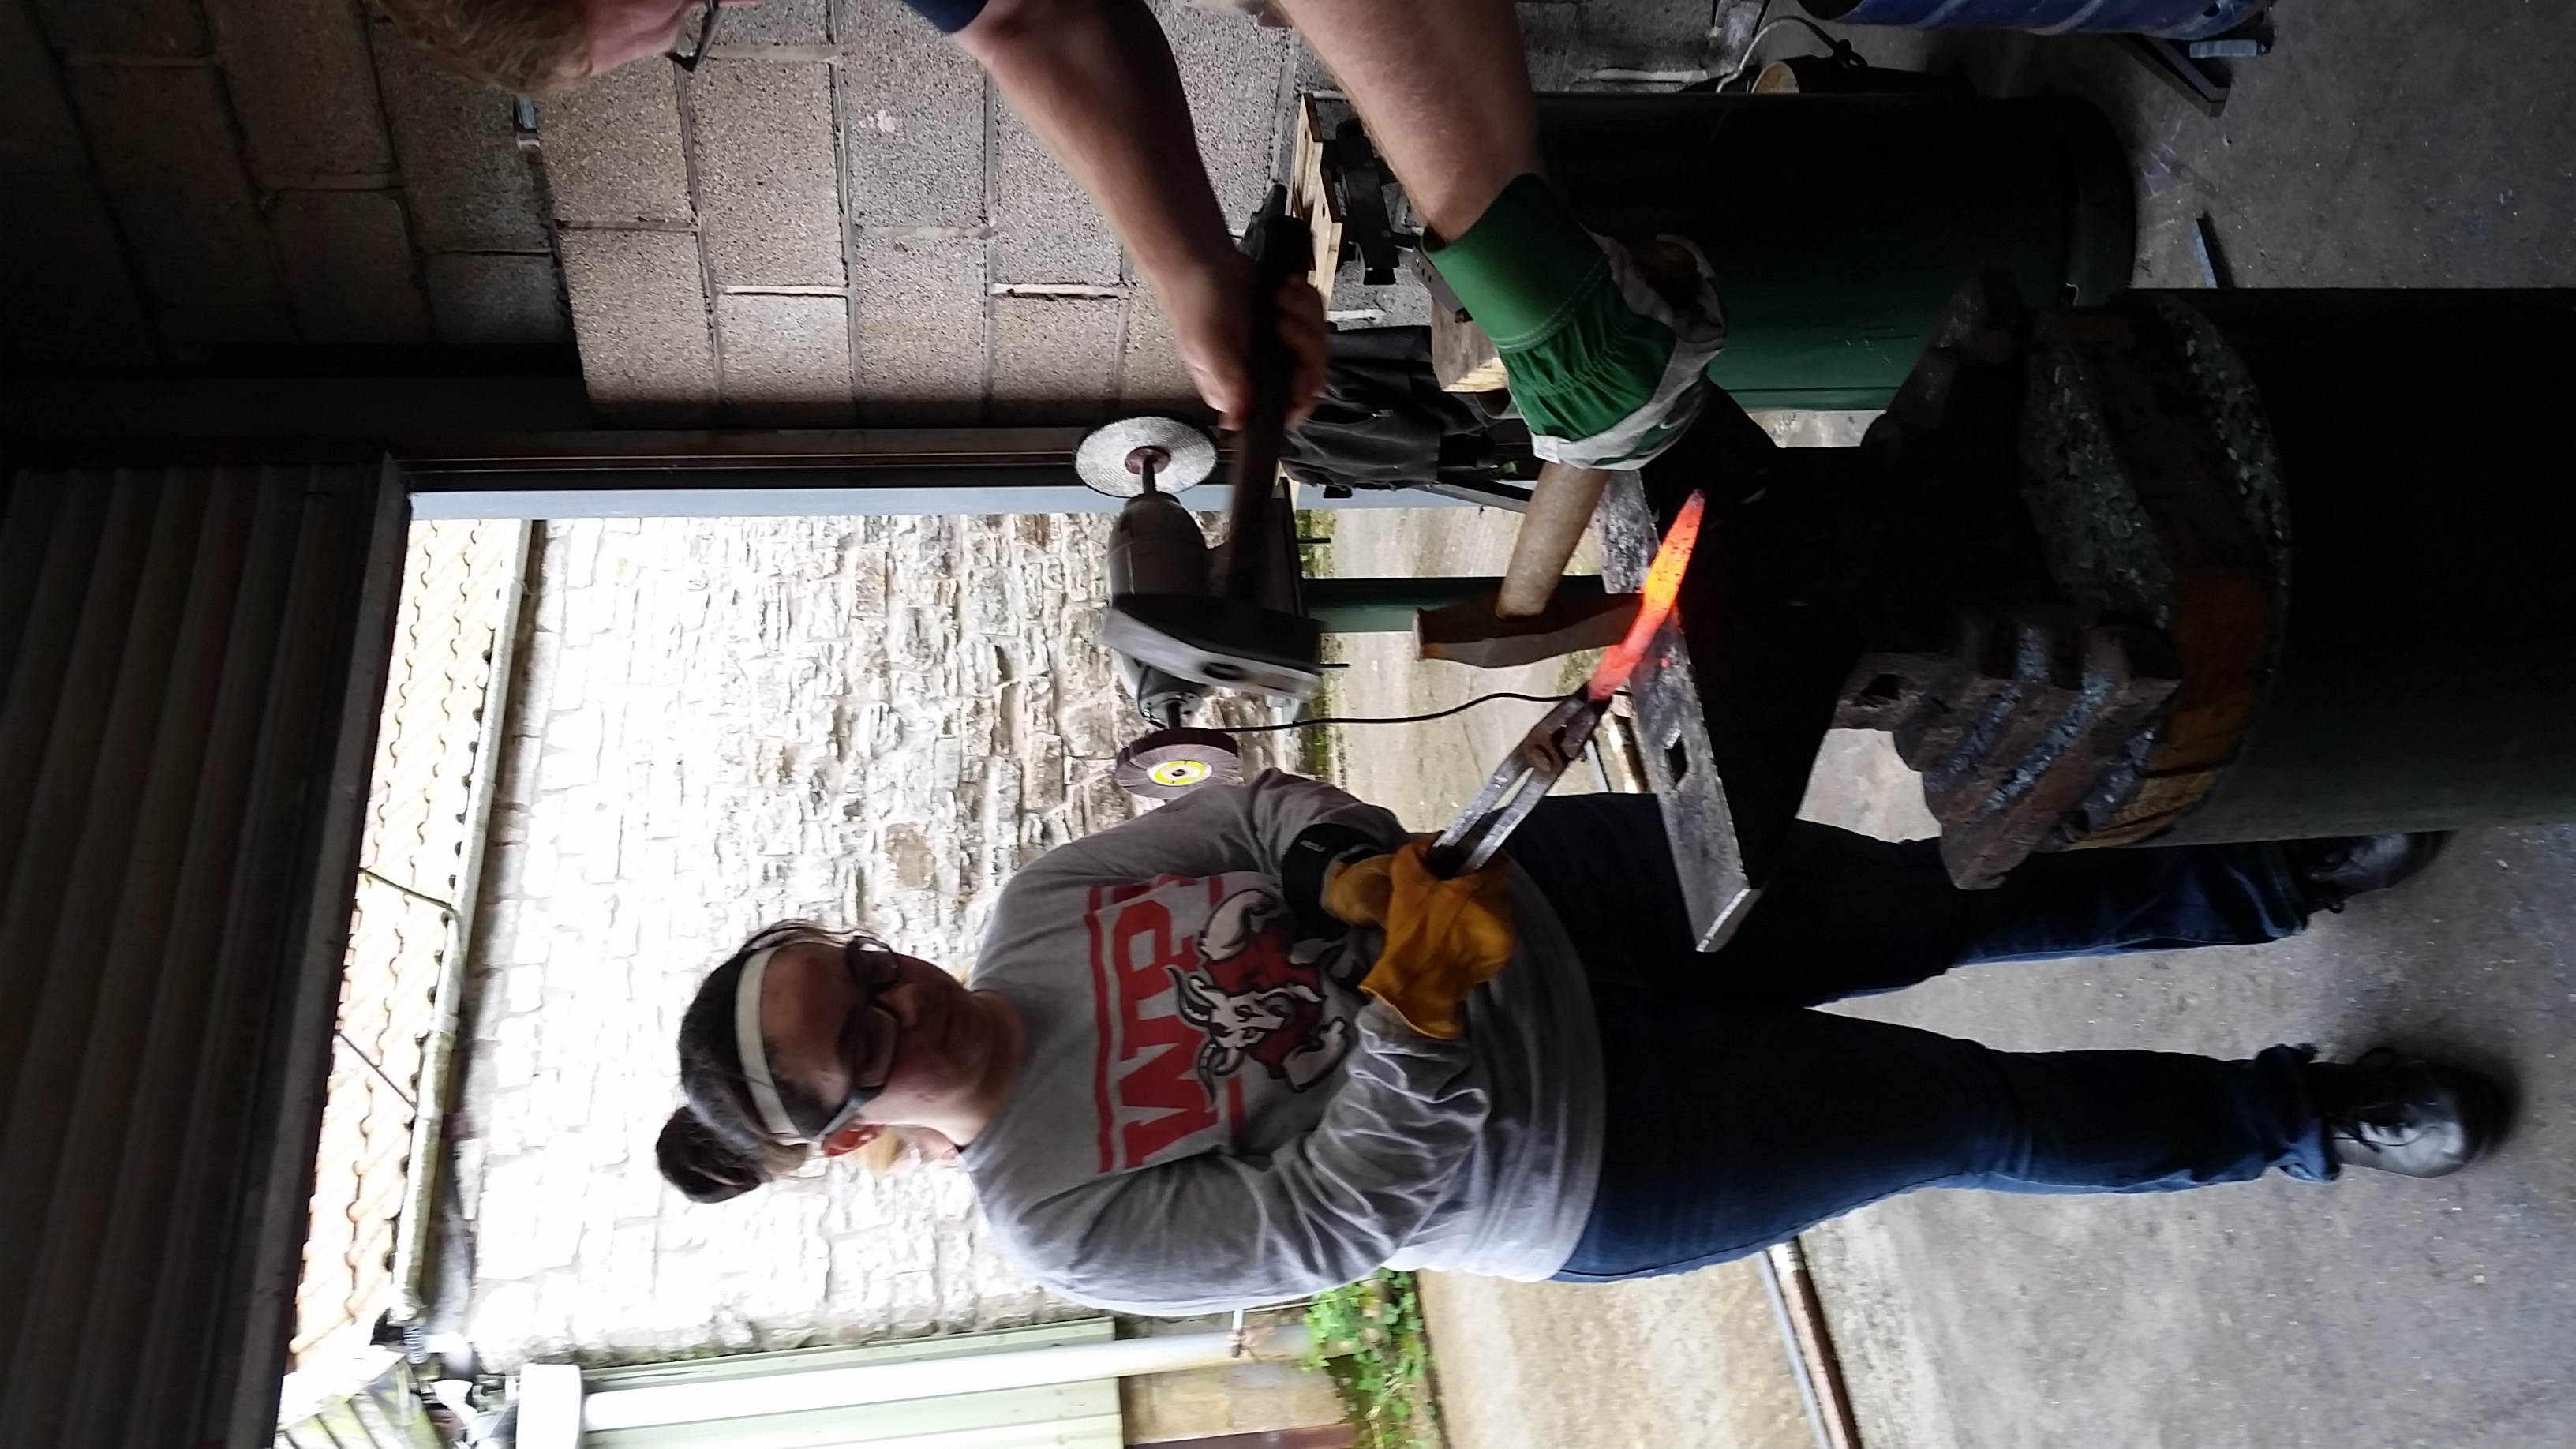
A 2 person chore of putting a hole into my cross guard
-
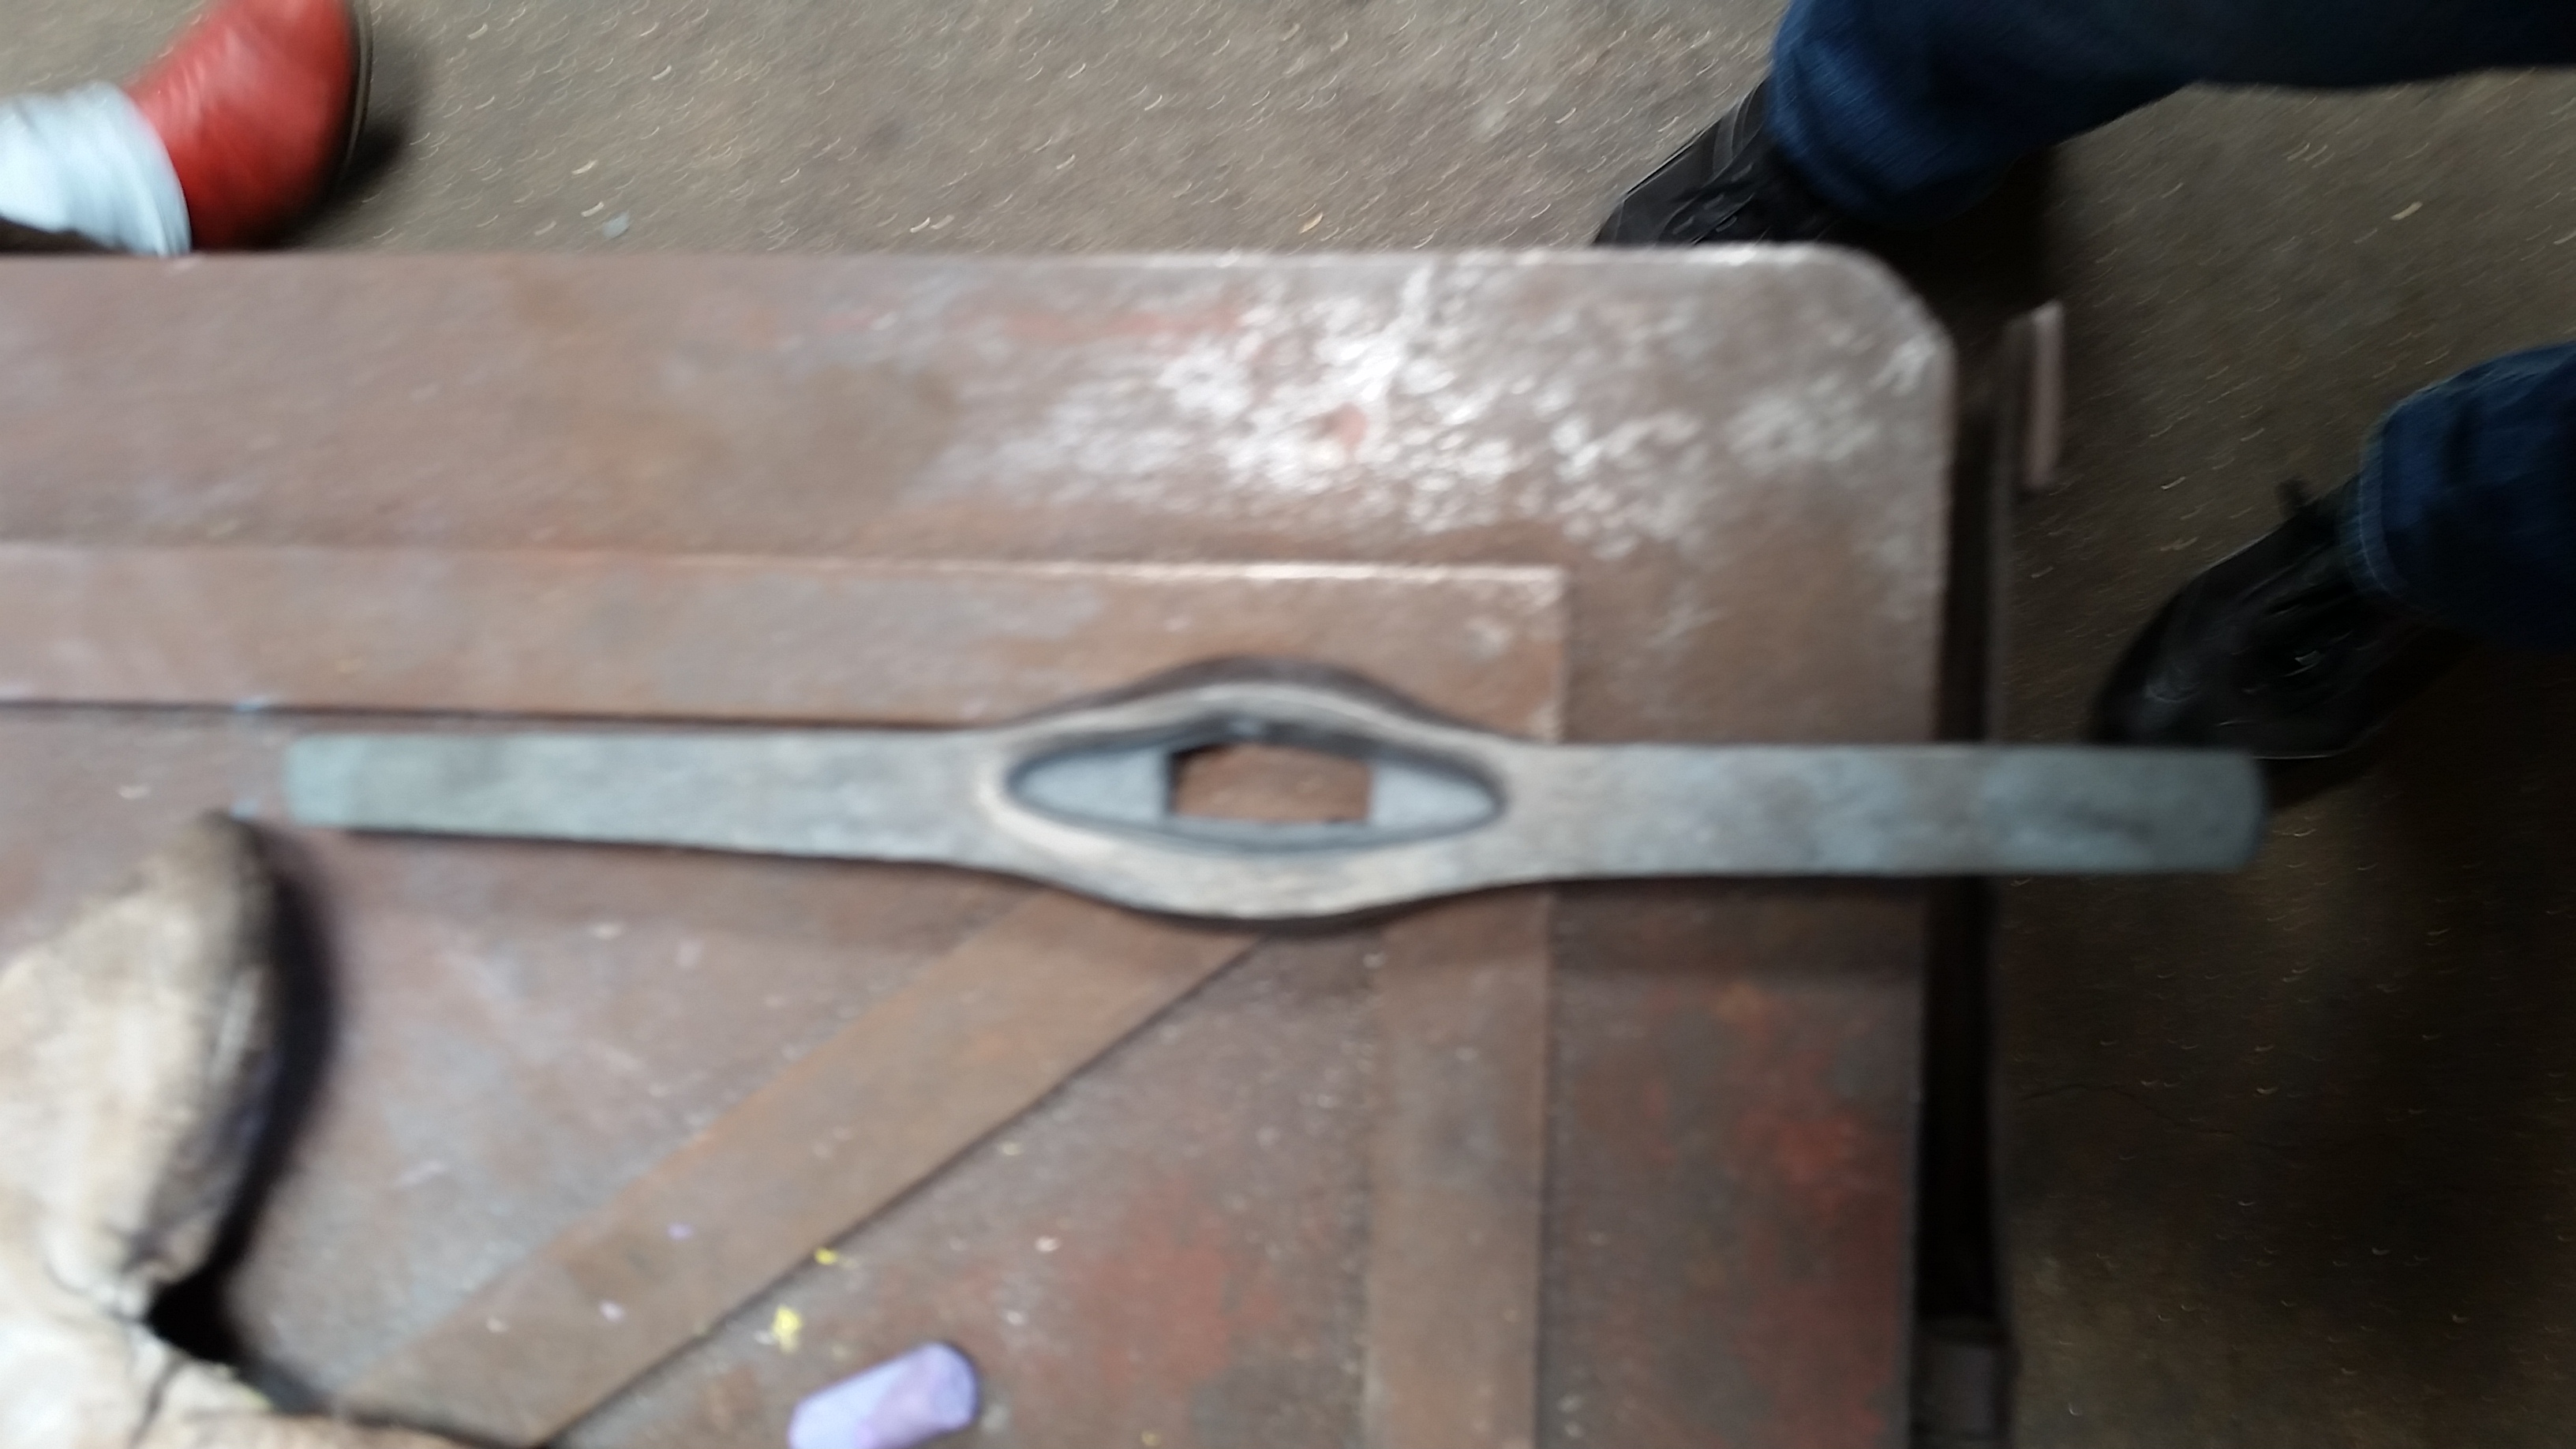
What my guard looked like at the end of my first twenty-four hours
Wed June 14, 2022 – Twenty-four hour period 2 at the Forge
Before even getting to the forge at 0900 this morning my unabridged left arm was aching from yesterday. When we did arrive though we started our day making nails once again, while the two I did make were yet meliorate than my first try yesterday they defiantly demand a lot of work not to mention that it still took me an hour and a half to make both of them. Once everyone was had gotten enough practice in nosotros then got to start on making the blade. The steel that we ended up using today was actually very dissimilar than what was used yesterday for the reasons. This first was the shape, which was a apartment rectangular prism, the 2d reason had to do with its limerick. The steel used yesterday was made u of about 1 per centum carbon but what we used today was most 7 percent carbon, which fabricated it much stronger and harder to shape. In guild to become started Richard cutting the steel with a 45-degree bending on both sides to help make the step of shaping the blade easier. The outset footstep was to create a point on one side, in lodge to practice this I had to hammer that the longer stop of the angle to push is towards the center of the bract. Turns out, I am not good at this, instead of getting a nice smooth indicate I ended up with many bumps and only the full general shape. Luckily Richard was able to smoothen and fix my point. With the first side complete I then had to wait to let the bract absurd off so I could flip information technology and do the same on the opposite side. Fortunately, this side went much meliorate and although I still need some help with the details I was able to practise a lot more to get the full general shape. After letting both sides cool once once more I then picked the stop that I thought looked the best to serve as my bespeak. With my side chosen the side by side footstep was to taper the blade; this helps with residual and artful since it wouldn't look so nice if the width of the blade was the same all the mode downwardly except for the signal. The tapering of the blade took a lot of time since the bract was so large and it had to exist done in sections to create a nice polish flow. Overall I spent about 3 hours tapering the blade. Nosotros so took our lunch since we need to let the blade cool down in order to work one the other side. Once lunch was over nosotros began to piece of work on the tang. This is The part of the sword that is fastened to the blade and goes through the handle and pommel, effectively belongings them on. We started by measuring from our bad terminate to nigh 140 mm and marking that point. This was over again tapered simply at a much steeper angle and information technology ended up forming a triangle. After the triangle was made Richard then used a jump loaded press to create the exact shape that would fit into the hole of our cross guard. While I defiantly wanted to try the car that was used I near likely would have made a error as information technology ended up looking similar information technology was had to control, as well if the was one accident that went incorrect I would have ruined the entire bract. Once that role was fashioned the next step was tapering the residual of the tang so that was the cantankerous baby-sit had a manner to slide onto the blade. The final footstep for the day was to fix the thickness of the blade. Since we shaped so much of the fabric we concluded up making the tip of the blade much thicker than the residual, which would have completely thrown off the balance. Afterwards heating of the blade i concluding time, Richard ran them all through the spring loaded press to flatten them out and nosotros end our day.
-
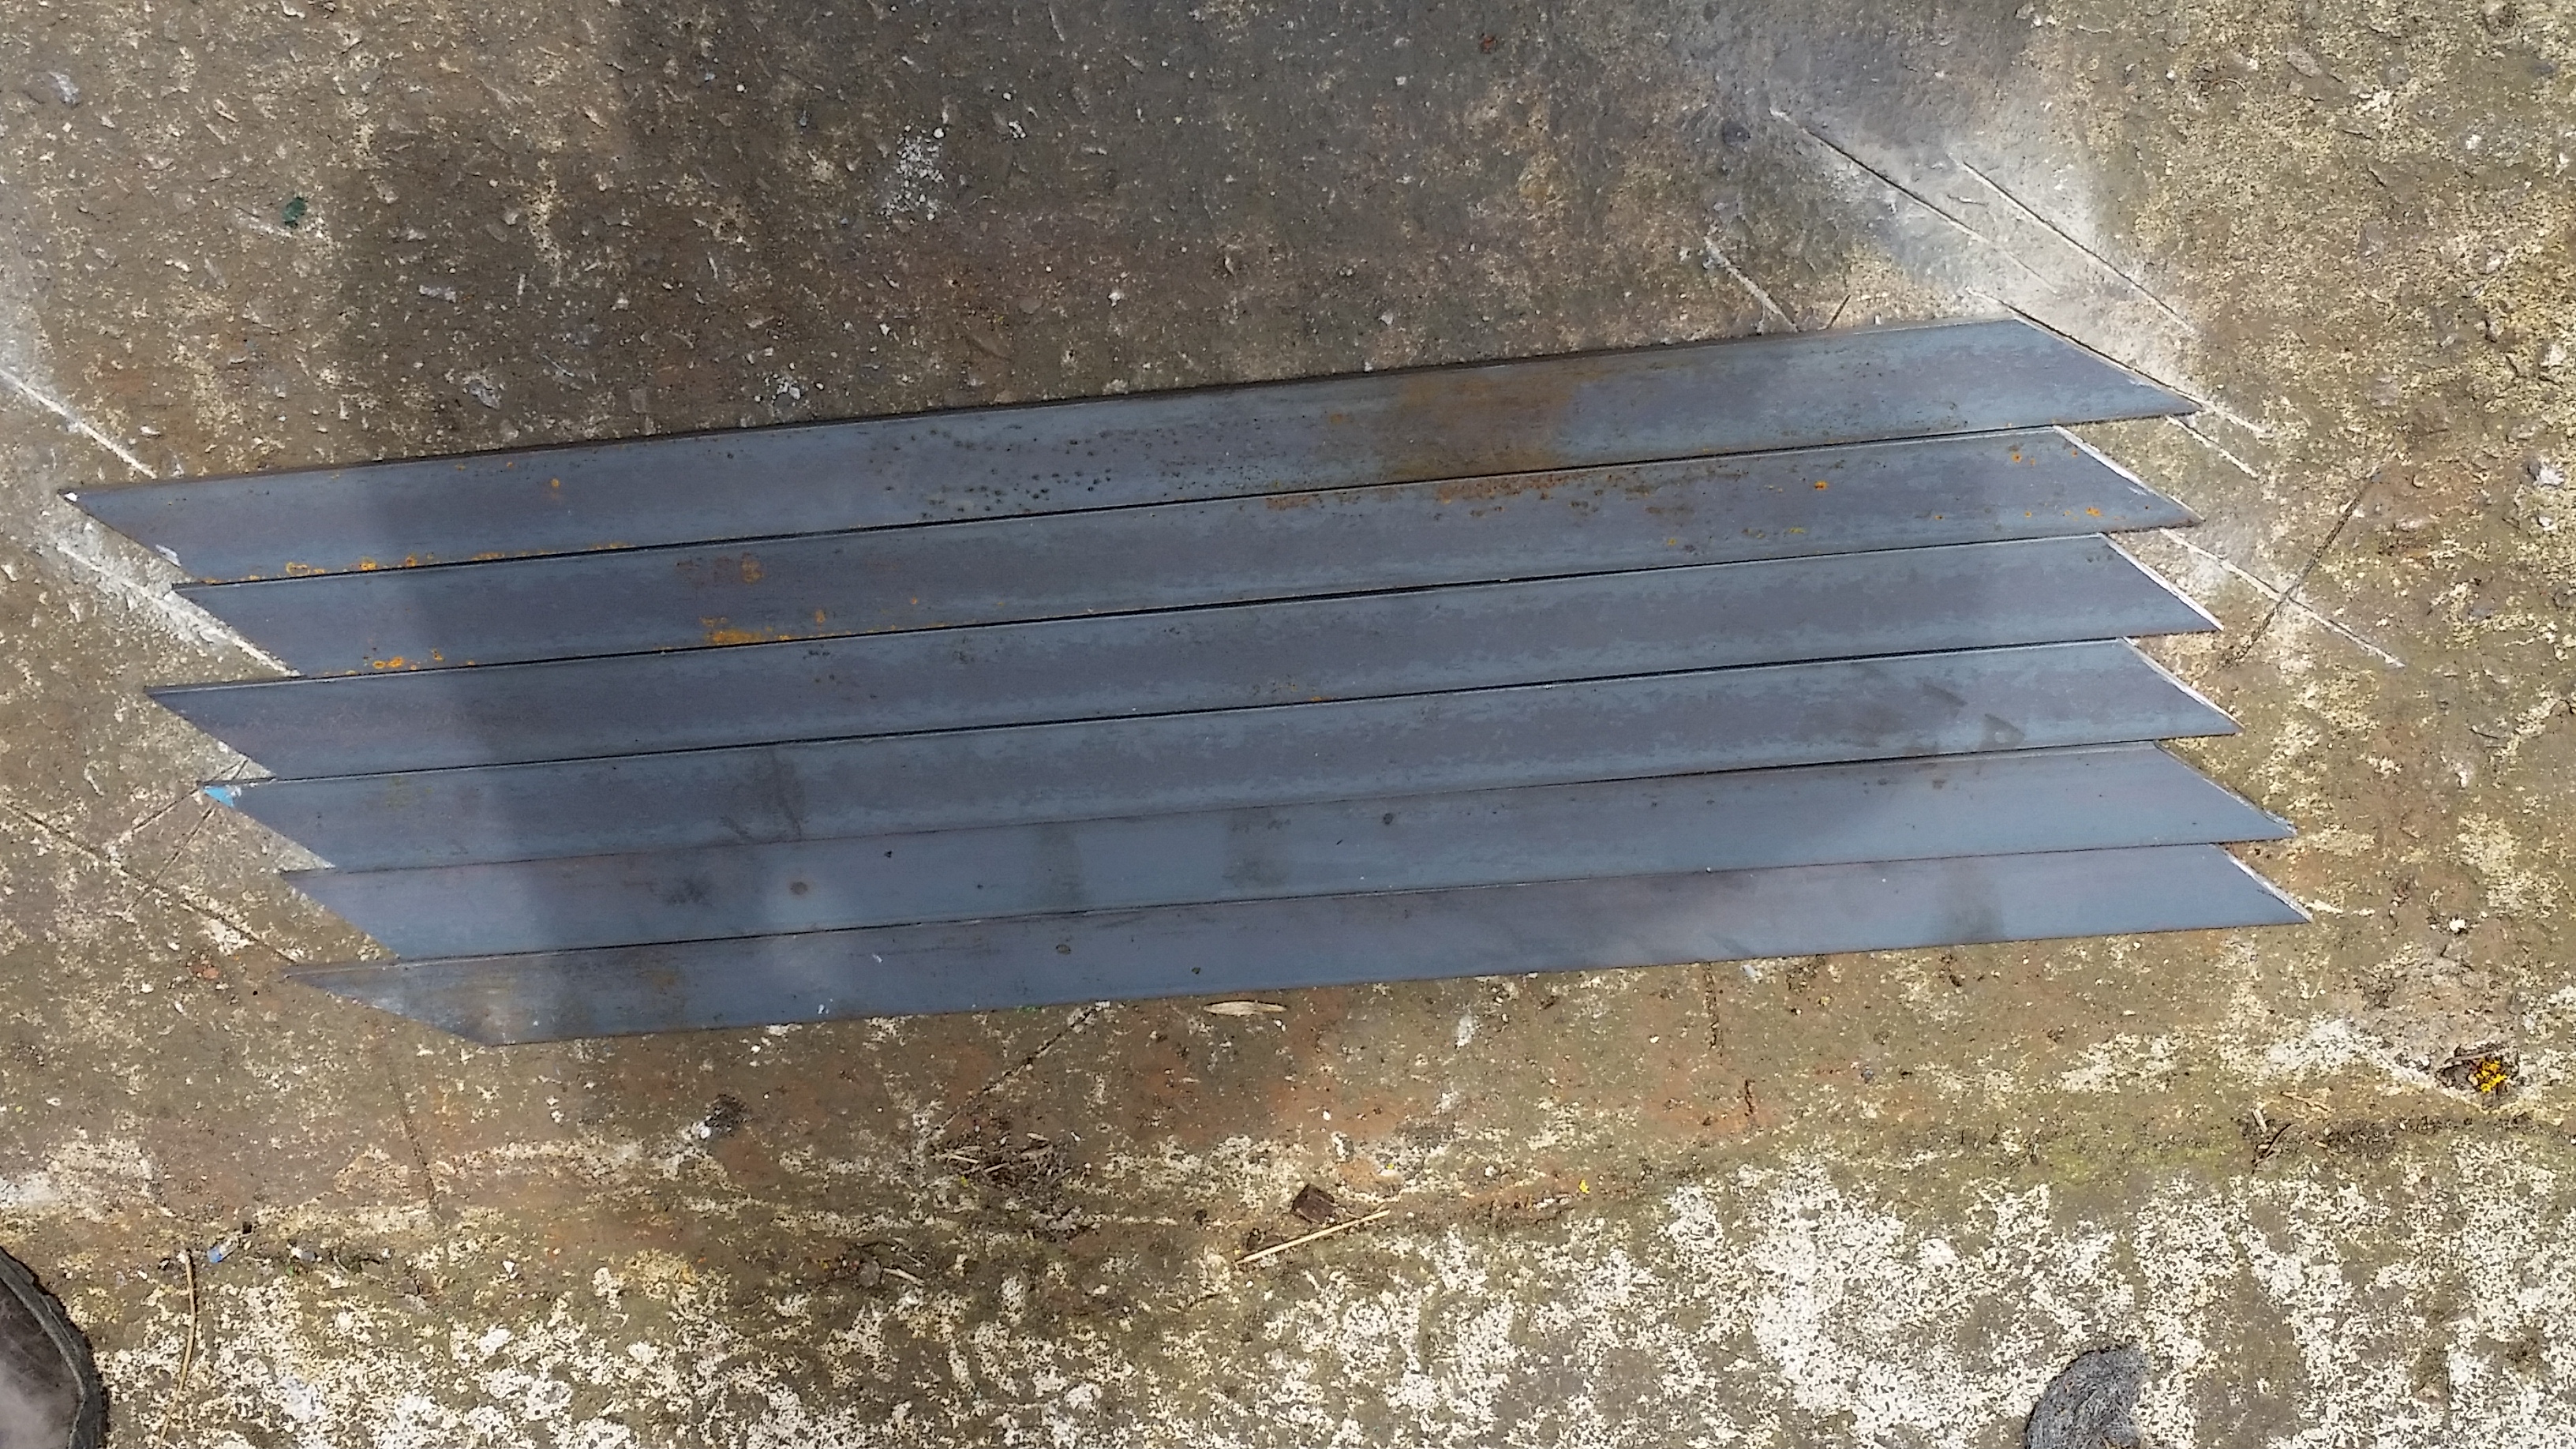
What the metal looked similar earlier making the blade
-
After creating points
-
The outset of the tang
-
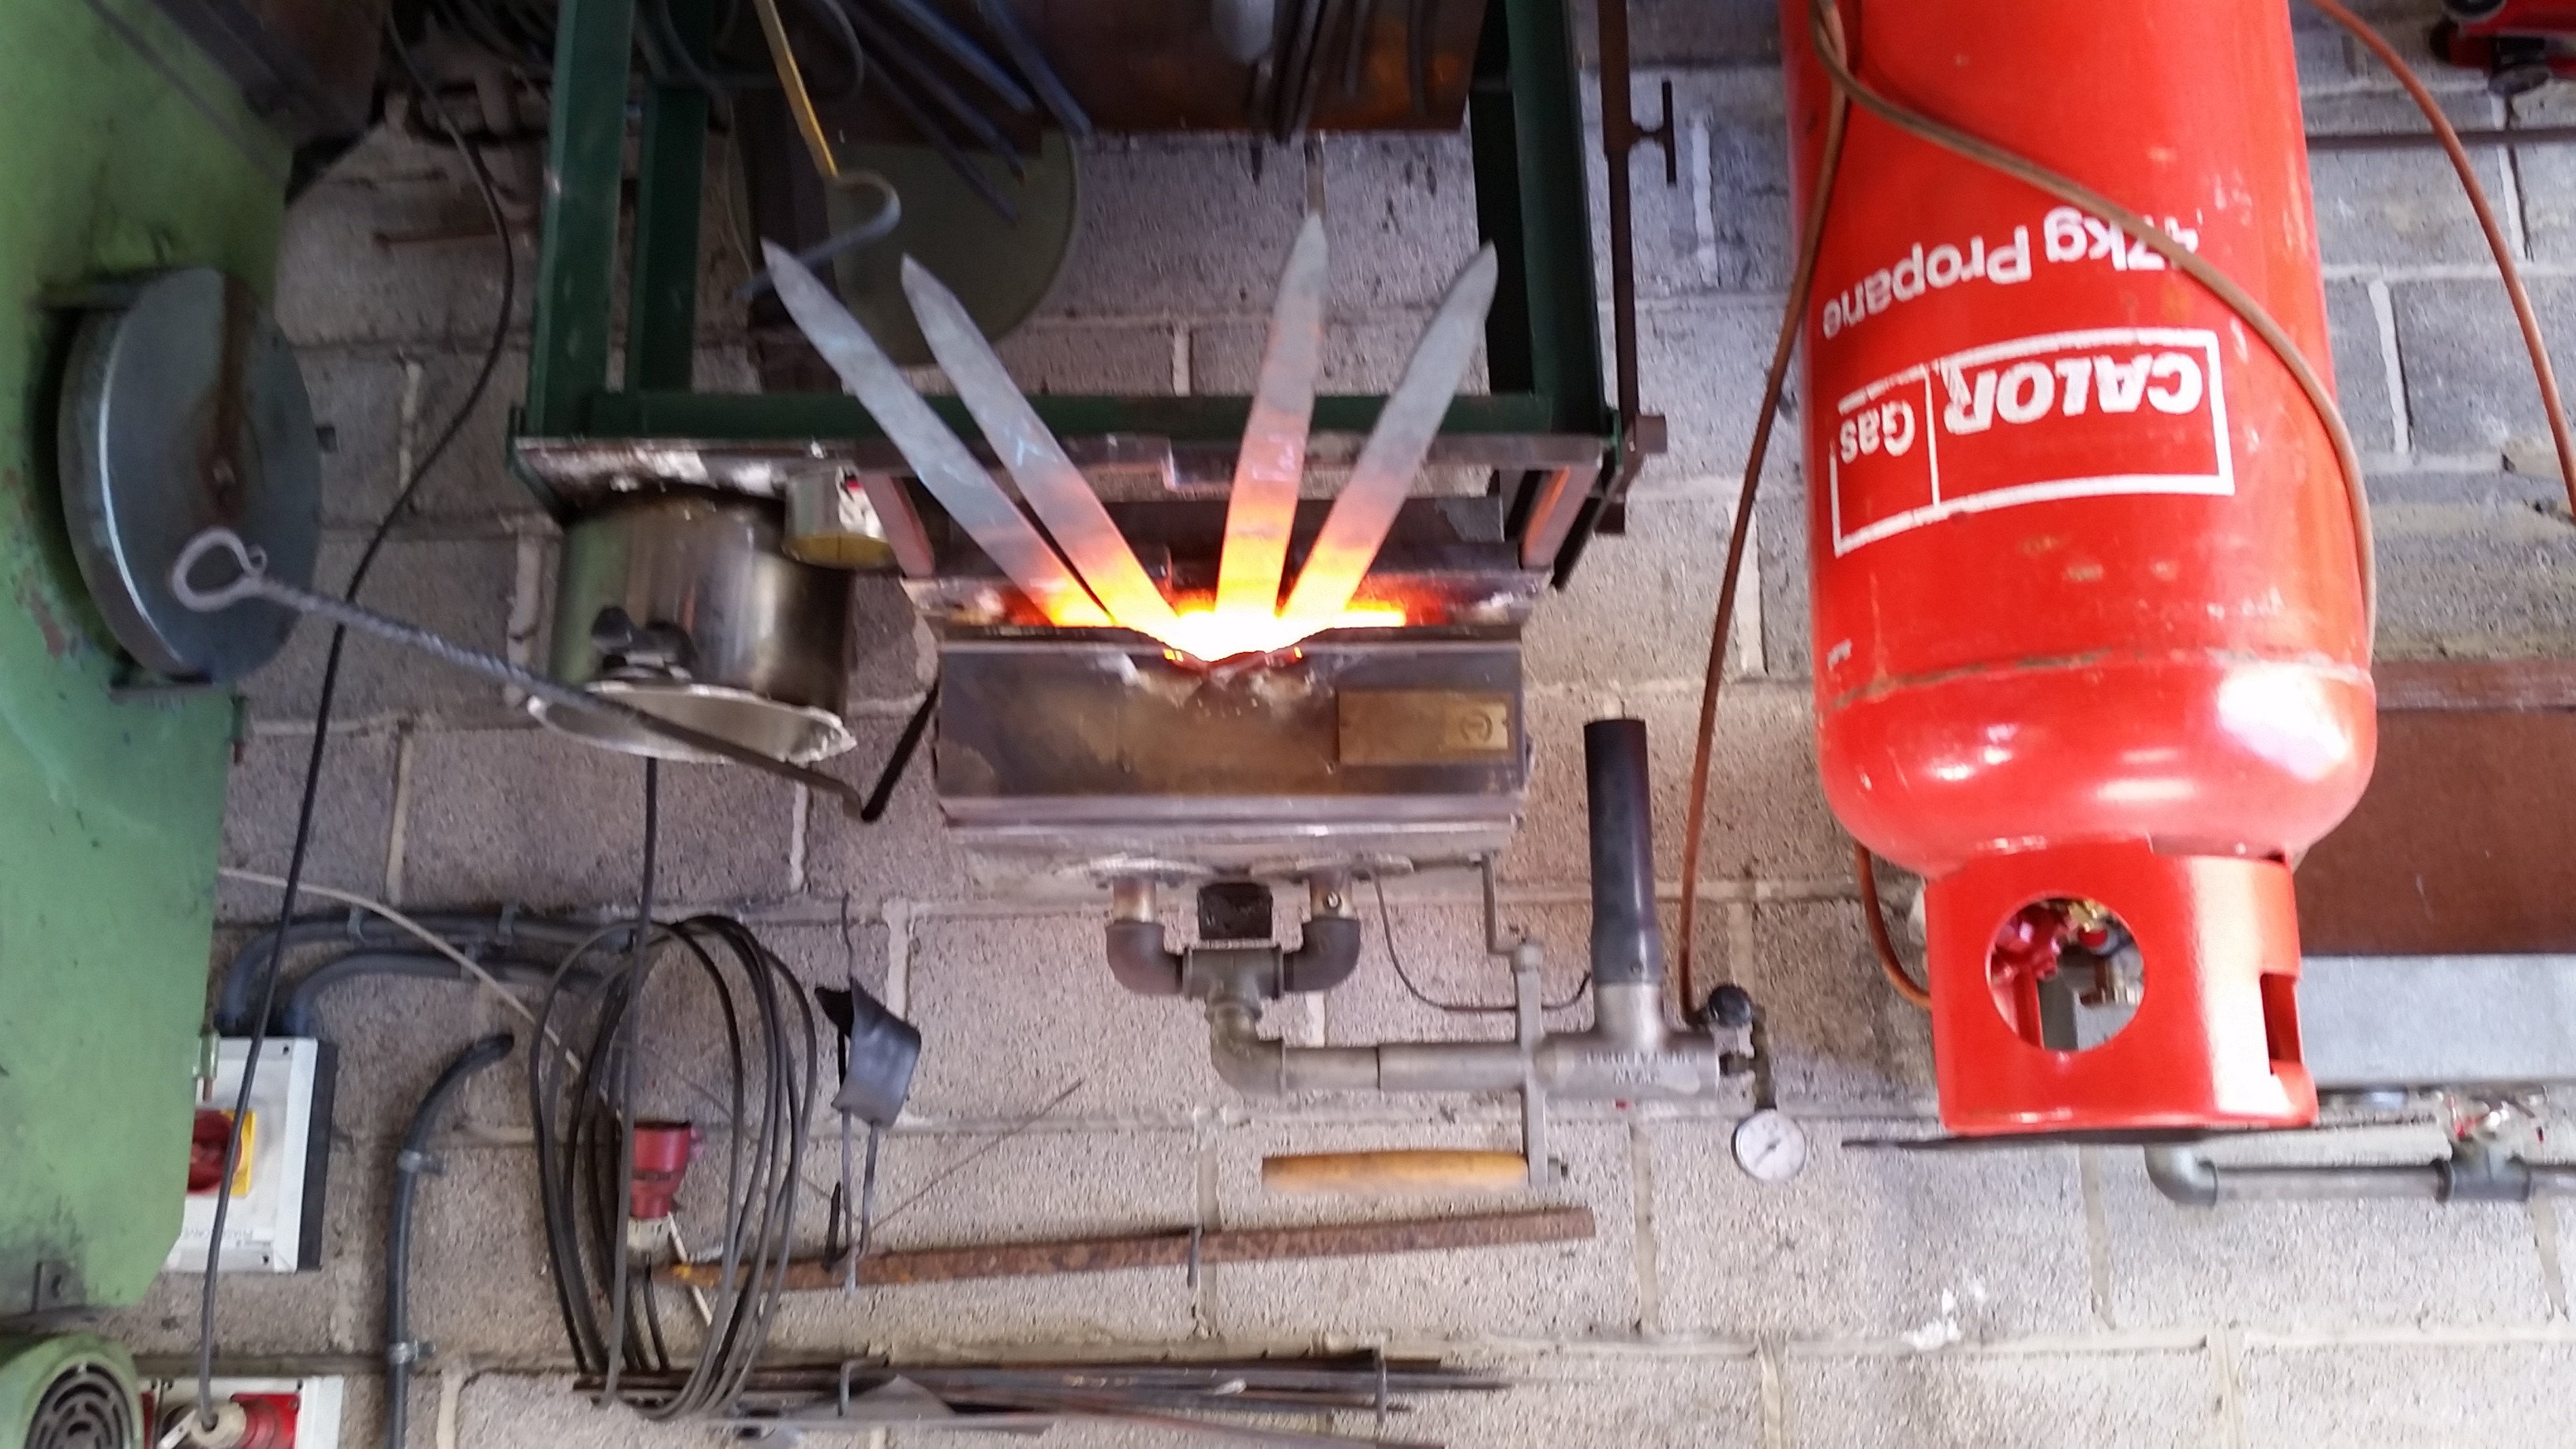
All of the blades in the propane forge
Thursday June 15, 2022 – Day iii at the Forge
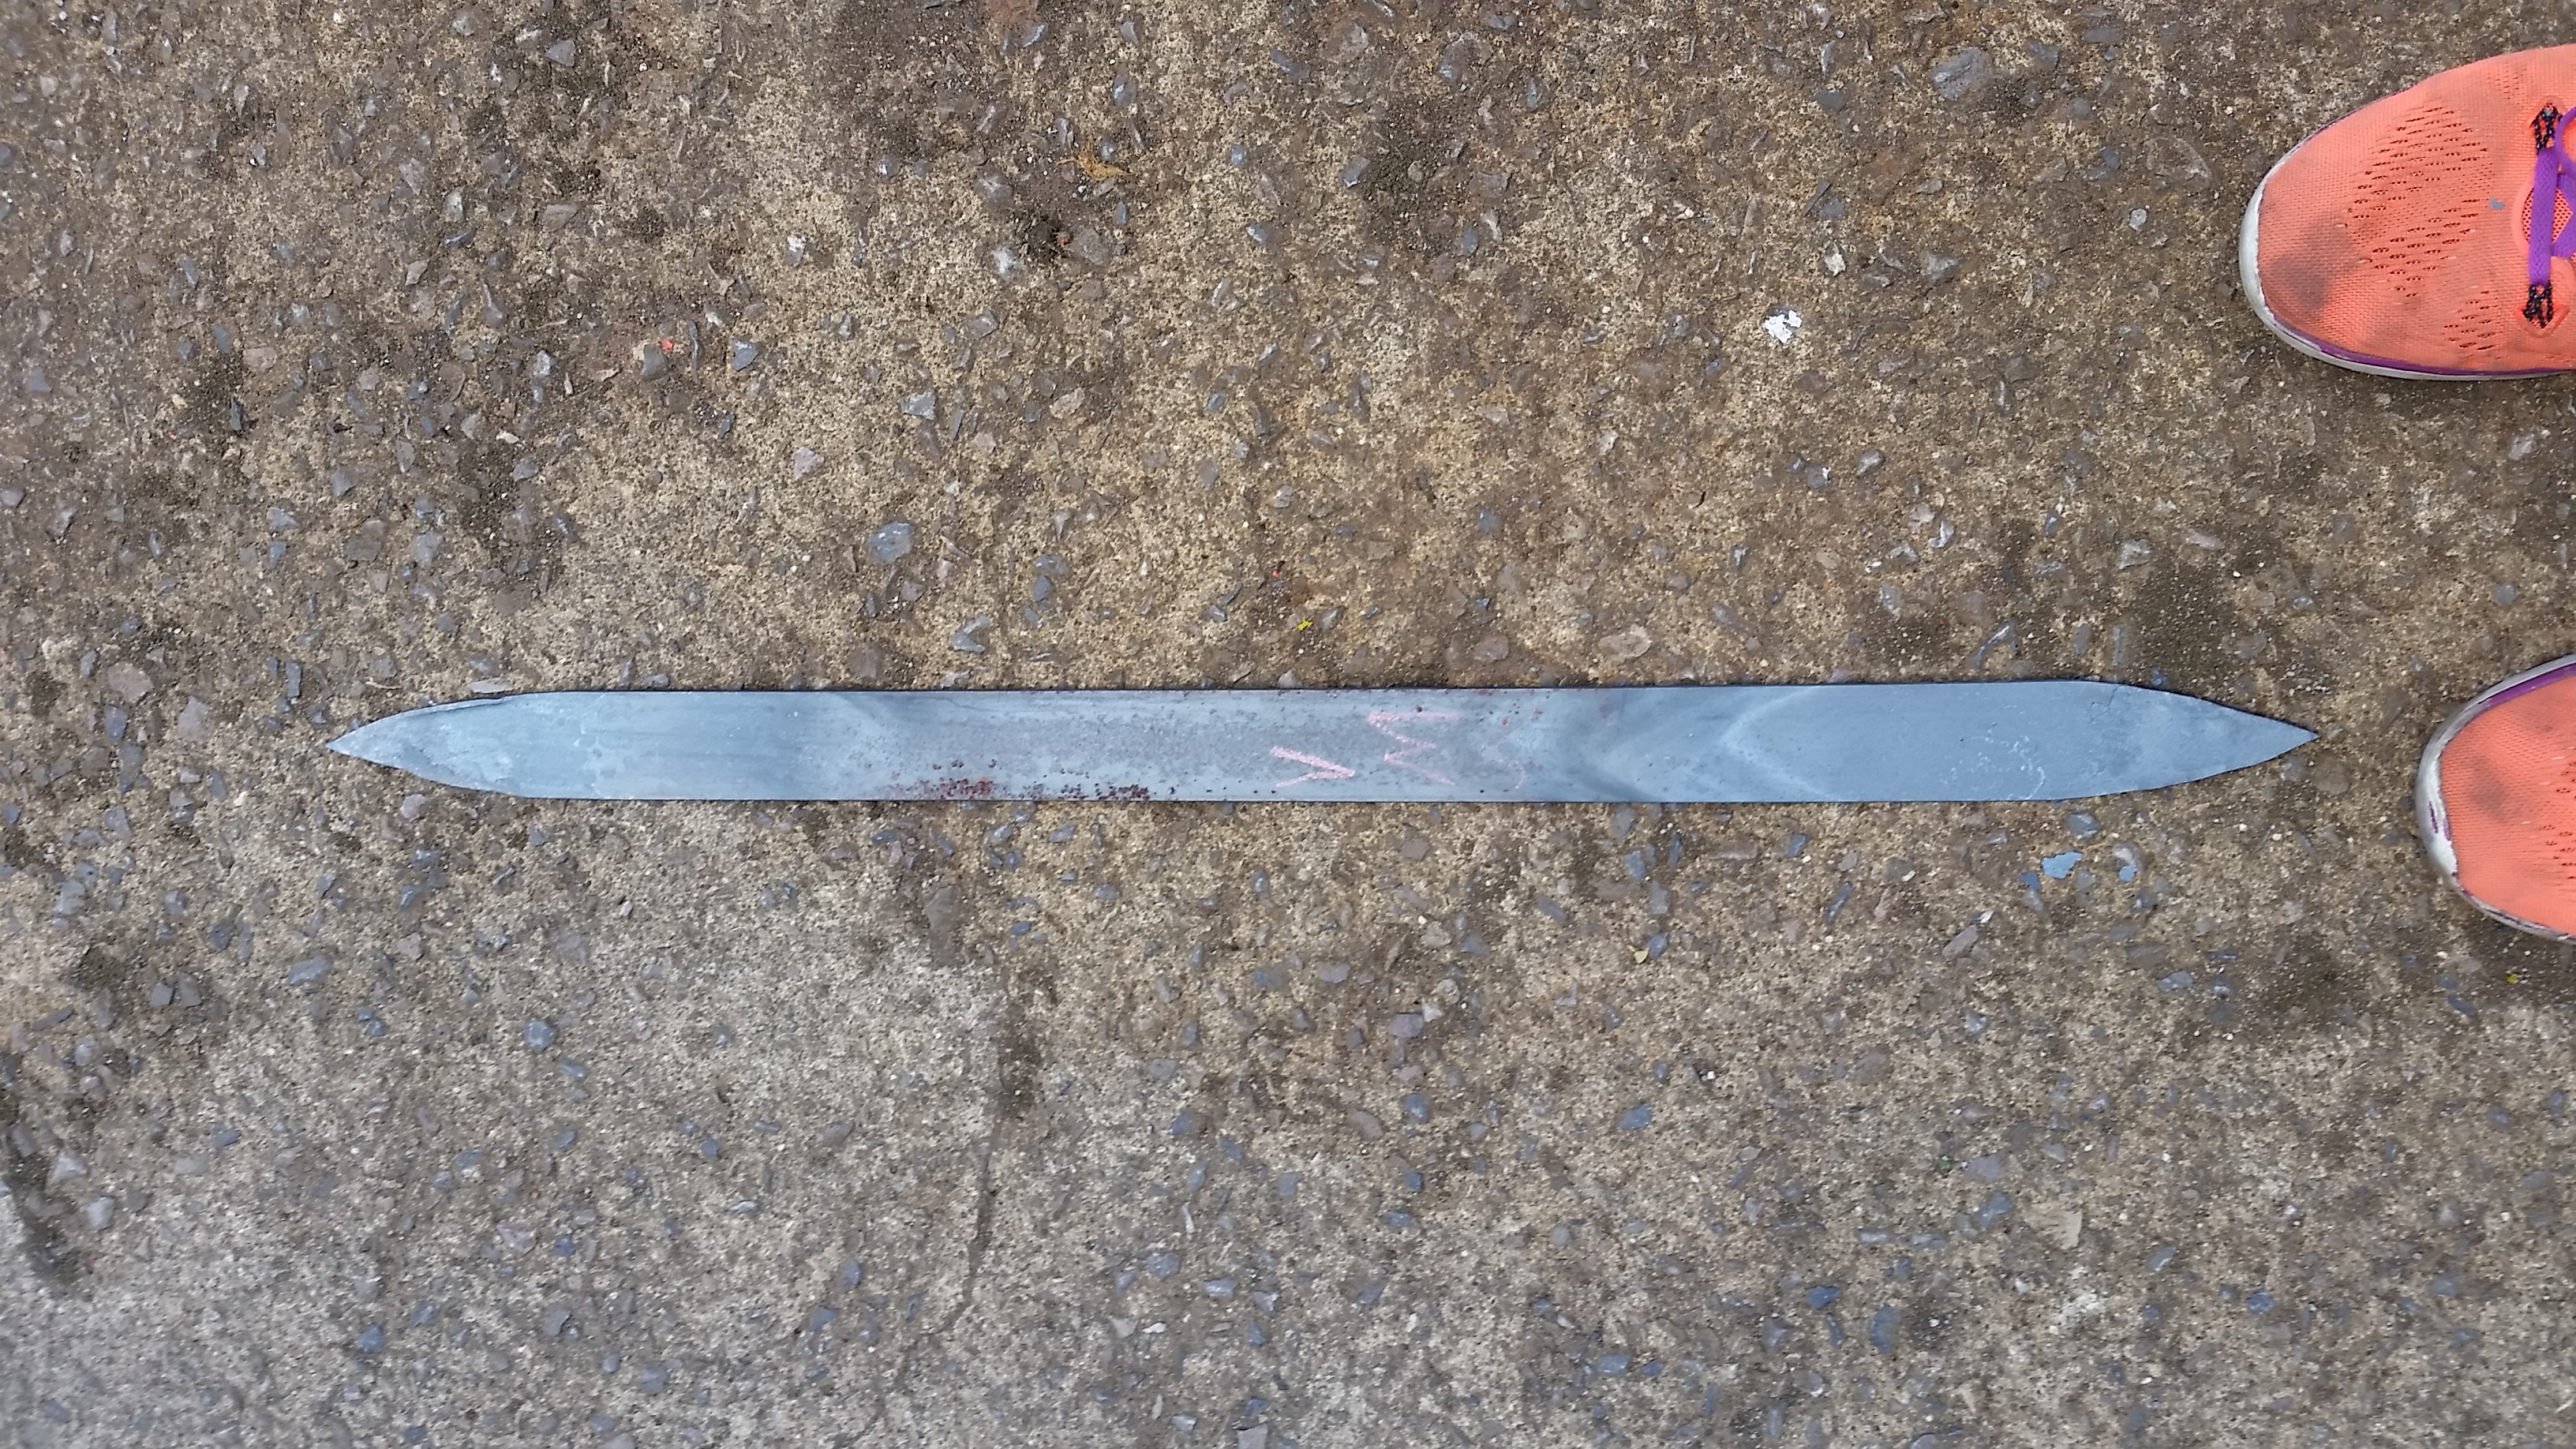
Today we didn't have to make whatever nails, which I was a little happy about as later on a while it gets tedious. Instead we focused on finishing the bract of our sword. The starting time stride was to complete forming the tang. Yesterday we tapered the end of the tang to help the the cross baby-sit fit on. The adjacent step was to take the rectangular lesser part and make it circular. This will be the end that fits into the hole of the pommel and will somewhen agree it onto the blade as well. I was a piddling nervous in making this function mainly because when crafting a boom I had some difficulty making a circular slice of metal square so in my caput making rectangular circular simply seemed even harder. Luckily before we began Richard used the spring loaded printing to narrow down our rectangular piece into a square making the task much easier. With the tang in a square all nosotros had to practice was hammer on the corners to make the foursquare an octagon, and then hammer those edges and so on until it became the roughly the shape of a circle and fit into our heading tool. Surprisingly this went well and I found that my skills lay in making circles instead of squares. The next stride in forging the blade was to bevel the edges of the sword. This concluded up existence a long and hard process that required working on the blade in sections starting from the tip. The trick in creating a overnice bevel is to deliver even hammer blows down the length of the blade on both sides. The biggest problem that I faced in this task was that I didn't and still don't take bang-up command over my hammer blows. Some of my blows were harder than other resulting in a wave on the border of my blade, I as well had accidentally hammered on edge more than than the other causing the blade to curve. Information technology turns out that when ane side is worked more than the other that side stretches and expands more. I tried to fix the curve simply struggled, later on a little bit Richard came effectually to anybody and worked on cleaning up the details, in my case he was able to stretch out my other side of the blade resulting in information technology once once again being straight. After letting the cool downwardly then they could be touched the edges were sanded, the two reasons to this was that information technology got rid of any bumps on the edges that may have formed from hammering the bevel, it also gave a better view forth the edge of the bract. When looking straight downwards the border of the blade it was easy to tell that it wasn't completely straight. The last step in forging the blade was to get rid of equally many of the wiggles as possible. Doing this was a slightly dissimilar process then all of our other times working with metal. Usually, we needed the piece we were working on to be a bright ruddy as that is the easiest to manipulate, notwithstanding in this case we wanted a deep cerise ruby-red colour. At this temperature when striking with medium to light strength hammer blows the sword would only straighten out versus change its shape like we had been doing earlier. This procedure didn't accept too long and once we were able to straighten our blades to the best of our abilities were finished for the twenty-four hours.
-
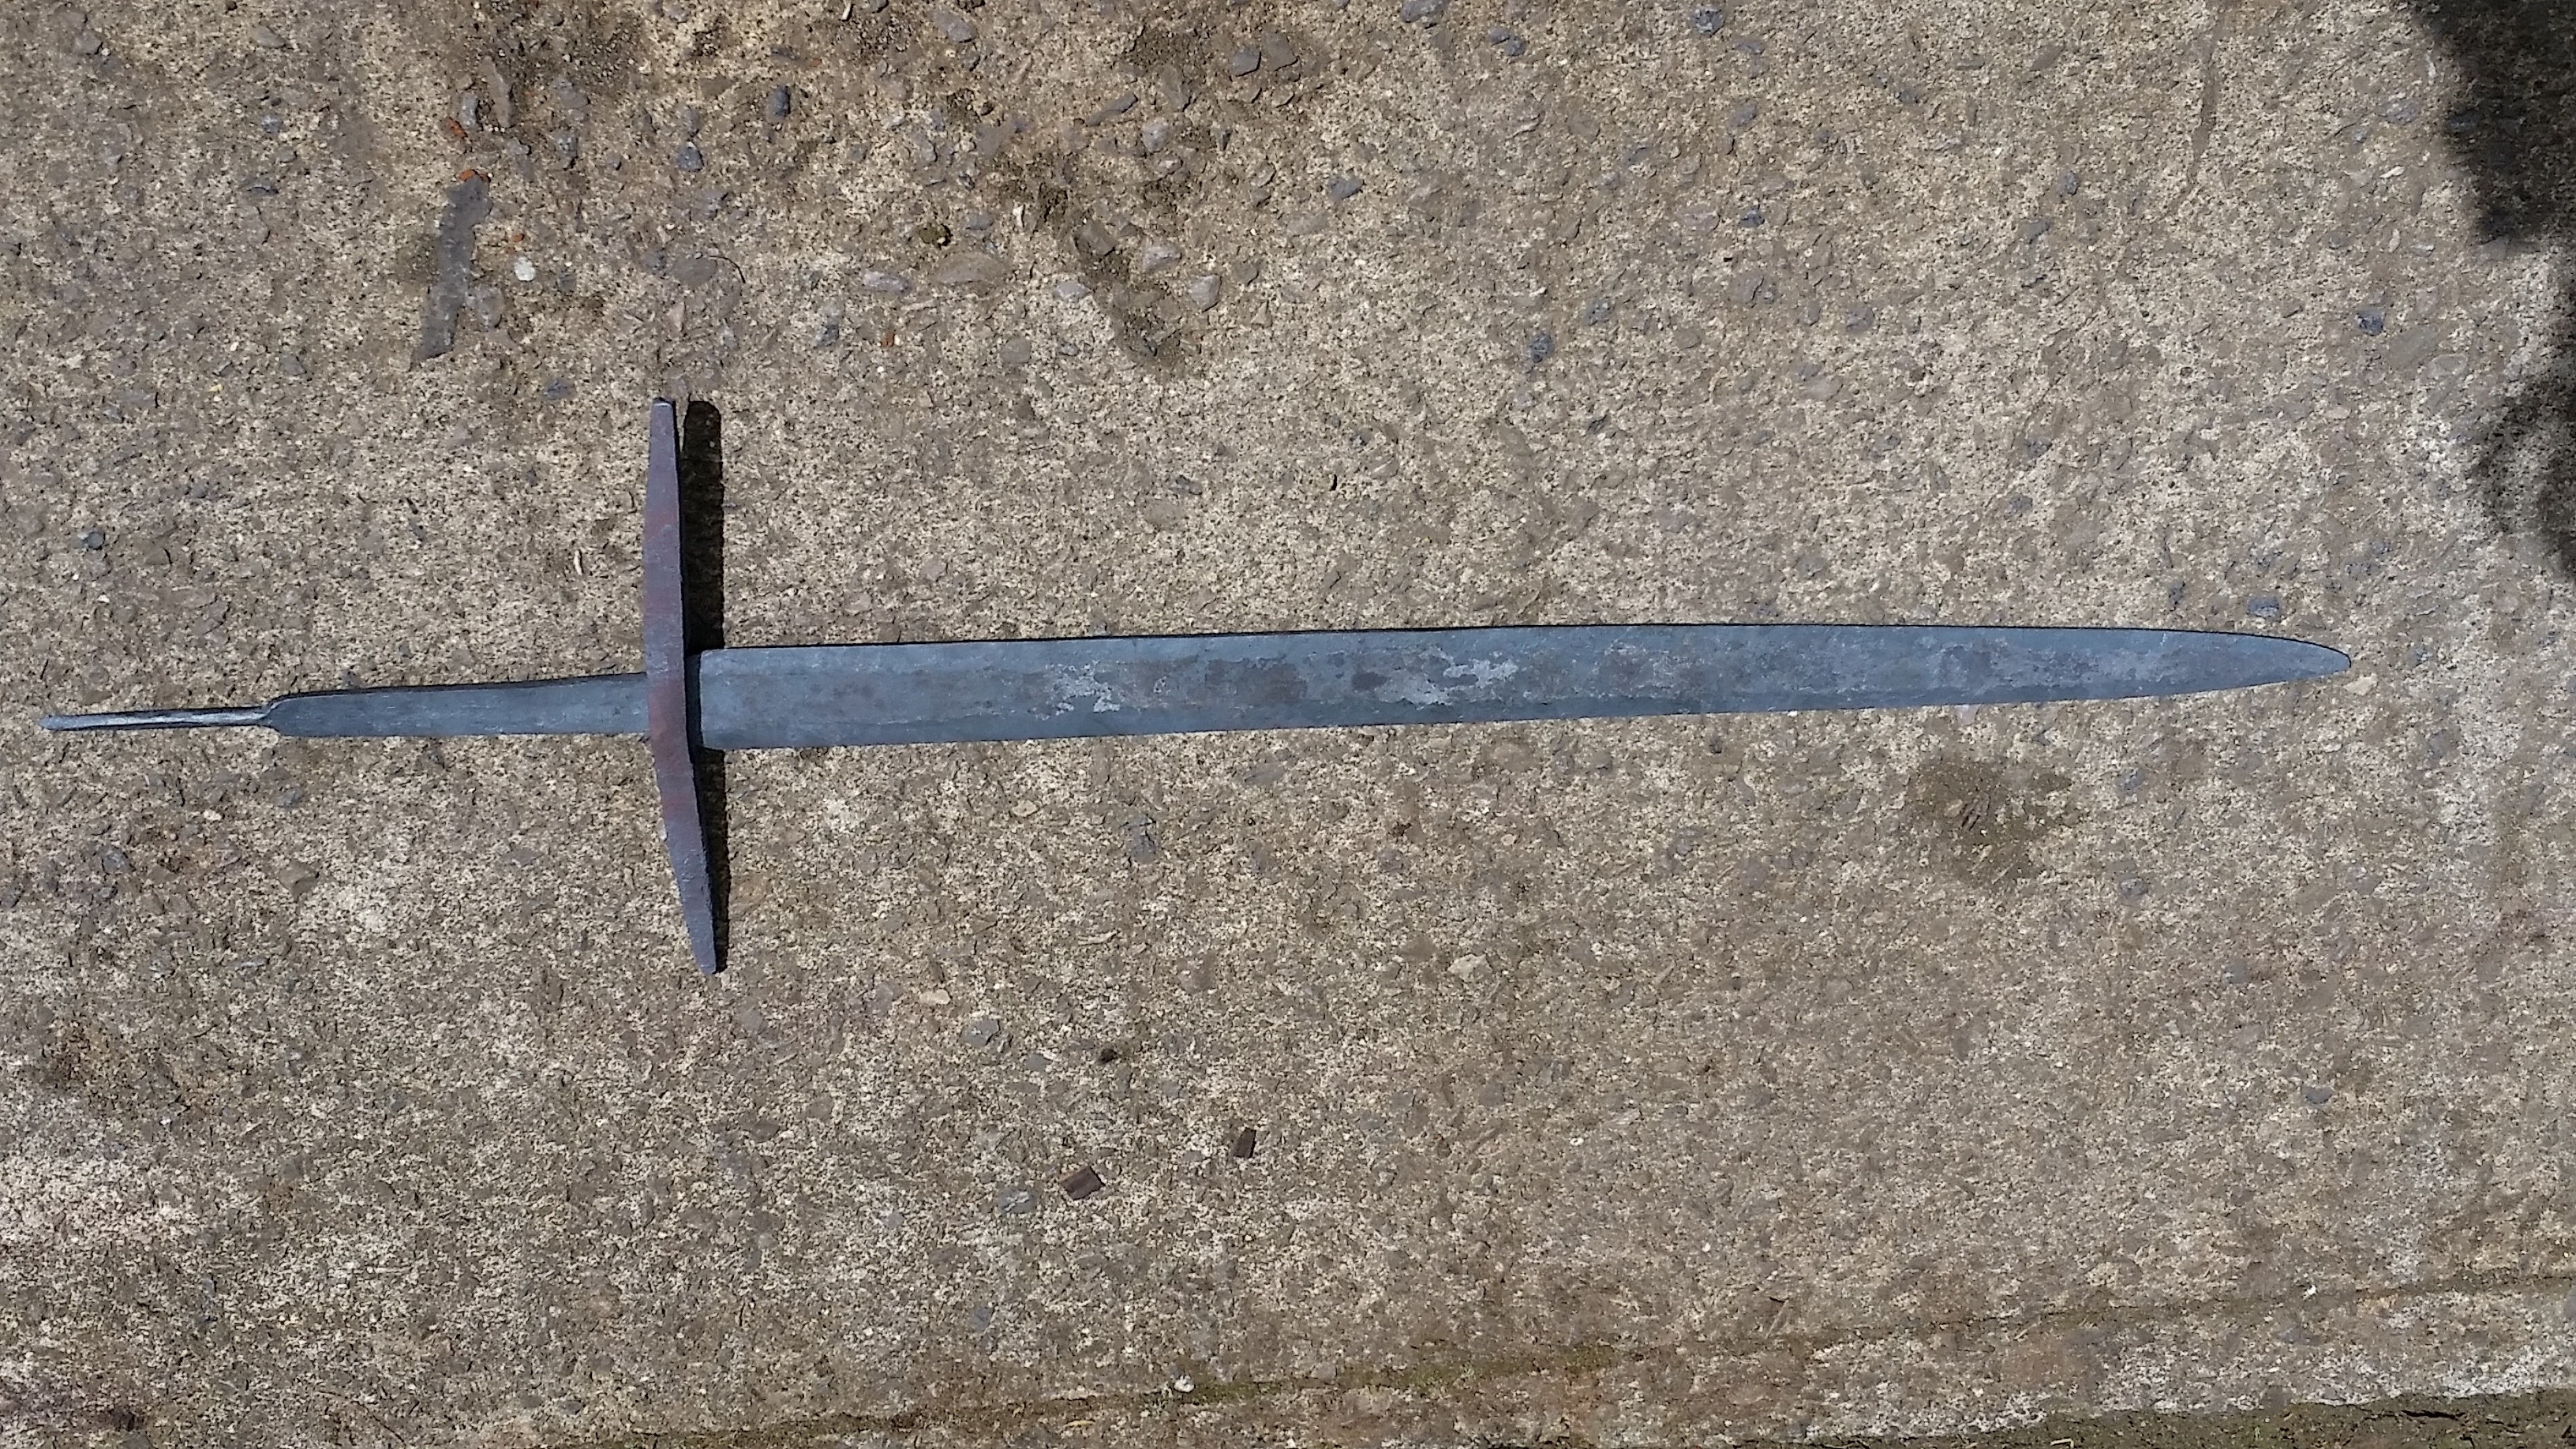
The blade and the cross guard together
-
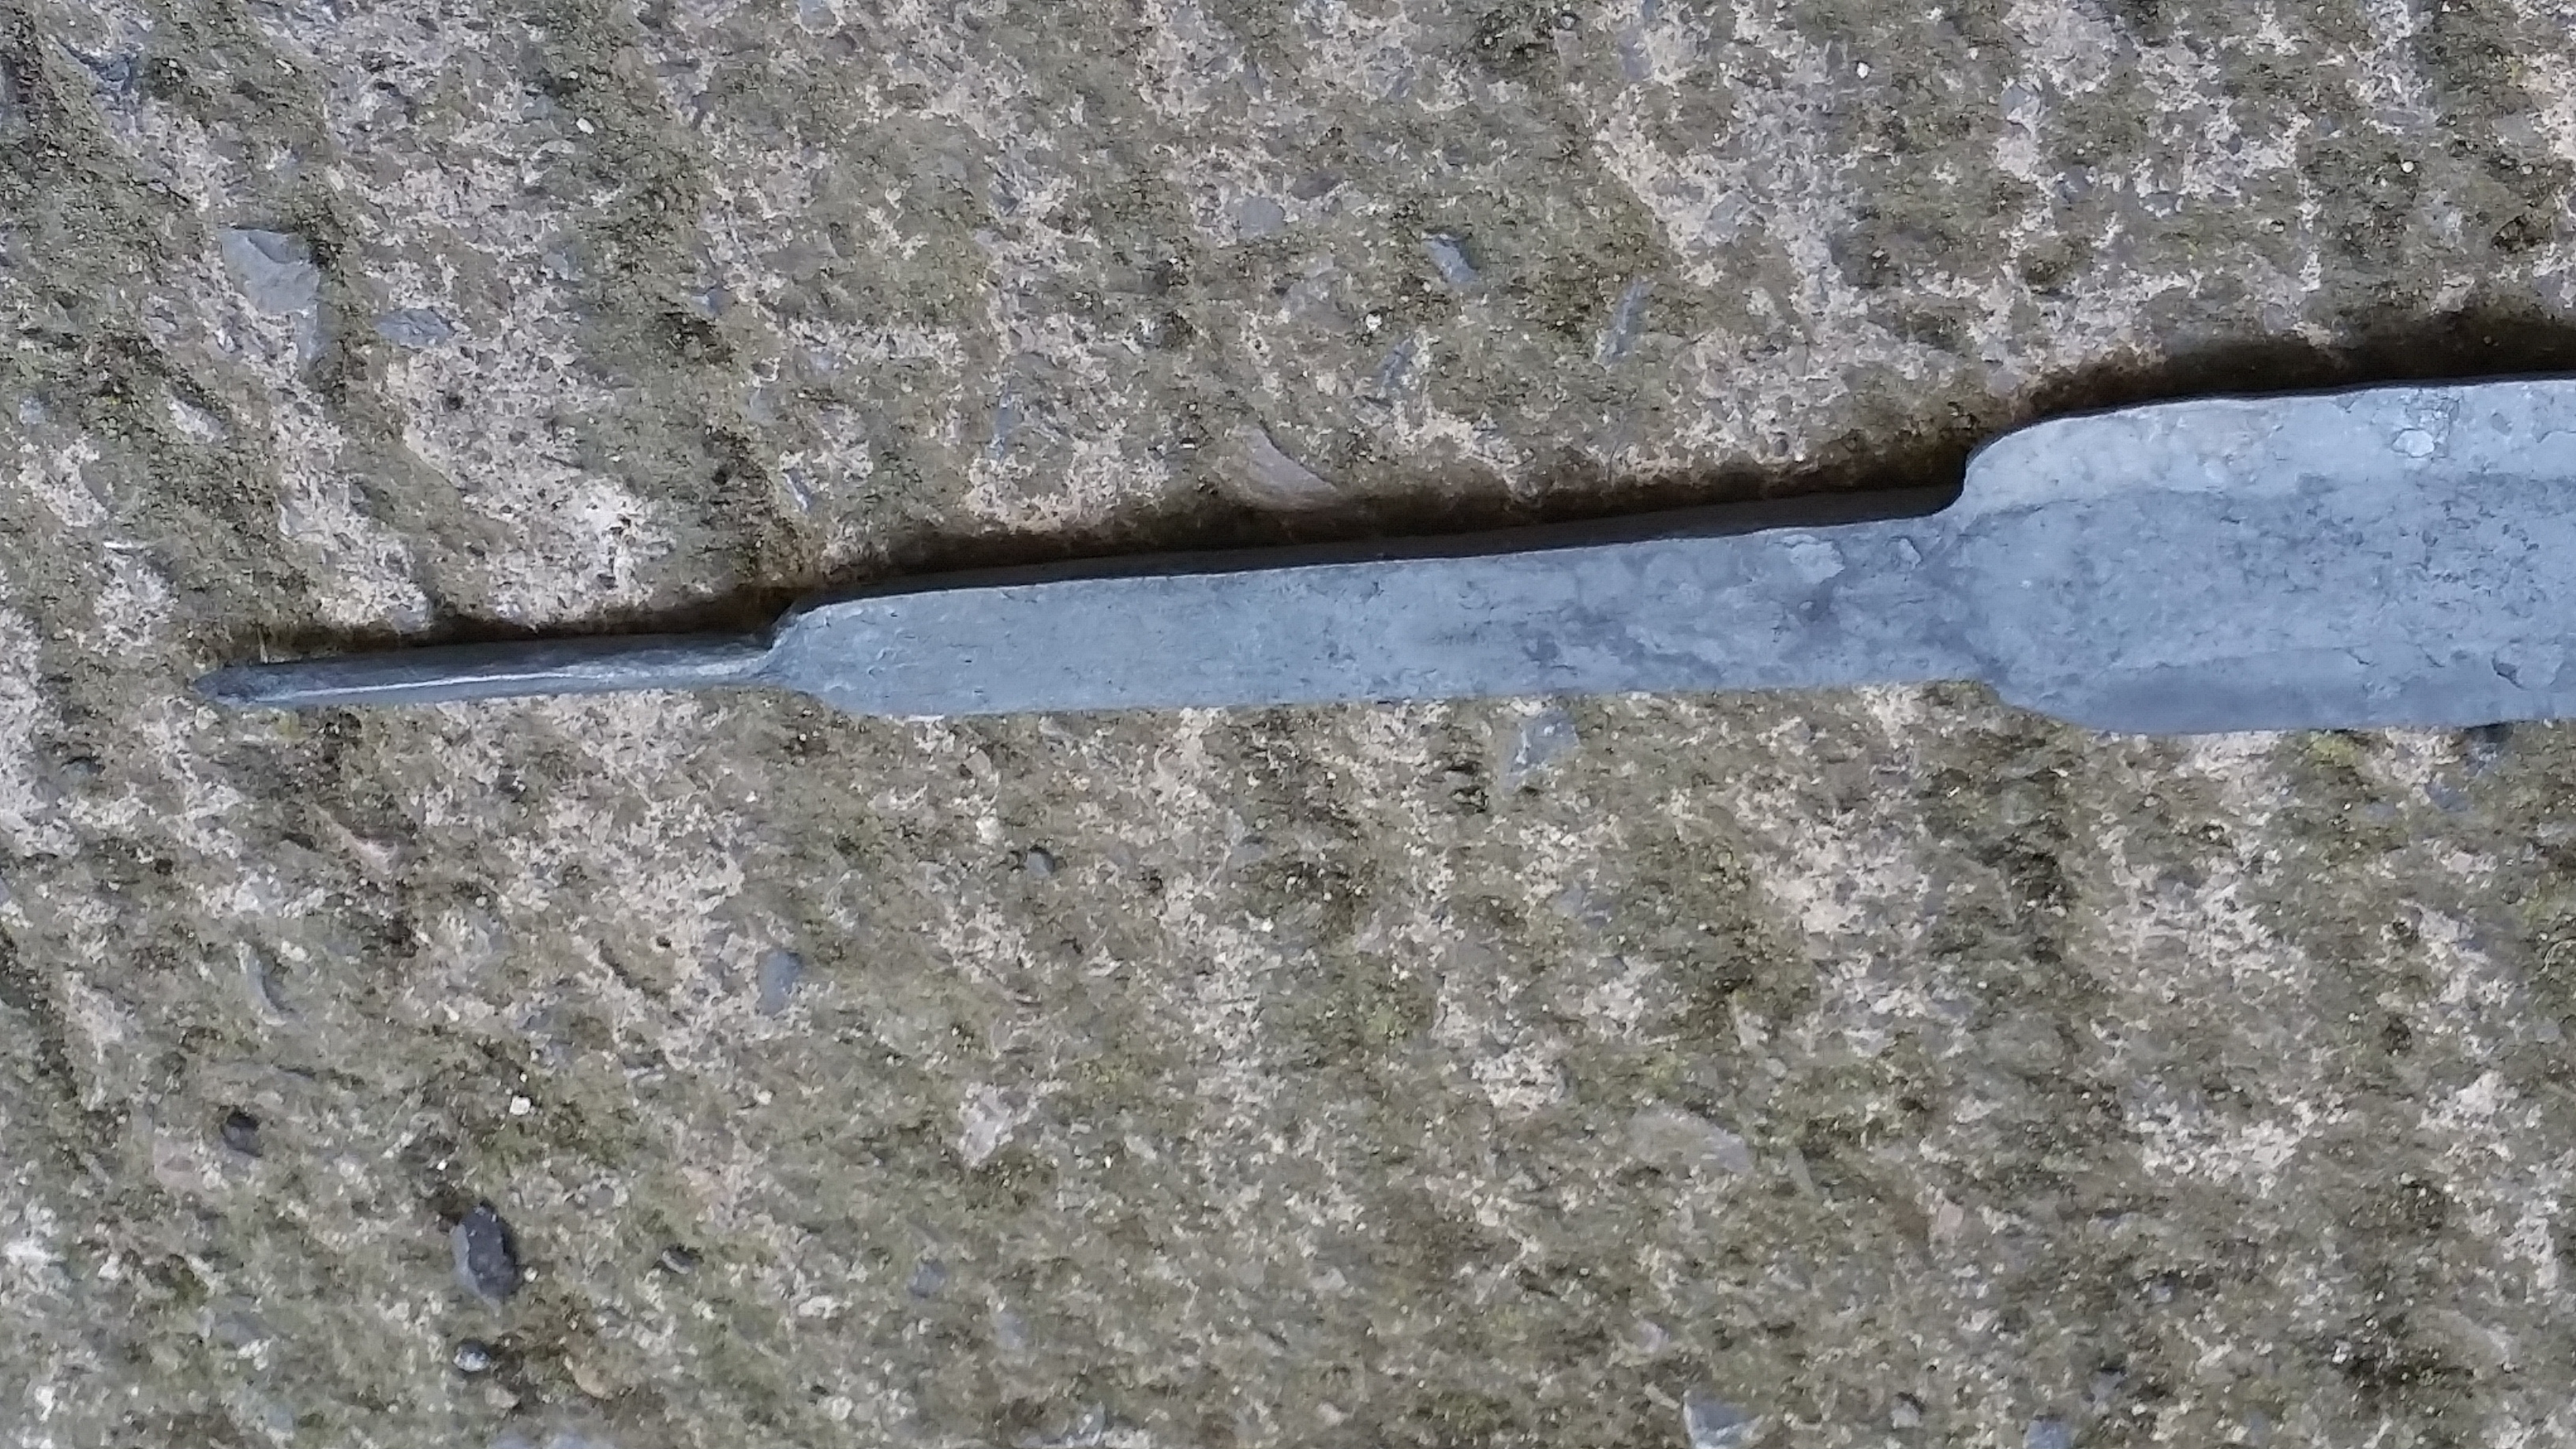
The tang of the bract. (What will be nether the handed and pommel)
-
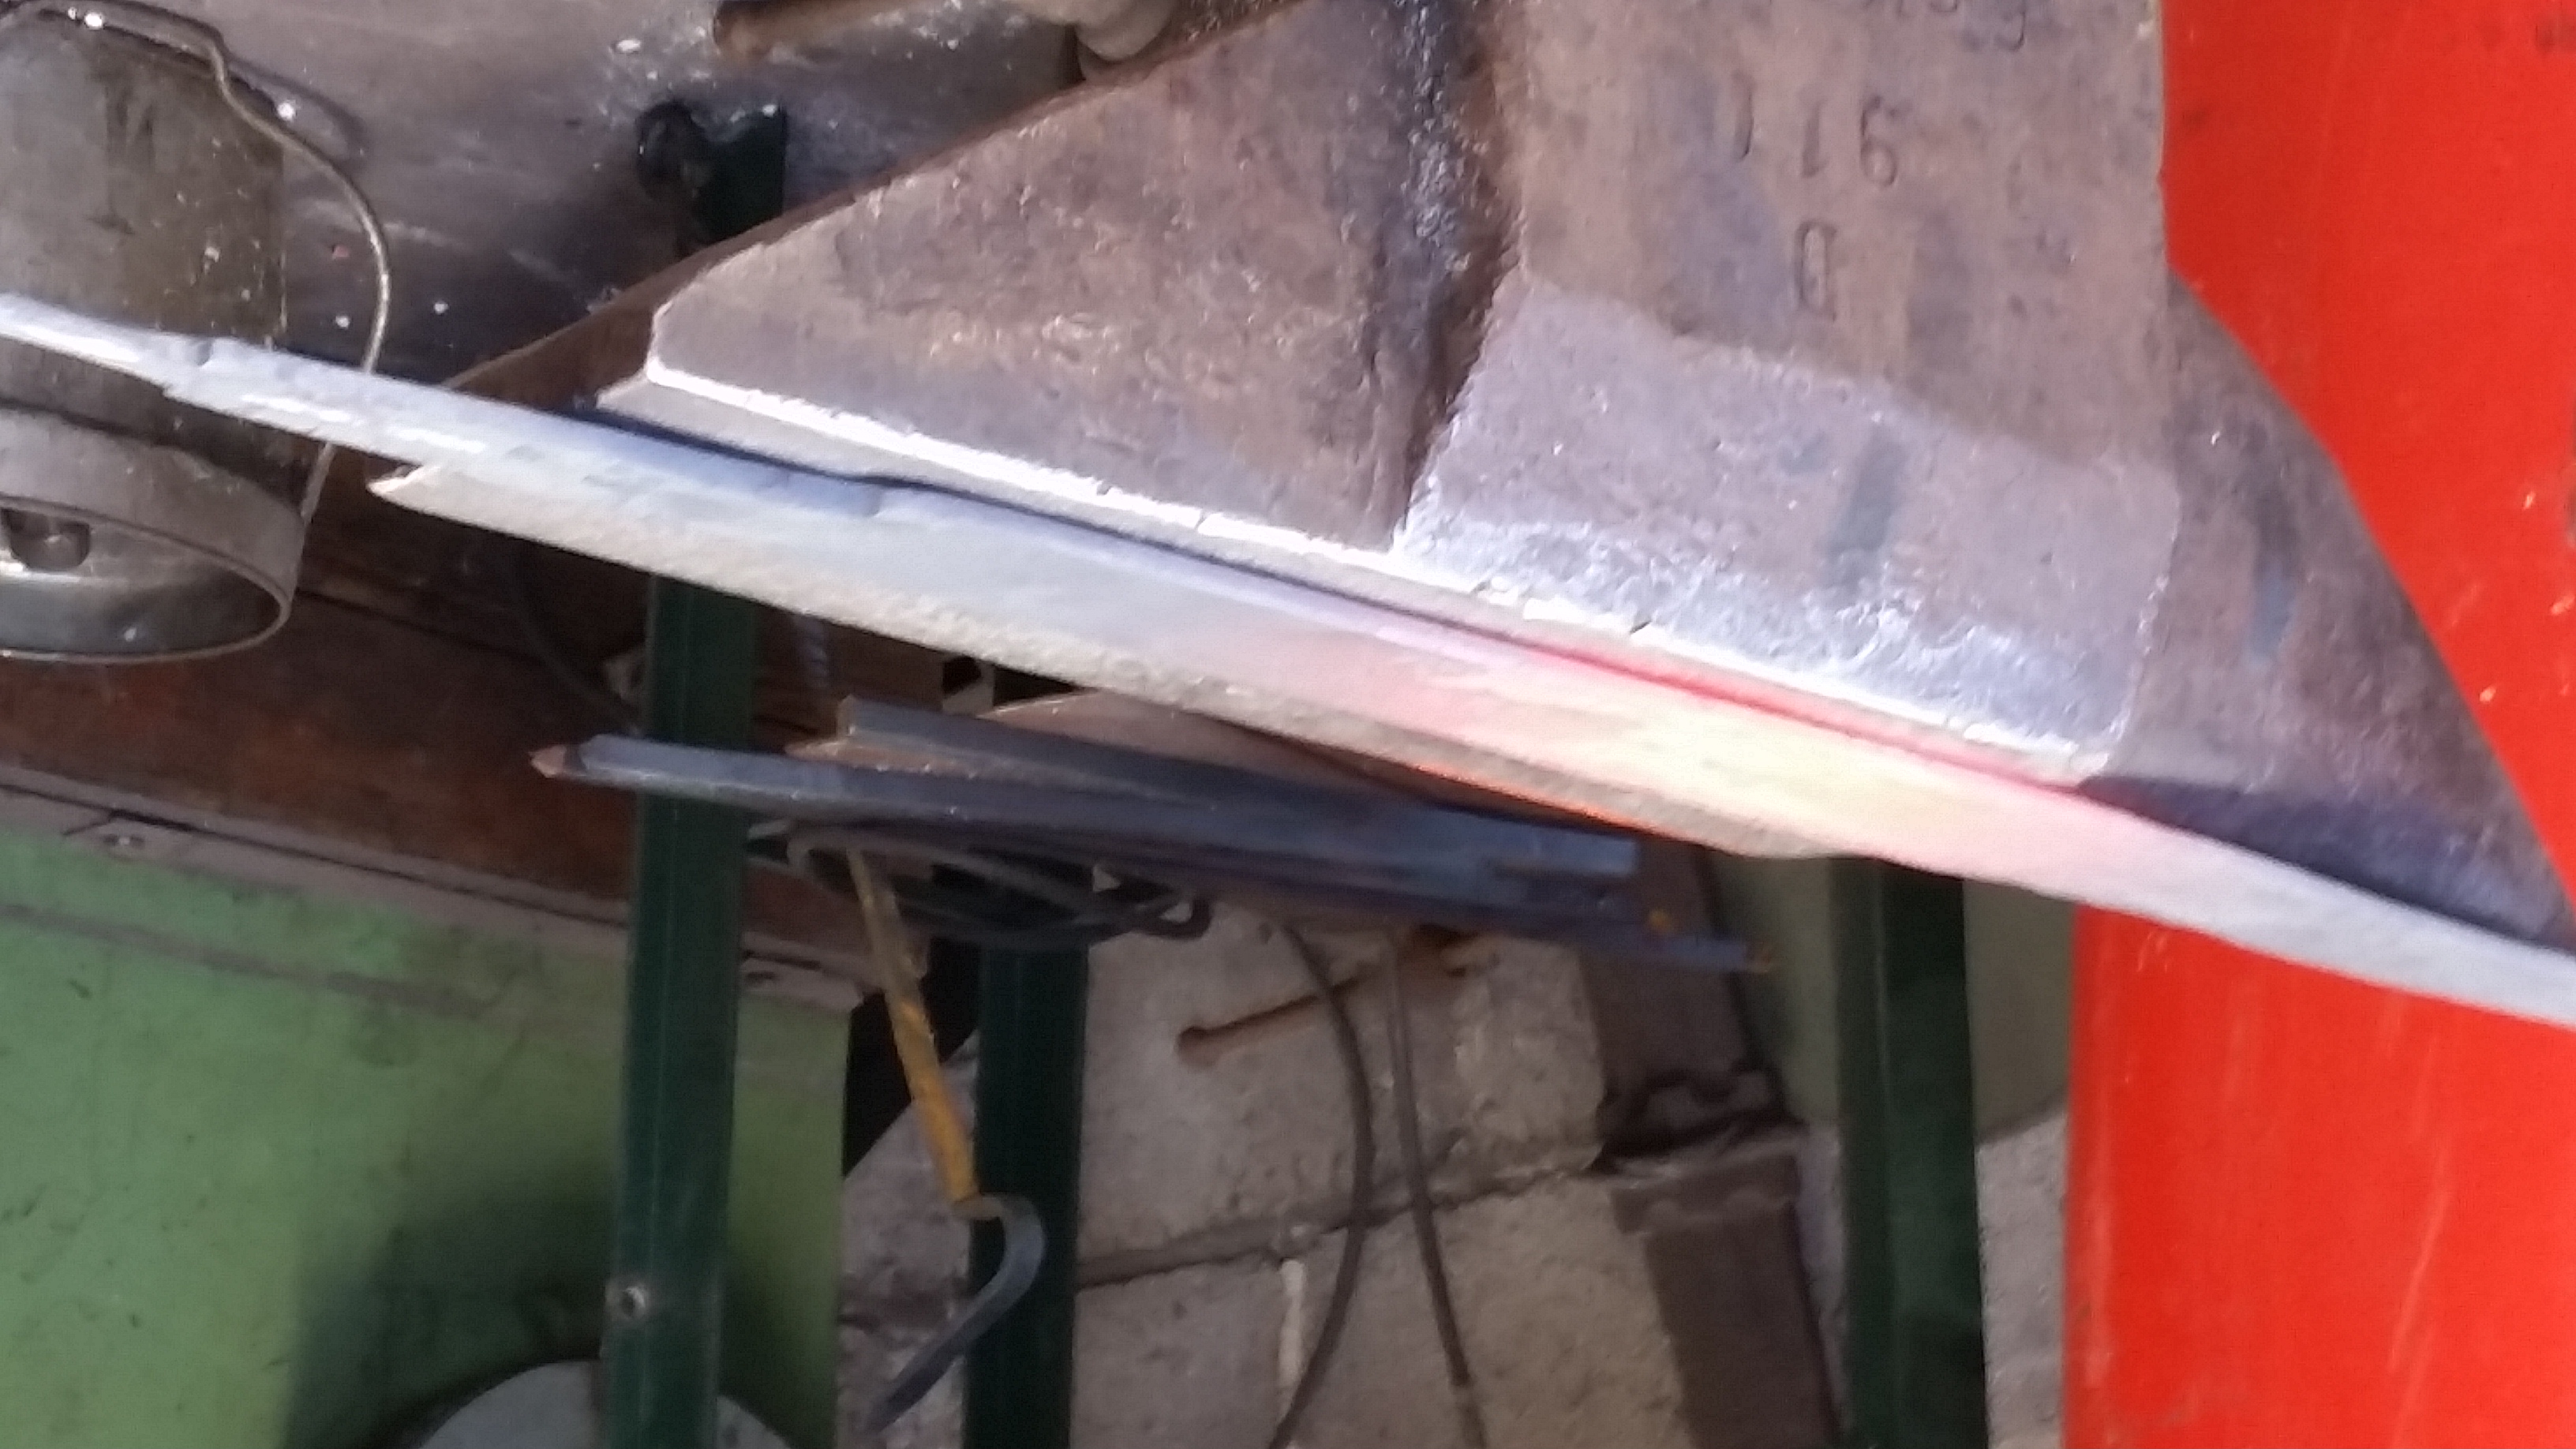
The blade just before forming the askew edges
-
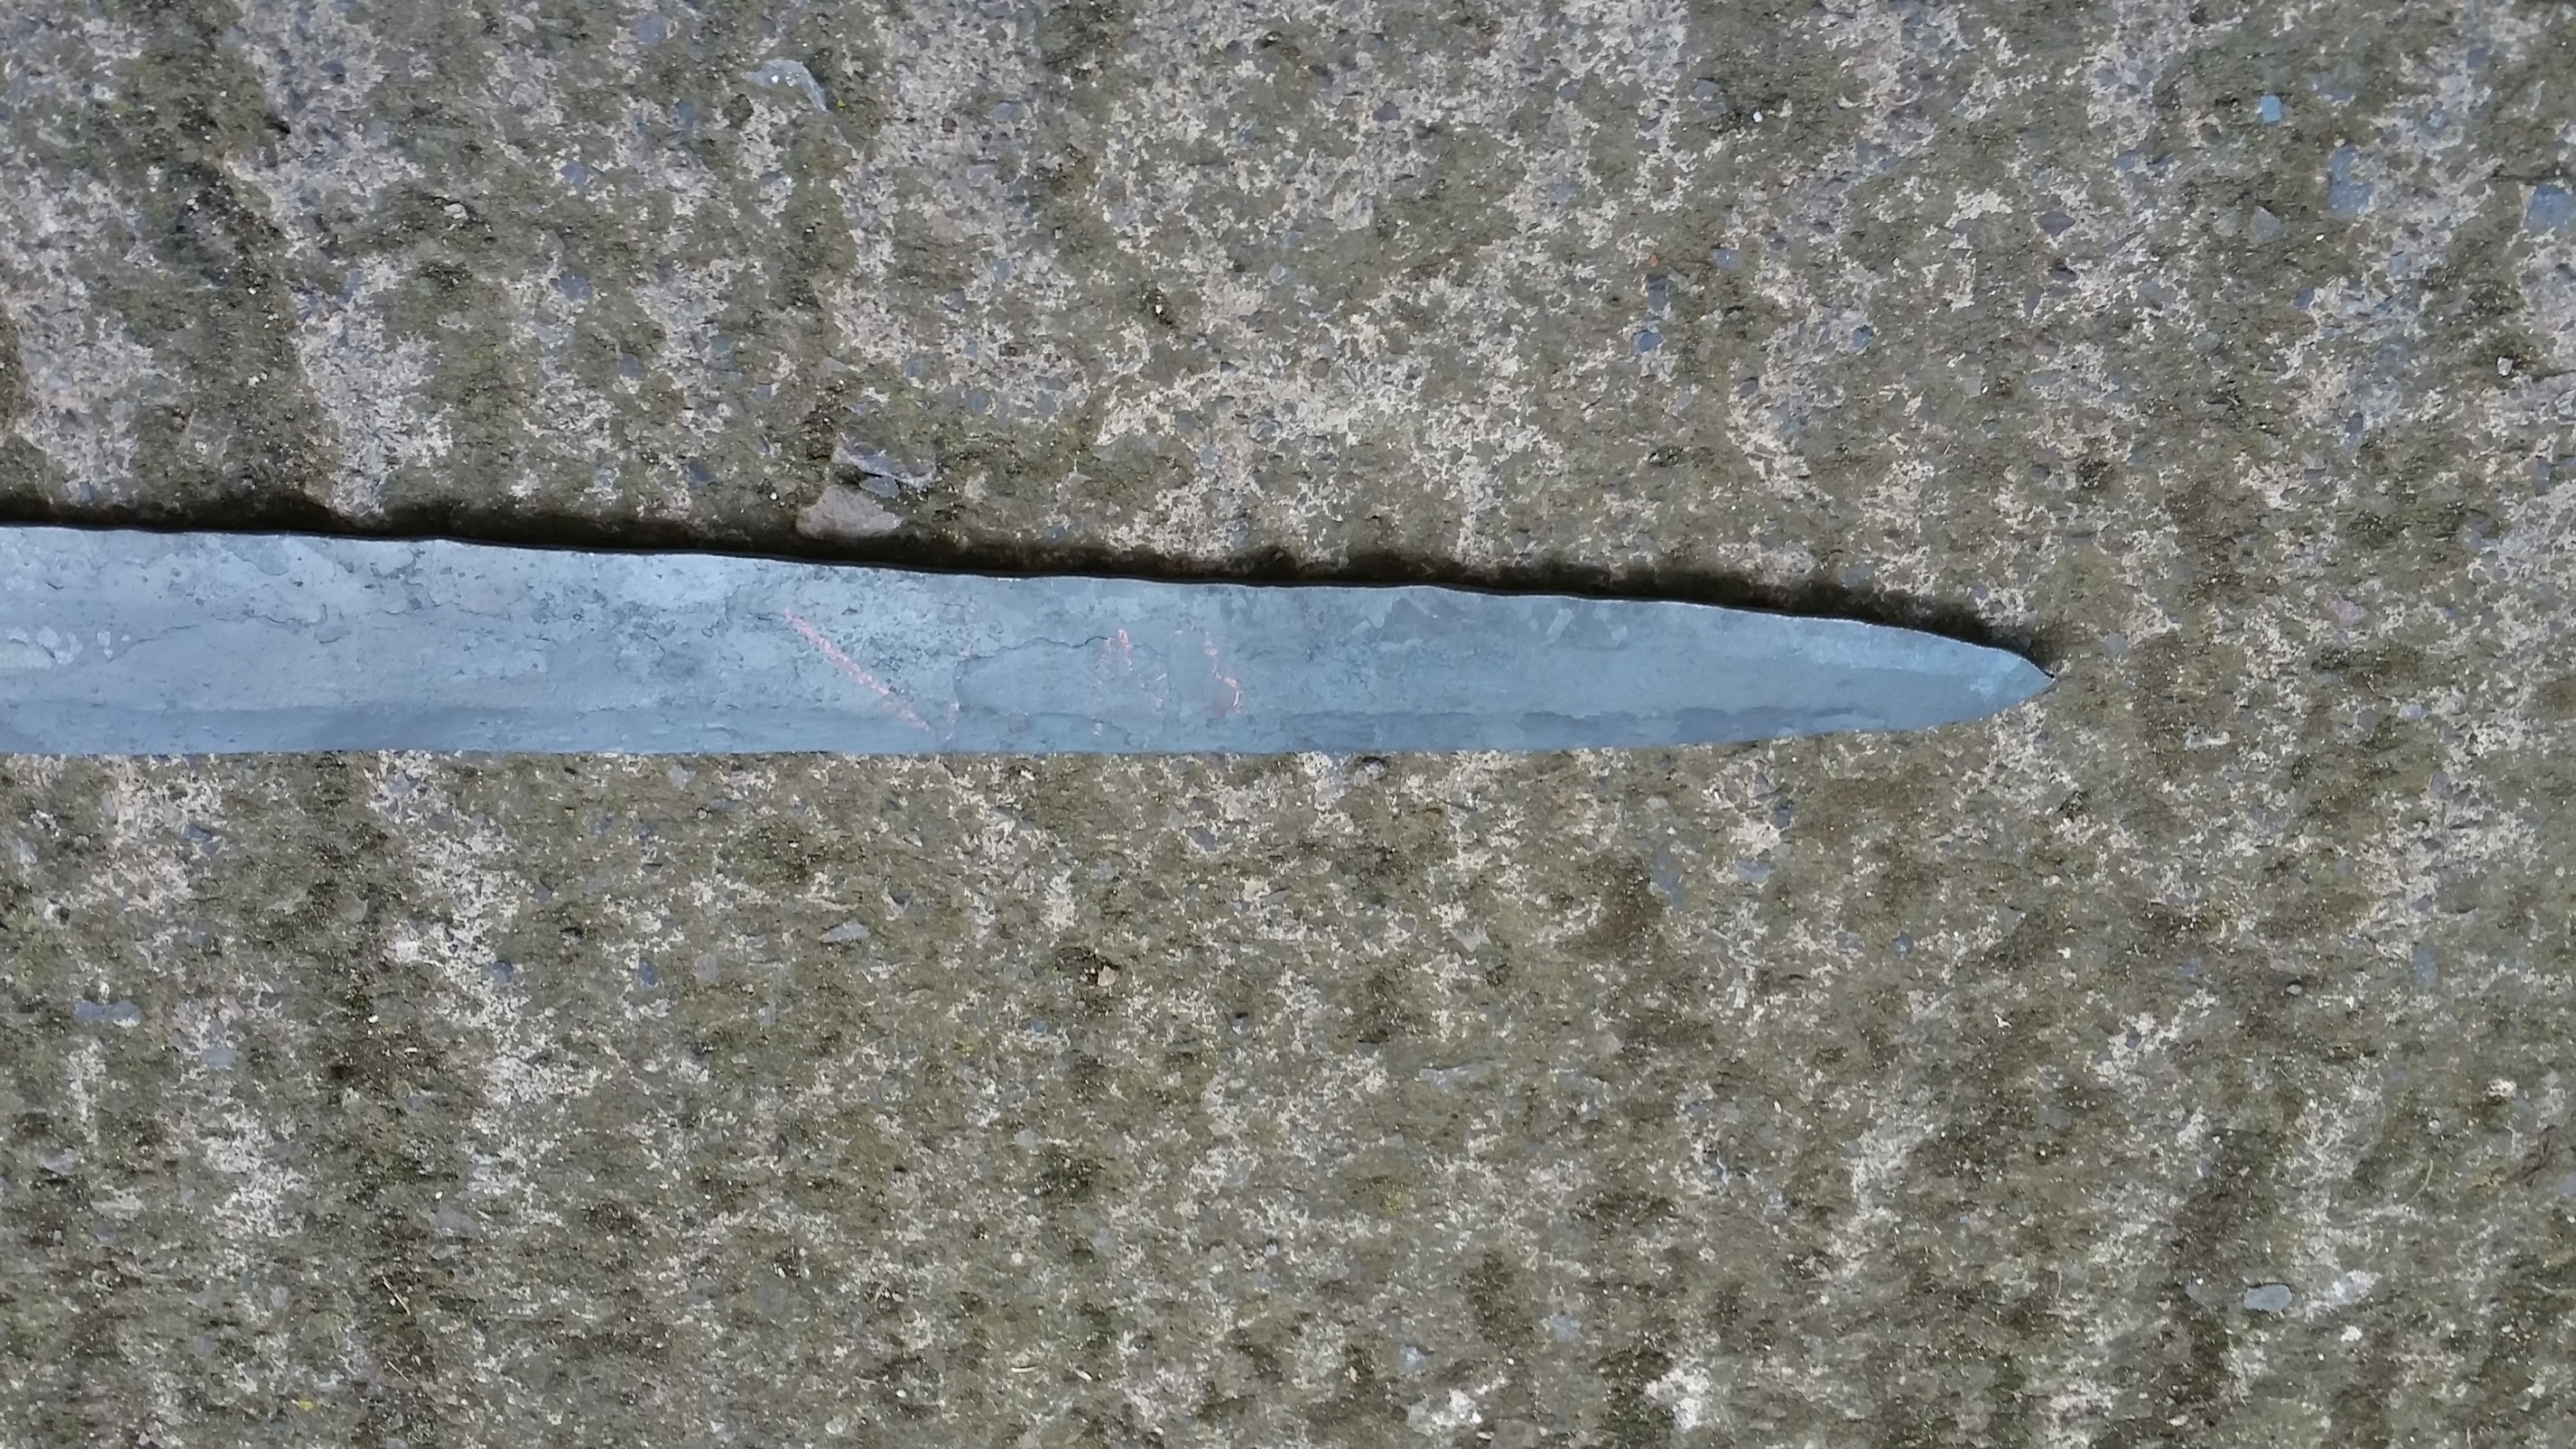
The tip of the sword
-
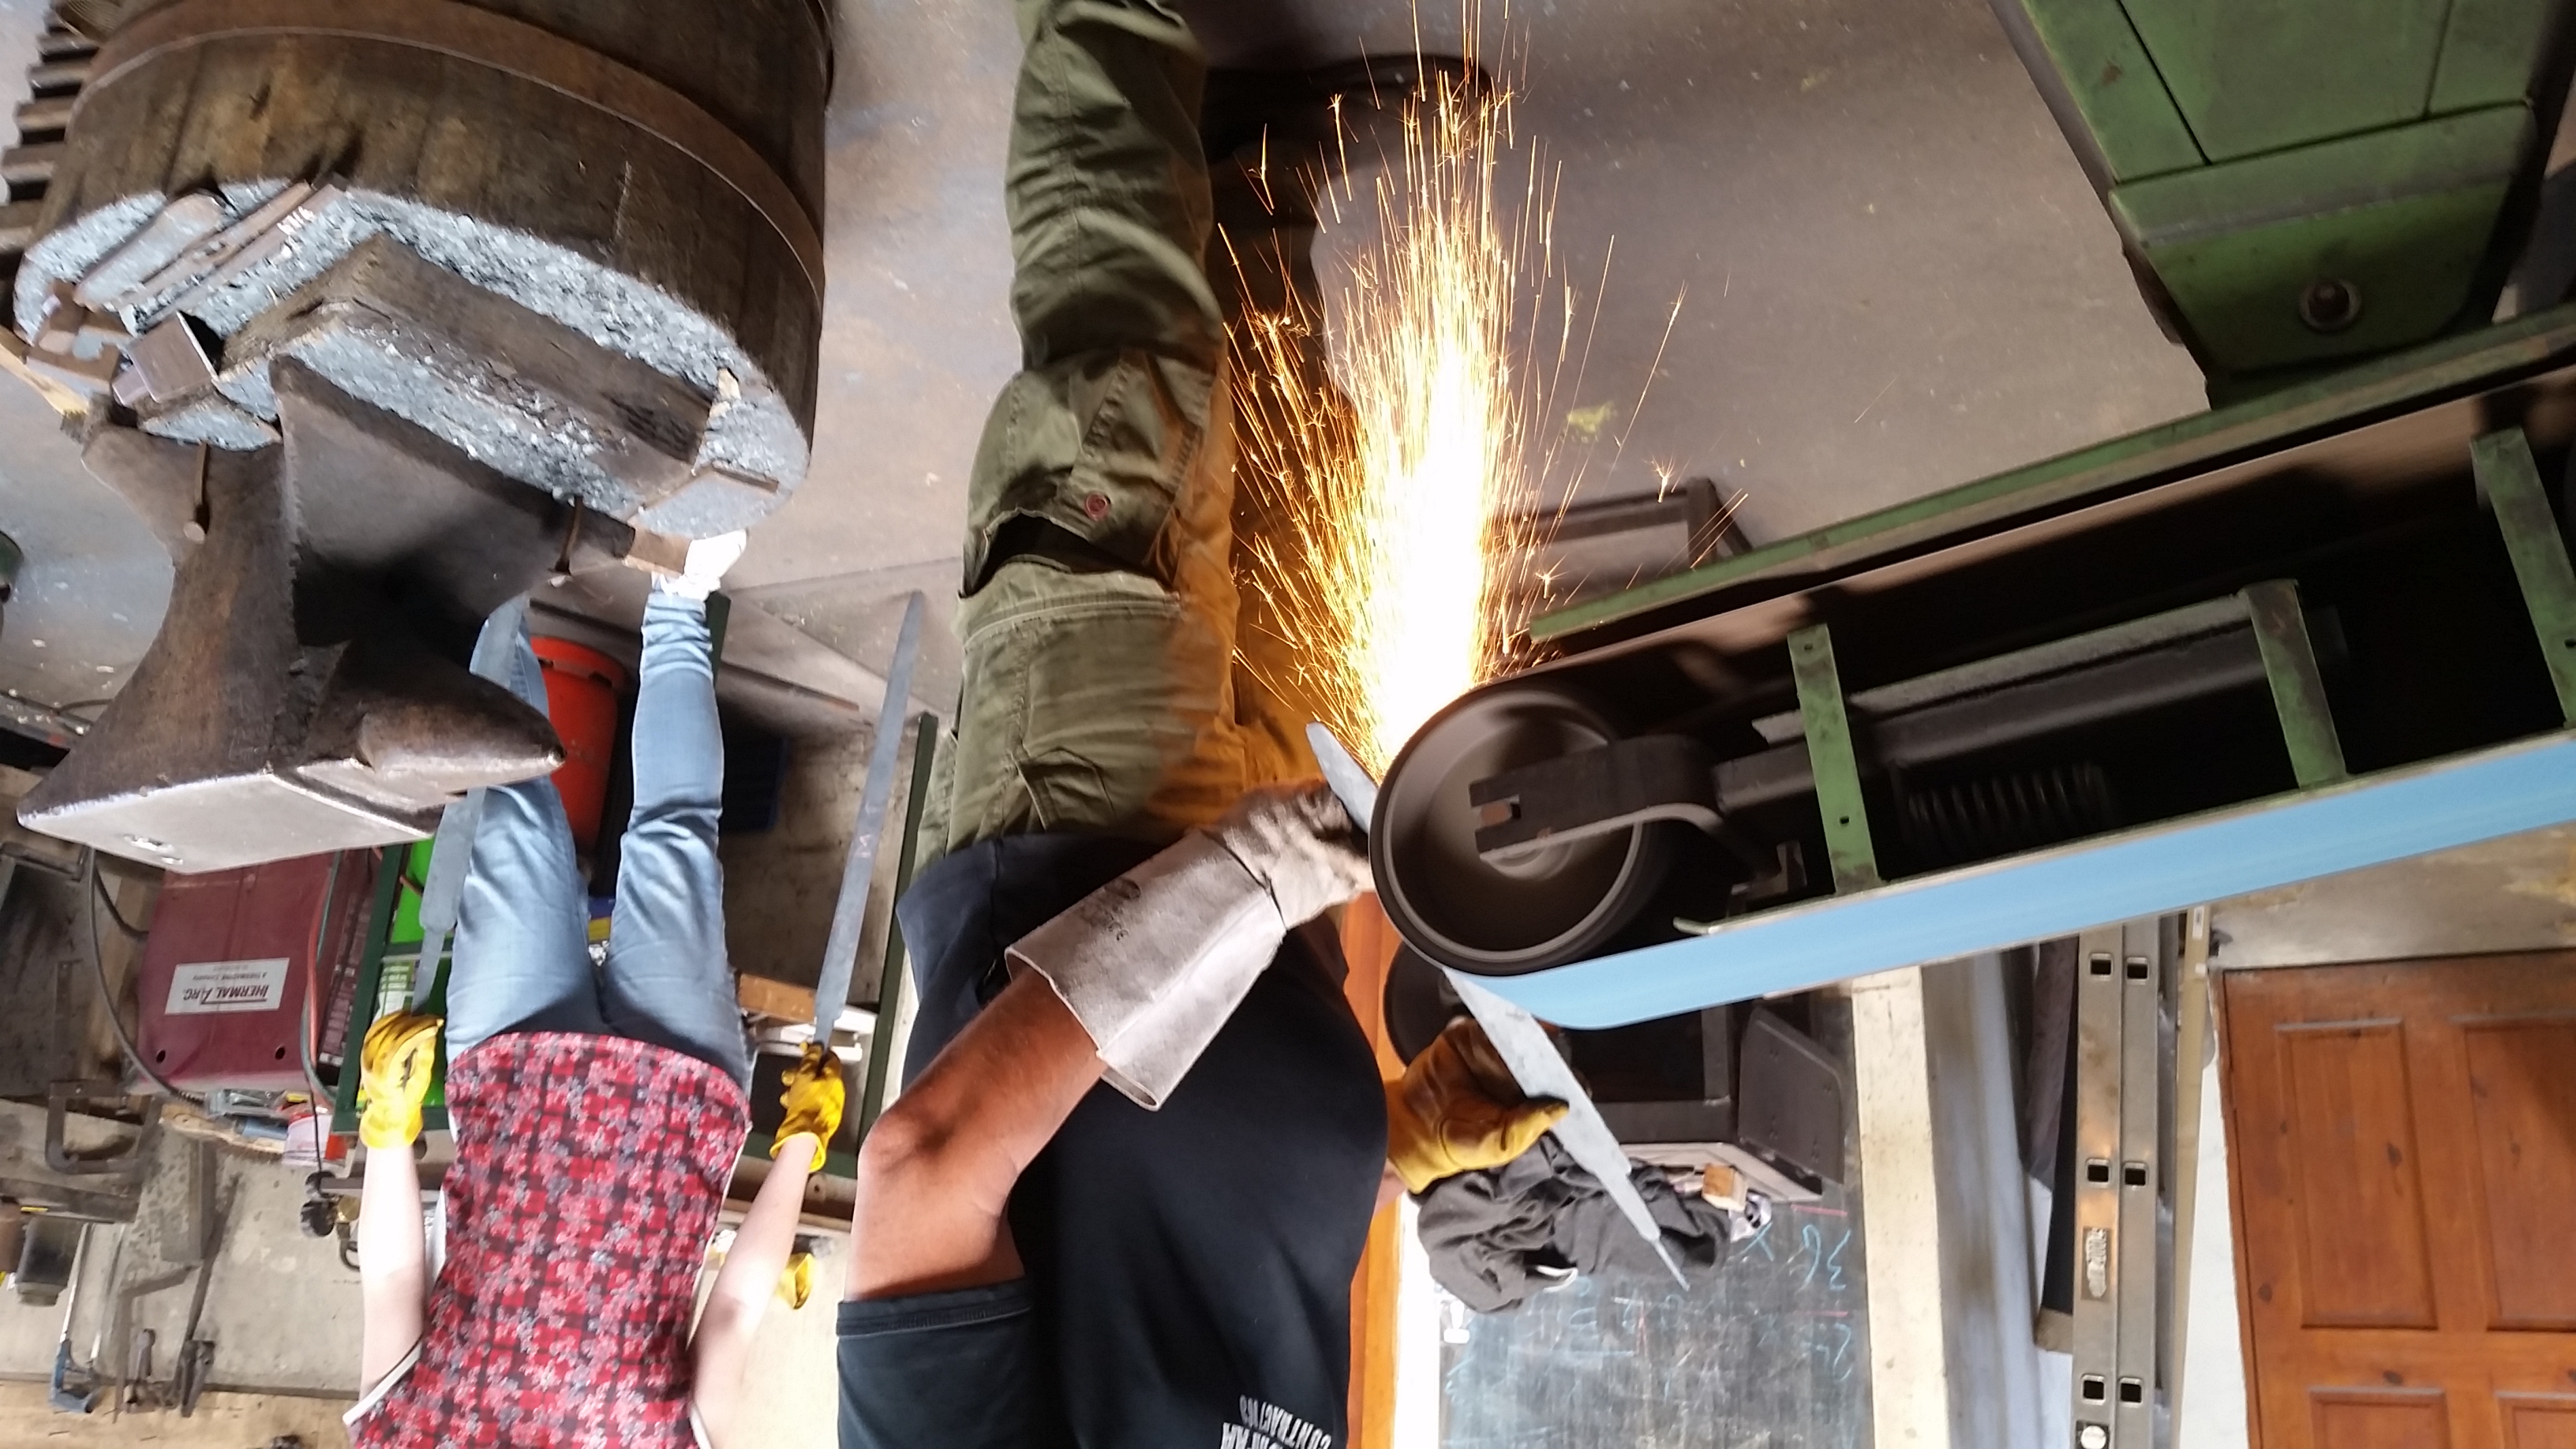
Sanding downwards the edge of the blade
Firday June sixteen, 2022 – Mean solar day 4 at the Forge
Our last twenty-four hour period at the forge started with us making nails once again. I am non certain if it was considering Richard wanted to see if we had improved or he just thought information technology was funny either way, I noticed that while my nails still were lacking the amount of time it took me to make one drastically decreased. I did notice while I was making them that I had was much further downwardly the handle of the hammer and so it had been earlier this week and my hits had too been more accurate, giving my blows more strength and efficiency. Once everyone had completed two more than nails we moved onto forging our last part of the sword, our pommel. This didn't take that long to make, the piece started out as a cylinder of steel that had been cutting off of a larger slice. The first footstep in creating the pommel was to oestrus information technology up and hammers the whole thing to go rid of the cutting marks and the rust that was on the outside. The next pace was to create askew edges all the manner around so that way it would exist shine. The last office definitely made me the virtually nervous in social club to create the pattern on the pommel a punch in the grade of a circle had to be held right in the center and striking repeated, the main problem is making sure that information technology was centred when hit and that the strength of the hammer accident was fifty-fifty. One of my sides came out very nice while my other side has two circles overlapping each other equally the punch movement when being hit. With the pommel being consummate our fourth dimension forging was washed, the terminal few steps involved cleaning up the pieces, putting the cross guard and pommel on the bract, and creating the handle. It was during this fourth dimension that our class formed an assembly line, one group of two focused on sanding downward the edges of the cross guards another used and angle grinder to clean the hammer scale off both the pommels and cross guard, while the concluding group which I was in cleaned upwardly the blades. This involved angle grinding the large amounts of hammerscale off the blades then taking a minor hammer to tap off what was left. Past doing the process in an associates format we were able to relieve a lot of time because people didn't demand to constantly switch jobs. The side by side step that we did was my favorite by far of the whole process, sanding downwardly the blade then that way it became shiny. Using a belt sanded and making long strokes with the bract we began the tedious procedure of cleaning the bract. Now, this ended up taking much longer than it should take for me and that was mainly because of my inexperience in the forge. My blade had a lot of indents from banged in hammer scale that wasn't brushed away properly so that meant that I had to grind down much more normal. Even subsequently all the time I spent grinding the blade, in that location are however parts left that aren't shiny because the indents in the blade were so deep. With the blade cleaned upwardly as much every bit possible, the adjacent step was associates. The cross guard got slid of the tang and I closed up the hole to make a tight fit by hammering both sides of the cross guard. And then came attaching the pommel, in lodge to get it securely onto the tang a hole was drilled through information technology'southward diameter that was the size of the round office of my tang. Then after heating only the tip of the tang, the pommel was speedily slid on tapped one into identify then the red hot edge of the tang was flattened downward to secure everything together. Once more this step was pretty nerve racking as the was only 1 take chances to put everything on right, if the tang wasn't hammered flat so in that location was no fashion to redo information technology. With that pat complete the merely ting left to practice on the sword was make the handle. When working on the handle nosotros really had to motion exterior since it was fabricated of wood. This is because all the woods shavings end upwards on the flooring and when working with cherry-red hot metal that would pose a safety issue in the workshop. The wood handle didn't take long to make as it was mainly carving a hole in two pieces of wood for the tang to sit down then shaping the wood circular and gluing it together with epoxy. The concluding function was to take a pseudo swade and gum it onto the wood.
-
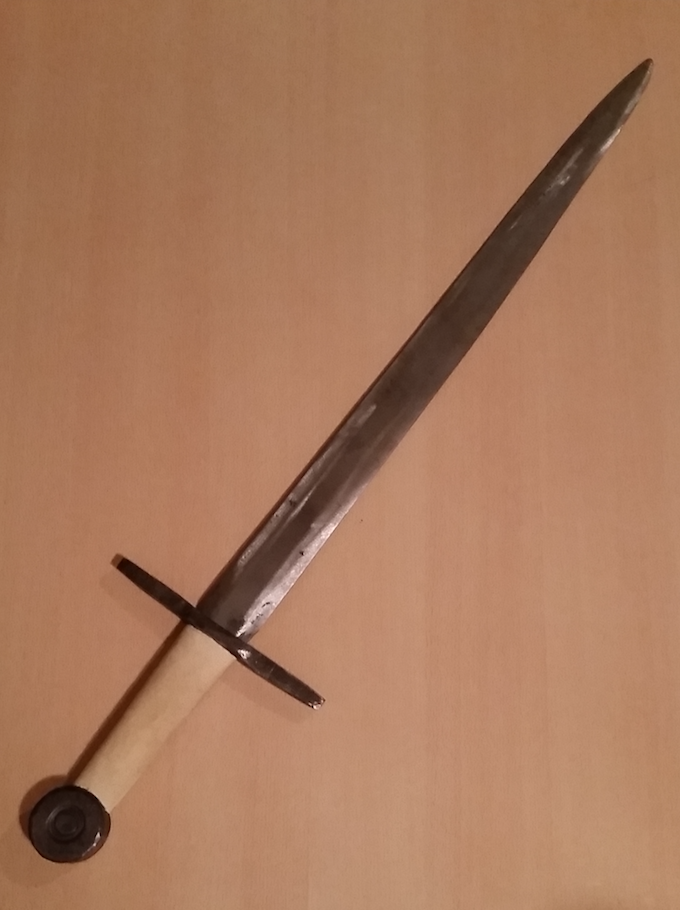
My completed sword
-
Before assembly
-
What the pommel looked like earlier forging information technology
Decision
The sword making experience was i of the well-nigh exciting things that I take ever done. Since I have never done whatsoever of the things that we did in class before there was a huge learning and experience curve, nonetheless having Richard in that location to fix the problems that popped up made my inexperience manageable. Ane of the biggest things I learned from the class was that this is an fine art that no matter how much you study it that can't substitute for do and muscle retention. Another affair that I learned was how much hammer calibration can affect your work. It shows up very hands and while forging it is something that isn't hard to ignore, but ignoring or just not brushing it off you piece enough can exist detrimental to the final look of the object. While sparse banged in hammer scale tin create terribly ugly pits in a slice that are near incommunicable to go out by sanding even at one mm thick. Coming home with my sword is a great take mode from the class because non only will I never forget the experience but at present I also have a cracking ice breaker to a conversation. I too loved the fact that I was able to run across with ii people from Australia that were taking the class and two from Manchester. We really had a neat adventure to bond and get to know each other which is something that is hard equally a tourist. I promise to take another blacksmithing grade in the hereafter that will further improve my skills and give me the take chances to learn new techniques.
This milestone besides showed merely how active the blacksmithing community is if yous know where to expect. There are forges scatter throughout the The states and the United kingdom if yous just look for them. It is too actually piece of cake to exist able to learn how to forge your own slice as many blacksmiths happily run classes to non just fund their business organization but also the keep what could be a dying arts and crafts alive. A similar project could also exist fabricated to focus on comparison the process of forging and hardening different type of metals.
References
Byko, M. (2002). The mod blacksmith: Metalworker, craftsperson, historical re-enactor. Jom, 54(10), 17. Retrieved from http://ezproxy.wpi.edu/login?url=http://search.proquest.com.ezproxy.wpi.edu/docview/232571531?accountid=29120
Young, G. (2005). Forging metal on Mackinac. Michigan History Mag, 89(4), 18. Retrieved June 20, 2022, from http://go.galegroup.com/ps/i.exercise?p=GRGM&u=mlin_c_worpoly&id=GALE%7CA163097912&five=2.ane&information technology=r&sid=summon&ugroup=exterior&authCount=ane#
Hrisoulas, J. (1987). The Complete Bladesmith: Forging your Way to Perfection. Boulder, CO: Paladin Press.

How To Repair Sword Medieval Blacksmith,
Source: https://londonhuawiki.wpi.edu/index.php/The_Crafting_of_A_Sword
Posted by: pannellcapent.blogspot.com
0 Response to "How To Repair Sword Medieval Blacksmith"
Post a Comment